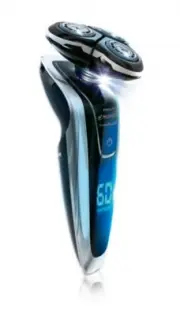
Page 2 - ENGLISH 4; Congratulations on your purchase and
2 ENGLISH 4 1290X/1280X/1280XCC/1260X/1250X/1250XCC Congratulations on your purchase and welcome to Philips Norelco! To fully benefit from the support that Philips Norelco offers, register your product at www.philips.com/norelco
Page 3 - IMPORTANT: The power plug contains a transformer. Do not; • Only use power plug supplied with the razor.; Read all instructions before using this appliance.; ENGLISH
water while plugged in. For assistance call 1-800-243-3050. 4. Keep the razor, Jet Clean System, charging stand, cord and charging plug away from heated surfaces. 5. Never drop or insert any object into any opening. 6. Do not clean, charge or plug in razor/Jet Clean System outdoors or operate where ...
Page 4 - Table of Contents
7 Table of Contents Features ...................................................... 8-11Multi-Level Display ................................ 12-16Charge Meter ............................................... 16Before First Use ..................................... 16-17Charging .........................
Page 5 - Smooth: UltraTrack heads catch every hair; Features; • Hair Chamber
8 9 Precision Trimmer Automatic Worldwide Voltage 100V to 240V AC Cleaning Brush Storage Pouch Charging Stand Rechargeable 1-hour Full Charge for up to 60 min. (1290X/1280X/1280XCC/ 1260X) or 50 min. (1250X/1250XCC) Quick Charge Cordless - To shave without a cord Full 2-Year Warranty 45-Day Money-Ba...
Page 7 - The display provides the following; 250XCC look different, but work the same way.
12 13 ENGLISH Multi-Level Display ◗ Remove any sticker or protective foil from the display before using razor. ◗ Depending on the razor model, there are 3 different types of displays: C Display for Models 1290X, 1280X and 1280XCC C Display for Model 1260X C Display for Models 1250X and 1250XCC The d...
Page 8 - Remaining Battery Capacity; Blocked Shaving Heads Indicator
14 15 ENGLISH ◗ Remaining Battery Capacity C Models 1290X, 1280X and 1280XCC -The remaining batter y capacity is indicated by the number of shaving minutes shown on the display. C Models 1260X, 1250X and 1250XCC -The remaining batter y capacity is indicated by the blinking charging lights. ◗ Low Bat...
Page 9 - Charge Meter; Important; Only use the power cord and charging stand; Charging
16 17 ENGLISH -This will occur when the appliance is moved for 5 minutes without switching it on. The razor will automatically go into power-saving mode. C ◗ The lock symbol blinks on the display to indicate the appliance is in power-saving mode. -To deactivate the power-saving mode, simply press th...
Page 10 - Charging in the Charging Stand; Charging Razor with Jet Clean
18 19 ENGLISH ◗ Charging or recharging requires one full hour. ◗ A fully charged razor has a shaving time of up to 60 minutes (models 1290X, 1280X, 1280XCC and 1260X) or 50 minutes (models 1250X and 1250XCC). ◗ You may recharge when the minutes indication blinks (models 1290X, 1280X and 1280XCC) or ...
Page 11 - Recharging; Always unplug charging stand/Jet Clean System; Quick Charge; When batteries are totally depleted, recharging; Put It To The Test & Shaving Tips
ENGLISH C 4 Press the razor tightly into the holder to lock it into place. 5 The display on the razor will indicate razor is charging. 6 Charging requires one full hour. A fully charged razor has a cordless shaving time of up to 60 minutes (models 1290X, 1280X, 1280XCC and 1260X) or 50 minutes (mode...
Page 12 - Shaving; Turn razor ON by pressing the on/off; Wet Shaving; Trimming
ENGLISH Shaving C 1 Turn razor ON by pressing the on/off button once. Shave against the direction of beard growth using both straight and circular movements. The razor display will light up briefly. 2 Stretch your skin with your free hand so blades can lift and cut whiskers. Gently press razor to sk...
Page 13 - Turn razor OFF when finished.; Activating the travel lock; turns ON to indicate that the razor has been; Cleaning
ENGLISH 3 Hold trimmer to exact hairline desired. Move trimmer downward with gentle pressure. 4 Trim beard, moustache or sideburns using the trimmer. 5 Turn razor OFF when finished. The display lights up for a few seconds and then shows the remaining batter y capacity. 6 Thoroughly clean the trimmer...
Page 14 - Cleaning the Shaving Unit; CAREFUL TO TEST WATER FIRST SO AS NOT; BE CAREFUL TO TEST WATER FIRST SO AS
ENGLISH ◗ Never clean, remove or replace shaving unit while motor is on. ◗ Do not apply pressure to shaving head combs. Do not touch razor heads with hard objects as this may dent or damage precision-made slotted combs. ◗ Do not use razor if shaving head combs are damaged or broken. Facial injury ma...
Page 15 - Cleaning the Shaving Unit in the; CAUTION: Keep cleaning solution out of; Other Philips Norelco razors; Always remove appliance from canister by lifting
ENGLISH Cleaning the Shaving Unit in the Jet Clean System (1280XCC and 1250XCC) CAUTION: Keep cleaning solution out of reach of children. Do not take internally. Avoid contact with eyes. In case of eye contact, thoroughly flush with cold water. If irritation persists, get medical attention. Importan...
Page 16 - Jet Cleaning the Razor; Press the ON/OFF button to start the
ENGLISH ◗ If you clean your razor every day, you should clean and refill the canister approximately every 15 days. C 5 Carefully lower the appliance back onto the Jet Clean canister making sure the release buttons snap back into place. When the canister is filled with cleaning solution, do not move ...
Page 17 - re-started by pressing the ON/OFF button; Do not press the ON/OFF button while the
ENGLISH razor holder will automatically move to the highest position. The cleaning cycle can be re-started by pressing the ON/OFF button once. C NOTE: If the cleaning solution level drops below the minimum level during the cleaning cycle, the ‘cleaning chamber empty’ symbol will blink and razor hold...
Page 18 - Extra-thorough cleaning method
Extra-thorough cleaning method Do not mix up the cutters and combs as the shaving performance may be adversely affected for several weeks before optimal shaving performance is restored. 1 Turn razor OFF. C 2 Pull the shaving unit straight off the razor. Do not turn the shaving unit when you pull it ...
Page 19 - Cleaning the Trimmer; BE CAREFUL TO TEST WATER FIRST SO; Cleaning the Jet Clean Canister
ENGLISH C 12 Insert the notch of the shaving unit into the slot in the top of the razor ( 1 ). Then press the shaving unit down (2) to attach it to the razor. You will hear a ‘click’. Cleaning the Trimmer Clean the trimmer after each use. 1 Press the trimmer slide forward to slide out the trimmer. C...
Page 20 - Replacing the Shaving Unit; This razor/charging stand/Jet Clean System has no; Maintenance; Note: DO NOT place or clean any par ts of the; Storage
ENGLISH 39 ENGLISH Replacing the Shaving Unit ◗ Replace the shaving unit once a year for optimal shaving results. ◗ Replace damaged or worn razor heads with model RQ12 Philips Norelco razor heads only. ◗ The individual shaving heads (cutters and combs) are NOT replaceable. Only the one-piece shaving...
Page 21 - Assistance; Accessories
ENGLISH Assistance ◗ For assistance, visit our website: www.philips. com/support or call 1-800-243-3050. ◗ Information is available 24 hours a day, 7 days a week. Battery Removal C ◗ This Philips Norelco razor contains a rechargeable Lithium-Ion battery which must be disposed of properly. ◗ Battery ...