Olde Midway ROLL-PRO19-DRW - User Manual
Olde Midway ROLL-PRO19-DRW Grill – User Manual, read for free online in PDF format. We hope this helps you resolve any issues you may have. If you have further questions, please contact us through the contact form.


Table of Contents:
- Page 2 – WARNING; Misuse of this machine may result in serious injury or death.; SPECIFICATIONS; Power; READ ALL INSTRUCTIONS BEFORE USING YOUR HOT DOG ROLLER.
- Page 3 – PARTS & WIRING DIAGRAM; Glass Shield Parts List; T3: Thermostatic Switch
- Page 4 – INSPECT ALL COMPONENTS BEFORE USE.; DO NOT ATTEMPT TO USE THE HOTDOG ROLLER; ASSEMBLY INSTRUCTIONS; GLASS; Skip
- Page 5 – OPERATING INSTRUCTIONS; rollers. Press the Power Switch; ON; . The indicator light will glow when the machine has; vary; STEP; and hot dog buns; Do not use your
- Page 6 – CLEANING & MAINTENANCE; It is recommended that the hot dog roller be cleaned after each use.; OFF
INSTRUCTION
MANUAL
PRO12
PRO18
PRO24
PRO30
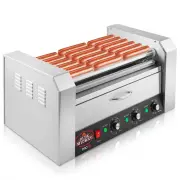
Hot Dog Roller
with
Warming Drawer
"Loading the manual" means you need to wait until the file loads and becomes available for online reading. Some manuals are very large, and the time they take to appear depends on your internet speed.
Summary
WARNING Misuse of this machine may result in serious injury or death. SPECIFICATIONS Model Temperature Power PRO1 2 0- 500 ° F 96 0 Watt PRO 18 0- 500 ° F 114 0 Watt PRO 24 0- 500 ° F 1 47 0 Watt PRO30 0- 500 ° F 1 64 0 Watt Rollers 5 7 9 11 Electric Voltage 1 1 0V 1 1 0V 1 1 0V 1 1 0V READ ALL INST...
PARTS & WIRING DIAGRAM Glass Shield Parts List Hot Dog Roller Components Circuit Diagram k1: Power Switch M: Motor T3: Thermostatic Switch D3: Warming Indicator Light R: Heater (120W/110V 150W/220V ) T1, T2: Temperature Control Switch D1, D2: Heating Indicator light
INSPECT ALL COMPONENTS BEFORE USE. DO NOT ATTEMPT TO USE THE HOTDOG ROLLER MACHINE IF ANY PARTS ARE DAMAGED OR MISSING. ASSEMBLY INSTRUCTIONS ** ATTACHING GLASS COVER ** Skip to Operating Instructions if Hot Dog Roller DOES NOT have a glass cover . STEP 1: Locate and remove the pair of screws on the...