Page 2 - Contents
Contents 2 Caring for the environment ......................................................................................... 6 Warning and Safety instructions .............................................................................. 7 Operating the washing machine ..............................
Page 4 - Service
Contents 4 An unsatisfactory wash result ...................................................................................... 73 The door will not open ................................................................................................... 74 Opening the door in the event of a blocked ...
Page 5 - Language; Detergents and care products; Specialist detergents
Contents 5 Controls / Display ....................................................................................................... 95 Language ................................................................................................................ 95 Consumption .........................
Page 6 - Caring for the environment; Disposing of your old appliance
Caring for the environment 6 Disposing of the packaging ma-terial The packaging material is used for hand-ling and protects the appliance fromtransport damage. The packaging ma-terial used is selected from materialswhich are environmentally friendly fordisposal and can generally be recycled.Recyclin...
Page 7 - Warning and Safety instructions; Correct application
Warning and Safety instructions 7 This washing machine complies with all current local and nationalsafety requirements. However, inappropriate use can lead to per-sonal injury and damage to property.Read the operating instructions carefully before using the washingmachine. They contain important inf...
Page 8 - Technical safety
Warning and Safety instructions 8 Please supervise children in the vicinity of the washing machine and do not let them play with it. Technical safety Please observe the instructions in “Installation” and “Technical data”. Before setting up the washing machine, check it for any externally visib...
Page 10 - Correct use
Warning and Safety instructions 10 Correct use Do not install the washing machine in a room where there is a risk of frost. Frozen hoses may burst or split. The reliability of the elec-tronic control unit may be impaired at temperatures below freezingpoint. Before using the machine for the first...
Page 11 - Accessories and spare parts
Warning and Safety instructions 11 If the correct amount of detergent is dispensed, the machine should not need to be descaled. If, however, you do wish to descaleit, only use a proprietary natural citric acid based descaling agent.Miele recommends using Miele descaling agent which is available to...
Page 12 - Operating the washing machine; Control panel; Sensor; Touch display and sensor controls
Operating the washing machine 12 Control panel Start/Stop a Sensor To go back a level in a menu. b Touch display c Start/Stop sensor control Touching the Start/Stop sensor control starts the selected programme or can- cels a programme that has already been started. The programme ca...
Page 13 - Main menu; Washing assistant; Settings
Operating the washing machine 13 Main menu After switching on the washing ma-chine, the main menu will appear in thedisplay.You can access all the important sub-menus from the main menu. Touch the sensor control at any time to return to the main menu. Values setpreviously are not saved. 11:02 ...
Page 14 - Option lists; Moving programmes; Setting numerical values
Operating the washing machine 14 Examples on how to operate themachine Option lists Programmesmenu (single selection) 11:02 2:39 3:19 1:59 1:09 h h h h Cottons Delicates Minimum iron Programmes Help ECO 40-60 You can scroll right or left by swipingyour finger across the screen. Place you...
Page 15 - Help display
Operating the washing machine 15 12 00 11 59 10 58 13 01 14 02 Clock display OK Enter the numbers by swiping up ordown. Place your finger on the numberthat you want to change and move yourfinger in the direction you want. Touchthe OK sensor control to accept the set numerical value. Tip: Briefly to...
Page 16 - Before using for the first time; Damage resulting from incorrect
Before using for the first time 16 Damage resulting from incorrect installation and connection.Installing and connecting the wash-ing machine incorrectly will causeserious property damage.See “Installation”. This washing machine has undergonea complete functional test at the fact-ory and there wil...
Page 17 - In order to use it you need:; Availability of the WiFi connection; or from the Google Play StoreTM.
Before using for the first time 17 Miele@home Your washing machine is equippedwith an integrated WiFi module. In order to use it you need: - a WiFi network- the Miele@mobile App- a Miele user account. The user ac- count can be created via theMiele@mobile App. The Miele@mobile App will guide youas yo...
Page 18 - Switch on the washing machine; steps; Setting the time
Before using for the first time 18 Switch on the washing machine Press the button. The welcome screen will light up. The display will guide you through the 6 steps of the initial commissioning process. 1. Set the language You will be asked to select the languageyou require for the display. It is...
Page 19 - Remove the transit bars; Settings for compartment
Before using for the first time 19 12 00 11 59 10 58 13 01 14 02 Clock display OK Place your finger on the number thatyou want to change and move yourfinger in the direction you want. Confirm with the OK sensor control. 4. Remove the transit bars Damage resulting from failure to remove the tr...
Page 20 - UltraPhase 1
Before using for the first time 20 The following message will then appearin the display: Please enter the dosing recommendation of your detergent for awash with normal soiling. Take note of yourwater hardness level. The dispensing quantity forUltraPhase 1 is preset for (hard- ness level II) . ...
Page 21 - UltraPhase 2
Before using for the first time 21 Settings for compartment The dispensing quantity forUltraPhase 2 is preset for (hard- ness level II) . 45 4443 46 47 Dosage for comp. ml 11:02 OK Confirm the preset value with the OK sensor control, or change the value. UltraPhase 2 Hardness level I 36 ...
Page 22 - must; Cottons
Before using for the first time 22 6. Start the calibration pro-gramme For optimum water and energy con-sumption and excellent wash results, itis important to calibrate the washingmachine. To do this, the Cottons programme must be run without laundry. No other programmes can be starteduntil calibra...
Page 23 - Washing environmentally and economically; Energy and water consumption
Washing environmentally and economically 23 Energy and water consumption - To get the most out of your machine, load the maximum dry load size forthe wash programme you are using.This will keep the energy and waterconsumption to a minimum in relationto the size of the load. - Programmes that are mor...
Page 24 - Feedback; - An estimate of the energy and water; Actual consumption; You can view the consumption data
Washing environmentally and economically 24 Feedback You can view information about the en-ergy and water consumption of yourwashing machine with the pull-downmenu.The following information will appear inthe display: - An estimate of the energy and water consumption before the programmebegins. - The...
Page 25 - Prepare the laundry; Sort the laundry; General tips
1. Prepare the laundry 25 Empty all pockets. Damage due to foreign objects. Nails, coins, paper clips, and so oncan cause damage to garments andcomponents in the machine.Check the laundry before washingand remove any foreign objects. Sort the laundry Sort the laundry by colour and by carelabel...
Page 26 - Select a programme; Press the; Selecting a programme; Touch the; Touch the sensor for that programme.
2. Select a programme 26 Switching on the washing ma-chine Press the control. The interior drum lighting will come on. The drum lighting will go out automat-ically after 5 minutes. Tip: To switch the lighting on again, open the pull-down menu from theoverview menu and then touch the sensor.Th...
Page 27 - Select programme settings; Selecting a temperature; Switch TwinDos on or off
3. Select programme settings 27 Selecting a temperature You can alter the preset temperature ofa wash programme. The temperatures reached inside thewashing machine might not be thesame as the temperatures selected.Perfect wash results are achievedthrough a combination of energy useand wash duration....
Page 28 - Selecting Extras; Activating CapDosing
3. Select programme settings 28 Selecting Extras You can supplement the wash pro-grammes with Extras. Touch the Extras sensor control. Select one or more Extras. Not all Extras can be used with everyprogramme, e.g. AllergoWash , Extra gentle and Extra quiet . Extras that can- not be combined ar...
Page 29 - Load the washing machine; Open the door; Take hold of the door and pull it open.; Close the door; Shut the door with a gentle swing.
4. Load the washing machine 29 Open the door Take hold of the door and pull it open. Check the drum for pets or foreignobjects before loading it with laundry. The most efficient use of energy andwater is achieved when a full load iswashed. However, do not overload asthis reduces cleaning efficienc...
Page 30 - TwinDos; Activating TwinDos dispensing
5. Add detergent 30 There are several options for adding de-tergent. TwinDos The washing machine has the TwinDossystem. TwinDos has to be activated as de-scribed in “Before using for the firsttime”. How UltraPhase 1 and UltraPhase 2work UltraPhase 1 is a liquid detergent whichdissolves dirt and remo...
Page 31 - Detergent dispenser drawer; Adding detergent; Detergent for the pre-wash; Adding fabric conditioner
5. Add detergent 31 Detergent dispenser drawer Any detergent suitable for automaticfront loading washing machines can beused. Please observe the instructionsfor use and dosage on the detergentpackaging. Ensure that TwinDos dispensing isdeactivated. Adding detergent Pull out the detergent drawer an...
Page 33 - Inserting a capsule
5. Add detergent 33 Inserting a capsule Open the detergent dispenser drawer. Open the lid of the / compart- ment. Press the capsule in firmly. Close the lid and press it firmly shut. Close the detergent dispenser drawer. Tip: TwinDos dispensing is switched off automatically when a caps...
Page 34 - Starting the programme; Time left; Energy savings; Add laundry; Add laundry
6. Starting the programme 34 Starting the programme The programme can be started whenthe Start/Stop sensor control is flashing on and off. Touch the Start/Stop sensor control. The door will lock and the programmewill start. The programme status will appear in thedisplay. 11:02 Cottons Status...
Page 35 - End of programme
7. End of programme 35 End of programme The door remains locked during the anti-crease phase and Finish/Anti-crease and Unlock with “Start/Stop” appear in the dis- play. Touch the Start/Stop sensor control. The door will unlock. The drum lighting will come on. Tip: The door unlocks automatically ...
Page 36 - Spinning
Spinning 36 Final spin speed in the pro-gramme When a programme is selected, the op-timum spin speed for this wash pro-gramme is shown in the display.A faster spin speed can be selected forcertain wash programmes.The highest selectable spin speed is in-dicated in the table. Programme rpm Cottons 160...
Page 37 - Ending a programme with a spin cycle; Interim spin
Spinning 37 Omitting the final spin (Rinsehold) Select the Rinse hold Extra. If Rinse hold is selected, the laundry re-mains in the water following the finalrinse cycle. This helps to prevent creas-ing if the laundry is not going to be re-moved from the drum immediately afterthe end of the program...
Page 38 - Programme chart
Programme chart 38 Cottons 90 °C to cold Max. load 9.0 kg Items Cotton, linen or mixed fibre fabric, e.g. table linen, underwear, T-shirts, etc. Tip Where particularly high levels of hygiene are required, please select atemperature of 60 °C or higher. Note for test institutes: Cottons 20 °C: program...
Page 40 - Sportswear; ing; Proofing
Programme chart 40 Sportswear Cold to 60 °C Max. load 3.0 kg Items Sportswear such as singlets and leggings as well as microfibre andfleece garments Tip - Do not use fabric conditioner - Follow the instructions on the care label Trainers Cold to 40 °C Max. 2 pairs of shoes Items Sport shoes only (no...
Page 41 - Down filled items; goWash
Programme chart 41 Down filled items Cold to 60 °C Max. load 2.0 kg Items Jackets, sleeping bags, pillows and other items with down filling Tip - Remove air from the laundry before washing to prevent an excess- ive build-up of foam. To do this either push the items into a narrowlaundry bag to compre...
Page 42 - Curtains
Programme chart 42 Curtains Cold to 40 °C Max. load 2.0 kg Items Curtains specified as machine-washable by the manufacturer Tip - To remove dust, the Pre-wash Extra is selected automatically. - For curtains which crease easily, reduce the spin speed or deselect the spin. - Remove weights from curtai...
Page 43 - Steam care
Programme chart 43 Steam care Max. load 2.0 kg Items Reduces the amount of creasing in damp, freshly washed and spuncotton or linen garments. The garments must be suitable for drying in a tumble dryer and suitable for ironing . Tip - 5–6 shirts make up a load of approx. 2.0 kg. - Smaller l...
Page 44 - Maintenance
Programme chart 44 Maintenance The washing machine has two maintenance programmes. 1. Clean machine for cleaning the washing machine. 2. Clean “TwinDos” for maintenance of TwinDos compartments / . See “Clean- ing and care – TwinDos maintenance” for more details. Clean machine 85 °C No load With ...
Page 45 - Extra options; Quick; and suitable; Soak
Extra options 45 You can use the extra options buttons toaugment the wash programmes. Quick The programme duration is reduced.Mechanical action and energy usage areincreased. Water plus The water level in the main wash andthe rinses will be increased.You can select by how much the waterlevel is incr...
Page 46 - Intensive; and suitable for ironing; Extra gentle
Extra options 46 Intensive For hard-wearing laundry that is veryheavily soiled. Cleaning efficiency is in-creased through more intense mechan-ical action and the application of moreheat energy. AllergoWash This option should be used where highstandards of hygiene are required. En-ergy consumption is...
Page 47 - Wash programme chart - Extras
Wash programme chart - Extras 47 Quick W a ter plus Extr a rinse Single W ash Pr e -ir oning Pr e -w ash Soak In tensiv e Allerg o W ash Extr a g en tle Extr a quiet Rinse hold Cottons ECO 40-60 – – – – – – – – – – – – Minimum iron Delicates ...
Page 48 - Programme sequence
Programme sequence 48 Main wash Rinses Spinning Water level Wash rhythm Water level Rinses Cottons 2-5 1,2,3 ECO 40-60 2–3 2 Minimum iron 2-4 2,3 Delicates 2-4 2,3 QuickPowerWash 2 Automatic plus 2-4 2, 3 Woollens 2 Silks 2 Express...
Page 49 - = ultra sensitive rhythm; Extra has been selected
Programme sequence 49 = low water level = medium water level = high water level = intensive rhythm = normal rhythm = sensitive rhythm = ultra sensitive rhythm = handwash rhythm = carried out – = not carried out This washing machine has fully elec-tronic controls with automatic load...
Page 50 - PowerWash; Water
Programme sequence 50 PowerWash PowerWash is a washing technique de-veloped by Miele. It is activated in thefollowing programmes: - Cottons (with small and medium load sizes) - ECO 40-60 (with small and medium load sizes) - Minimum iron- Shirts- Automatic plus- Delicates- Cottons (with small and ...
Page 51 - Changing the programme sequence; Interrupting a programme; Selecting another programme
Changing the programme sequence 51 Changing a programme (safetylock) A programme, temperature, spin speedor selected options cannot be changedonce the machine has been successfullystarted. This prevents the machine be-ing operated unintentionally, e.g. by chil-dren. If the washing machine is switche...
Page 52 - Garment care label symbols
Garment care label symbols 52 Washing The figure quoted in the bucket is themaximum temperature at which thegarment can be washed. Normal agitation Reduced agitation Much reduced agitation Hand wash Do not wash Programme selection examples Programme Garment care label symbols Cottons ...
Page 53 - Favourite programmes; Creating favourites; Option 1; To enter a name
Favourite programmes 53 Creating favourites You can save your own customisedwash programmes under names of yourchoice. Option 1 The main menu must be visible in thedisplay. Touch the Favourites sensor control. The display will change to show the Fa-vourites menu. Touch the Create sensor control....
Page 54 - Extras
Washing assistant 54 The wash assistant helps you with loadsconsisting of items with different careinstructions. The washing machine willuse the list of items to put together asuitable wash programme. Scroll to the second page in the mainmenu. Touch the Washing assistant sensor control. A list ...
Page 55 - Timer; Setting the timer
Timer 55 The Timer can be used to set the timeyou wish a programme to finish or startat. The programme start can be delayedby up to 24 hours. Setting the timer Touch the Timer sensor. Select the Finish at or Start at option. Set the hours and the minutes withthe OK sensor. Changing the timer...
Page 56 - SmartStart; Setting the timeframe; SmartStart
Timer 56 SmartStart The SmartStart function lets you define a period of time during whichyour washing machine will start auto-matically. The appliance will start onreceipt of a signal, e.g. from your en-ergy supplier, that indicates that theelectricity tariff is particularly econom-ical.This functio...
Page 57 - Detergent; The correct detergent; - the soiling level of the load; Water softeners; Water hardness levels; Dispensing aids
Detergent 57 The correct detergent All detergents produced for automaticwashing machines are suitable. Followthe manufacturer's instructions anddosage recommendations on the pack-aging.For users in Asia:please use a low foaming detergentsuitable for use in front-loading ma-chines The right amount to...
Page 58 - TwinDos dispensing
Detergent 58 Adding fabric conditioner or li-quid starch separately Prepare the starch in accordance withthe manufacturer's instructions on thepackaging. Tip: When adding fabric conditioner, ac- tivate the Water plus Extra. Dispensing via the detergent dis-penser drawer Add fabric conditioner to t...
Page 59 - Recommended Miele detergents
Detergent 59 Recommended Miele detergents Miele detergents have been specially designed for day-to-day use in Miele washingmachines. See “Detergents and care products” for more information about thesedetergents. Miele UltraPhase 1 and 2 Miele single-use capsules Cottons – ECO 40-60 – ...
Page 61 - Replacing the TwinDos cartridge; Preparing the cartridge; or; Replacing the cartridge
Replacing the TwinDos cartridge 61 A message will appear in your washingmachine display if a detergent cartridgeis empty. Preparing the cartridge Remove the cover cap from the cart-ridge. or Remove the film seal from the cart-ridge completely. Risk of damage from film seal If the film seal is ...
Page 62 - Cleaning and care; Risk of electric shock!; Removing the dispenser drawer
Cleaning and care 62 Cleaning the external casingand the control panel Risk of electric shock! Mains voltage is present when thewashing machine is switched offDisconnect the machine from theelectricity supply before cleaning ormaintenance. Risk of damage due to ingress of water.The pressure of a...
Page 63 - Cleaning the siphon and the; Remove the siphon from
Cleaning and care 63 Cleaning the siphon and the / compartment channel Liquid starch results in clogging. Ifclogged, the siphon in the / compartment will not work and thecompartment can overflow.Clean the siphon particularly thor-oughly after using liquid starch a fewtimes. 1. Remove the sip...
Page 64 - TwinDos maintenance; Starting the maintenance programme; Cleaning the compartment
Cleaning and care 64 Cleaning the drum (Hygiene info) Washing at low temperatures and/or us-ing liquid detergent can cause bacteriaand unpleasant odours to build up in thewashing machine. Use the Clean machine programme to clean the machine. Runthis programme regularly or at the latestwhen the Hygie...
Page 65 - Cleaning the water inlet filter; First turn off the stopcock.; be put back in place
Cleaning and care 65 Cleaning the water inlet filter The washing machine has a filter to pro-tect the water inlet valve. The accessiblefilter in the union at the open end of theinlet hose should be checked every sixmonths or so, or more often if there arefrequent interruptions to the water sup-ply. ...
Page 66 - Problem solving guide; The programme does not start; There is no power to the machine.; Close the door again.; Fault message after a programme has been interrupted.; Problem; Clean the drain filter and the drain pump.
Problem solving guide 66 Many malfunctions and faults that can occur in daily operation can be easilyremedied. You can save time and money in many cases, as you do not need to callthe Miele Customer Service Department.Information to help you rectify faults yourself can be found at www.miele.com/ser-...
Page 67 - Fault message at the end of a programme
Problem solving guide 67 Problem Cause and remedy Water intake fault.Open the stopcock. The water intake is blocked or restricted. Check whether the stopcock has been properlyopened. Check whether the intake hose is kinked. Check whether there is sufficient water pressure. The filter in the ...
Page 68 - Clean
Problem solving guide 68 Problem Cause and remedy Hygiene info: Select“Maintenance” andrun the “Clean ma-chine” programme. A wash programme using a temperature above 60 °Chas not been run for a long time. In order to prevent bacteria and unpleasant odoursbuilding up in the washing machine, run t...
Page 69 - Messages or faults with the TwinDos system
Problem solving guide 69 Problem Cause and remedy Align the machine.Laundry not properlyspun The Pre-ironing Extra which runs at the end of the pro- gramme could not be carried out properly. Check whether the washing machine is aligned cor-rectly as described in “Installation – Levelling themach...
Page 71 - General problems with the washing machine; tenance wash
Problem solving guide 71 General problems with the washing machine Problem Cause and remedy The washing machinesmells. Hygiene info was ignored. A wash programme using atemperature above 60 °C has not been run for a longtime. In order to prevent bacteria and unpleasant odoursbuilding up in the was...
Page 72 - Water plus
Problem solving guide 72 General problems with the washing machine Problem Cause and remedy Large amounts of deter-gent residue remain inthe detergent dispenserdrawer. The water pressure is too low. Clean the water inlet filter. It may be useful to select the Water plus extra op- tion. Powder de...
Page 73 - An unsatisfactory wash result; Use the
Problem solving guide 73 Problem Cause and remedy Noises while steam isbeing generated. This is not a fault.These noises occur when steam is being generatedand when steam is being injected into the drum. A load value is displayedin the pull-down menuwhen the drum is empty.A load value < 25 % isdi...
Page 74 - The door will not open; Freshen up; programme
Problem solving guide 74 The door will not open Problem Cause and remedy The door cannot bepulled open during aprogramme. The door is locked during a programme. Touch the Start/Stop sensor to cancel the pro- gramme. The programme is cancelled, the door will unlock andyou will be able to pull it op...
Page 75 - Switch off the washing machine.; Blocked drain outlet; Risk of scalding due to hot suds.; Draining the washing machine; Once the flow of water ceases:
Problem solving guide 75 Opening the door in the eventof a blocked drain outlet and/orpower cut Switch off the washing machine. Open the access panel for the drainpump. Blocked drain outlet If the drain outlet is blocked, there maybe a large quantity of water left behindin the washing machine. ...
Page 76 - Clean the drain filters thoroughly.; Danger of injury due to rotating
Problem solving guide 76 Clean the drain filters thoroughly. Remove any foreign objects (e.g. but-tons, coins, etc.) and clean the in-terior. Turn the pump impellers byhand to check that they rotate freely. Replace the drain filters correctly (onthe right and left) and tighten themsecurely. ...
Page 77 - Contact in the event of a fault; Optional accessories
Service 77 Information to help you rectify faultsyourself and about Miele spare partscan be found at www.miele.com/ser-vice. Contact in the event of a fault In the event of any faults which you can-not remedy yourself, please contactyour Miele dealer or the Miele Cus-tomer Service Department. You ca...
Page 78 - Installation; Front view
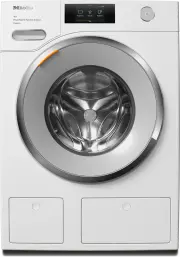
Installation *INSTALLATION* 78 Front view a Inlet hoses with Waterproof systemfor cold mains water and alternativewater supplies b Mains connection cable c Flexible drain hose (with detachableswivel elbow) d Control panel e Detergent dispenser drawer f Door g Access to filters, pumps and emer-gency ...
Page 79 - Rear view; Drain hose
Installation *INSTALLATION* 79 Rear view a Drain hose b Transport clips for inlet and drainhoses and mains connection cable c Mains connection cable d Protruding lid for holding when mov-ing the machine e Cold water intake hose with Water-proof system. f Water intake hose with Waterproofsystem for a...
Page 80 - Installation surface; If installing on a wooden joist floor:
Installation *INSTALLATION* 80 Installation surface A concrete floor is the most suitable in-stallation surface. It is far less prone tovibration during the spin cycle thanwooden floorboards or a carpeted sur-face.Please note: The machine must be level and se-curely positioned. To avoid vibratio...
Page 81 - Removing the transit bars; Removing the left-hand transit bar; Removing the right-hand transit bar; Withdraw the transit bar.
Installation *INSTALLATION* 81 Removing the transit bars Removing the left-hand transit bar Push the cover out and turn the left-hand transit bar 90° using the span-ner supplied. Withdraw the transit bar. Removing the right-hand transit bar Push the cover out and turn the left-hand transit bar...
Page 82 - Covering holes; Risk of injury from sharp edges.; Securing the transit bars; Risk of damage from incorrect; Fitting the transit bars; Opening the covers; The bars will slide in more easily if
Installation *INSTALLATION* 82 Covering holes Risk of injury from sharp edges. There is a risk of injury from reachinginto holes that are not covered.Cover the holes for the transit barsafter they have been removed. Push the covers in firmly until theyengage in position. Securing the transit bar...
Page 83 - Levelling the machine; Screwing out and adjusting the feet
Installation *INSTALLATION* 83 Levelling the machine The washing machine must stand per-fectly level on all four feet to ensure safeand proper operation.Incorrect installation may increase elec-tricity and water consumption and maycause the machine to move about. Screwing out and adjusting the feet ...
Page 84 - Installing under a continuous worktop; Risk of electric shock due to ex-
Installation *INSTALLATION* 84 Installing under a continuous worktop Risk of electric shock due to ex- posed cablesThere is a risk of coming into contactwith live parts while the lid is re-moved.Do not remove the washing machinelid. This washing machine (with lid intact)can be pushed under a count...
Page 85 - The water protection system; The inlet hoses
Installation *INSTALLATION* 85 The water protection system The Miele water protection system pro-tects all parts of the washing machinefrom water damage.The system consists of three main com-ponents: - the inlet hose- the electronic unit and drainage and overflow protection - the drain hose The Wate...
Page 86 - Connection to the water supply; Health risk and risk of damage; Connecting water inlet hoses; Only use a; Miele Waterproof system; hose should you need a replacement.
Installation *INSTALLATION* 86 Drain hose The drain hose is protected by a ventila-tion system which prevents the washingmachine from being emptied com-pletely. Connection to the water supply Health risk and risk of damage due to contaminated incoming water.The quality of the incoming watermust co...
Page 87 - Hose extension; Damage caused by incorrect wa-; Markings on the water intake hoses; - You can heat up your water with
Installation *INSTALLATION* 87 Hose extension A 1.5 metre long (metal) extension hoseis available from your Miele dealer orthe Miele Spare Parts Department as anoptional extra.This hose is tested to withstand pres-sures of up to 14,000 kPa and can beused as a flexible extension to the watersupply. O...
Page 88 - Soft water, rain water and well water; Water drainage
Installation *INSTALLATION* 88 Soft water, rain water and well water 1. For hygiene reasons water should be at least of the quality used for bathingin. 2. The chemical composition of the wa- ter must not endanger parts of themachine. 3. The water must not contain any solid particles e.g. sand. We re...
Page 89 - Fitting the elbow
Installation *INSTALLATION* 89 Drainage options: 1. Directed into a sink or basin: Please note: – Hook the hose over the edge and secure it. – If the water is pumped into a washbasin, make sure that it candrain away freely. Otherwise thereis a risk of water overflowing or ofsome of the drained water...
Page 90 - Electrical connection; Risk of fire from overheating.
Installation *INSTALLATION* 90 Electrical connection The washing machine is supplied withan electrical connection cable withmoulded plug ready for connection to aswitched socket.The socket must be easily accessibleafter the washing machine has been in-stalled. If that is not possible, ensurethat a s...
Page 91 - Consumption data
Consumption data 91 Pr ogr amme Load Energy W a ter Running time Temper a tur e 1 R esidual moistur e Speed kg kWh Litr es h:min °C % rpm E C O 4 0-6 0 * 9.0 0.9 0 65 3:19 4 3 4 2 16 00 4.5 0.4 1 56 2:39 3 2 44 16 00 2.5 0. 2 0 28 2:29 2 4 46 16 00 Cott ons 6 0 9.0 1.45 65 2:29 55 5 0 16 00 2 0 3 9...
Page 92 - Comparison betw; in the settings f
Consumption data 92 Comparison betw een cold w a ter and hot w a ter connection Pr ogr ammes Load kg Cold w a ter Hot w a ter 55 °C* Energy kWh W a ter litr es Running time h:min Energy kWh W a ter litr es Running time h:min Cott ons 6 0 9,0 1,45 65 2:29 0,5 0 61 2:2 4 Minimum ir on 4 0 4,0 0,65 5 7...
Page 93 - Technical data; EU Conformity declaration
Technical data 93 Height 850 mm Width 596 mm Depth 643 mm Depth with door open 1077 mm Height for building under 850 mm Width for building under 600 mm Weight Approx. 95 kg Capacity 9.0 kg dry laundry Supply voltage See data plate Rated load See data plate Fuse rating See data plate Consumption data...
Page 94 - UK Conformity declaration; manuals and enter the name of the product or the serial number; This; Statement of Compliance; confirms this Miele product fully complies with the; Paul Wright; Washing Machine HW20-W
Technical data 94 UK Conformity declaration Miele hereby declares that this washing machine complies with UK Radio Equip-ment Regulations 2017, as amended. The complete text of the UK declaration of conformity is available from one of thefollowing internet addresses: - Products, Download from www.mi...
Page 95 - Accessing the settings menu; Selecting settings; Changing a setting; Closing the settings menu; Consumption
Settings 95 You can use the settings to alter thewashing machine's electronics to suitchanging requirements.The settings can be altered at anytime. Accessing the settings menu Switch on the washing machine. Scroll to the second page in the mainmenu. Touch the Settings sensor. The display will ...
Page 96 - Options
Settings 96 Code The code prevents the washing ma-chine being used without your know-ledge. Options - Activate If you activate the code, you have toenter a code after switching the wash-ing machine on. Otherwise it cannotbe operated.The factory default code is 125. - Change If wished, you can set a ...
Page 97 - “Display” off status
Settings 97 “Display” off status The display and the sensor controllighting is switched off to save energy.The Start/Stop sensor flashes slowly. Options - Off The lighting remains switched on. - On (factory setting) The lighting switches off after10 minutes. - On. Not in current prog. The lighting r...
Page 98 - Maximum rinse level; Longer Pre-wash Cottons; Gentle action; Gentle action can be activated for the; Network
Settings 98 Maximum rinse level The water level in the rinses can bepermanently set to the highest value. This function is important for allergy suf-ferers as it achieves excellent rinse res-ults. The water consumption will be in-creased.The maximum rinse level is deactivatedas standard. Soak durati...
Page 99 - SmartGrid; Remote control; MobileControl
Settings 99 Connection status (visible if Miele@home is activated)The following values are displayed: - The quality of WiFi reception- The network name- The IP address Set up again (visible if set up)Resets the WiFi login (network) to im-mediately re-establish a new connec-tion. Reset (visible if se...
Page 100 - Activating /Deactivating; Appliance parameters
Settings 100 RemoteUpdate The RemoteUpdate menu option is only displayed and can only be selected ifthe requirements for usingMiele@home have been met (see“Before using for the first time –Miele@home”). The RemoteUpdate function is used toupdate the software in your washingmachine. If an update is ...
Page 101 - Legal information; You can view information here.
Settings 101 - Rain water This setting is recommended if thewater hardness level of the alternativewater supply is lower than that of themains water supply. Detergent savingscan be made with this setting. - Well water This setting is recommended in orderto prevent a build-up of limescale inthe washi...
Page 102 - Installation requirements; Low water pressure; - to prevent the danger of scalding if the; Temperature reduction
Settings 102 Copyrights and licences for the com-munication module For the purpose of operating and con-trolling the communication module,Miele uses proprietary or third-partysoftware that is not covered by opensource licensing terms. These items ofsoftware/software components are pro-tected by copy...
Page 103 - Miele UltraPhase 1 and 2; Caps Sport
Detergents and care products 103 Detergent, fabric care products, addit-ives and machine care products areavailable for this washing machine. Allproducts have been designed for Mielewashing machines.These and many other products can beordered from www.shop.miele.com, theMiele Customer Service Depart...
Page 104 - Fabric care
Detergents and care products 104 Fabric care These fabric care products are availableas convenient single-use capsules. Fabric conditioner cap - Fabric conditioner for freshly scented laundry - Pure and thorough cleanliness with a fresh scent - For soft, bouncy laundry- Prevents static charge in ...
Page 107 - United Kingdom
United Kingdom Miele Co. Ltd., Fairacres, Marcham Road, Abingdon, Oxon, OX14 1TWTel: 0330 160 6600, Internet: www.miele.co.uk, E-mail: [email protected] Australia Miele Australia Pty. Ltd.ACN 005 635 398ABN 96 005 635 398Level 4, 141 Camberwell RoadHawthorn East, VIC 3123Tel: 1300 464 353E-mail: [em...


 Miele WWD380 WCS PWash&Steam&9kg User Manual
 Miele W 1614 Manual
 Miele G 5266 SCVi SFP Active Plus User Manual
 Miele Classic C1 Turbo Team PowerLine - SBAN0 User Manual
![Miele PDR 307 [EL]](https://manualsarea.com/img/product/thumbs/48/ba/fd/bafde84806e8abc8b420f34eaf8fcd6e.webp) Miele PDR 307 [EL] User Manual
Miele PDR 307 [EL] User Manual Miele F 1911 Vi Manual
![Miele PDR 908 [EL MAR 3N AC 400V 50-60Hz]](https://manualsarea.com/img/product/thumbs/48/05/b7/05b705998b251f92b271e908423e1ecb.webp) Miele PDR 908 [EL MAR 3N AC 400V 50-60Hz] Installation Manual
Miele PDR 908 [EL MAR 3N AC 400V 50-60Hz] Installation Manual Miele K 9757 iD Manual
 Miele WWD020 WCS 8kg User Manual
 Miele WWG360 WCS PWash&9kg User Manual
 Miele WWG660 WCS TDos&9kg User Manual
 Miele WWG880 WCS PWash&TDos&Steam User Manual
 Miele WWK360 WCS PWash&10kg User Manual
 Miele WXD160 WCS User Manual
 Miele WXF660 WCS TDos User Manual
 Miele WXR860 WCS TDos & IntenseWash User Manual
 Miele XCI-Box User Manual
 Miele 04 950 470 Manual
 Miele 07 682 190 Manual
 Miele 09 798 350 Manual