Page 3 - Gas-heated appliances; Safety precautions to take if you smell gas; Open all doors and windows to ventilate the area.; In the UK you must now:; For any gas work in the UK always use a Gas Safe registered engineer.
Gas-heated appliances 3 Safety precautions to take if you smell gas Turn off the gas emergency control valve immediately.This is usually located near the gas meter. Eliminate all sources of ignition in a safe manner.Do not smoke, light cigarette lighters or matches. Do not operate electrical l...
Page 4 - Contents
Contents 4 Warning and Safety instructions ...................................................................... 6 Caring for the environment .............................................................................. 16 Guide to the appliance .......................................................
Page 5 - Converting to another gas type
Contents 5 Installation notes ................................................................................................. 40 Surface-mounted installation ......................................................................... 40Flush-fit installation ............................................
Page 6 - Warning and Safety instructions
Warning and Safety instructions 6 This hob complies with all relevant local and national safety re-quirements. Inappropriate use can, however, lead to personal in-jury and material damage. Read the operating and installation instructions carefully beforeusing the hob. They contain important informat...
Page 7 - Correct application; This hob is intended for domestic use and use in other similar en-
Warning and Safety instructions 7 Correct application This hob is intended for domestic use and use in other similar en- vironments. This hob is not intended for outdoor use. It is intended for domestic use only to cook food and keep it warm. Any other use is not supported by the manufacturer ...
Page 8 - Safety with children
Warning and Safety instructions 8 Safety with children Children under 8 years of age must be kept away from the hob unless they are constantly supervised. Children over 8 years of age may use the hob without supervision if its operation has been clearly explained to them and they are ableto use ...
Page 9 - Technical safety
Warning and Safety instructions 9 Technical safety Unauthorised installation, maintenance and repairs can cause considerable danger for the user. Installation, maintenance and re-pairs must only be carried out by a Miele authorised technician. Damage to the hob can compromise your safety. Check ...
Page 11 - Danger of electric shock!
Warning and Safety instructions 11 Danger of electric shock! Do not use the hob if it is damaged or if it suffers damage duringuse. Switch it off immediately. Disconnect it from the mains electri-city and gas supply. Call Service. If the hob is installed behind a cabinet door, do not close the d...
Page 12 - Correct use
Warning and Safety instructions 12 Correct use The hob gets hot when in use and remains hot for some time after being switched off. Do not touch the hob if there is a possibility thatit could still be hot. Due to the high temperatures radiated, objects left near the hob when it is in use could c...
Page 15 - Cleaning and care; Do not use a steam cleaning appliance to clean this hob.
Warning and Safety instructions 15 Cleaning and care Do not use a steam cleaning appliance to clean this hob. The steam could reach electrical components and cause a short cir-cuit.
Page 16 - Caring for the environment
Caring for the environment 16 Disposal of the packing mater-ial The packaging is designed to protectthe appliance from damage duringtransportation. The packaging materialsused are selected from materials whichare environmentally friendly for disposaland should be recycled. Recycling the packaging re...
Page 17 - Guide to the appliance; Hob
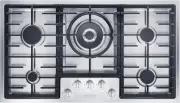
Guide to the appliance 17 Hob a Small burner b Large burner c Wok burner d Medium burner e Medium burner f Pan supports (x 3) Controls knobs for the cooking zones: g Front left h Rear left i Middle j Rear right k Front right
Page 18 - Control knobs; Small, medium and large burners
Guide to the appliance 18 Control knobs Small, medium and large burners Symbol Description Burner off, the gas supply is turned off Largest flame Smallest flame Wok burner Symbol Description Burner off, the gas supply is turned off Largest flame: inner and outer burner on highest setting. ...
Page 19 - Burner; Wok burner
Guide to the appliance 19 Burner Wok burner a Outer burner cap b Inner burner cap c Burner head d Burner base e Thermocouple f Ignitor Small, medium and large burners a Burner cap b Burner head c Burner base d Thermocouple e Ignitor
Page 20 - Accessories supplied; Wok ring
Guide to the appliance 20 Accessories supplied The accessories supplied with your ap-pliance as well as a range of optionalones are available to order from Miele(see “Optional accessories”). Wok ring The wok ring supplied gives additionalstability to the wok, especially to wokswith a rounded base. C...
Page 21 - Before using for the first time
Before using for the first time 21 Please stick the extra data plate forthe appliance supplied with this doc-umentation in the space provided inthe “After sales service” section ofthis booklet. Remove any protective wrapping andstickers. Cleaning the hob for the firsttime Before using for the ...
Page 22 - Pans
Pans 22 Minimum pan base diameter Burner Ø cm Small burner 10 Medium burner 10 Large burner 12 Wok burner 15 Maximum diameter at top of pan Burner Ø cm Small burner 20 Medium burner 22 Large burner 24 Wok burner Without combination trivet: 26 With combination trivet: 30 - Select the pan to suit th...
Page 23 - Combination trivet; The combination trivet must be used if
Pans 23 Combination trivet The combination trivet must be used if - you wish to use a pan with a smaller diameter base than the minimumgiven in the chart. - you are using large pans on the wok burner of a flush fit hob (see chart).This minimises the likelihood of dam-age to the worktop and/or discol...
Page 24 - Tips on saving energy; - Use a pan lid whenever possible to
Tips on saving energy 24 - Use a pan lid whenever possible to minimize heat loss. - Wide, shallow pans are preferable to tall, narrow ones. They will heat upfaster. - Cook with as little water as possible. - Reduce the size of the flame once the water has come to the boil or the oilis hot enough to ...
Page 25 - Operation; Risk of fire with overheated food.; Switching on; position and see “Prob-
Operation 25 Risk of fire with overheated food. Unattended food can overheat andcatch alight.Do not leave the hob unattendedwhilst it is being used. Switching on Press in the relevant rotary controland turn it anticlockwise to the largeflame symbol. The ignition electrodewill “click” and ignite ...
Page 26 - Adjusting the flame
Operation 26 Adjusting the flame The burners can be regulated at anylevel between the strongest and weak-est flame. As the outer part of the flame is muchhotter than the centre, the tips of theflames should stay beneath the panbase. Flame tips which extend beyondthe sides of the pan merely warm upth...
Page 27 - Safety features; position, the burner is ready
Safety features 27 Thermo-electric flame failuremonitor Your hob is equipped with a thermo-electric flame failure monitor. If a gasflame is extinguished, e.g. by food boil-ing over or by a draught, the gas supplyis switched off. This prevents the re-lease of gas. If you turn the rotary con-trol to t...
Page 28 - Unsuitable cleaning agents
Cleaning and care 28 Danger of burning due to hot surfaces.The hob surface, pan supports andburners will be hot after use.Allow the hob to cool down beforecleaning it. Risk of damage due to moisture ingress.The steam from a steam cleaning ap-pliance could reach live electricalcomponents and caus...
Page 29 - Stainless steel trough; Risk of damage by pointed ob-; Pan supports; Remove the pan supports.
Cleaning and care 29 The entire hob should be cleanedafter each use. Soften any stubborn soiling before-hand. Dry the hob thoroughly after everydamp cleaning to avoid limescaleresidue. Stainless steel trough Risk of damage by pointed ob- jects.The seal between the hob and theworktop could su...
Page 31 - Assembling the wok burner
Cleaning and care 31 Assembling the small, medium andlarge burners Place the burner head on the burner base so that the thermo- couple and the ignitor extend through their respective holes in theburner head. The burner head mustclick into place correctly. Place the burner cap flat ...
Page 32 - Problem solving guide; Problem
Problem solving guide 32 Many malfunctions and faults that can occur in daily operation can be easilyremedied. Time and money will be saved because a service call will not beneeded. The following guide may help you to find the reason for a malfunction or a fault,and to correct it. Problem Cause and ...
Page 34 - Optional accessories; Microfibre cloth; Removes finger marks and light soiling
Optional accessories 34 Miele offer a comprehensive range ofuseful accessories as well as cleaningand conditioning products for yourMiele appliances. These products can be ordered throughthe Miele Webshop. They can also be ordered from Miele(see end of this booklet for contact de-tails) or from your...
Page 35 - After sales service; Contact in the event of a fault
After sales service 35 Contact in the event of a fault In the event of any faults which you cannot remedy yourself, please contact yourMiele dealer or the Miele Customer Service Department. You can book a Miele Customer Service Department call-out online atwww.miele.com/service. Contact information ...
Page 36 - Installation; Safety instructions for installation; Risk of damage from incorrect connection.
Installation *INSTALLATION* 36 Safety instructions for installation Risk of damage from incorrect connection. Incorrect installation can cause damage to the hob.The hob must only be installed by a qualified person. Damage from falling objects. Take care not to damage the hob when fitting wall un...
Page 37 - Safety distances; Safety distance above the hob
Installation *INSTALLATION* 37 Safety distances Safety distance above the hob A minimum safety distance must bemaintained between the appliance andthe cooker hood above it. See thecooker hood manufacturer's operatingand installation instructions for details.If the manufacturer's instructions arenot ...
Page 38 - or
Installation *INSTALLATION* 38 Safety distances to the sides andback of the hob Ideally the hob should be installed withplenty of space on either side. Theremay be a wall at the rear or a tall unit orwall on one side (right or left) (see illus- trations). Minimum distance between the back of the ...
Page 39 - Hob with frame or bevelled edge
Installation *INSTALLATION* 39 Safety distance when installing the appliance near a wall with additionalniche cladding A minimum safety distance must be maintained between the worktop cut-out andany niche cladding to protect it from heat damage. If the niche cladding is made from a combustible mater...
Page 40 - Installation notes; Surface-mounted installation
Installation *INSTALLATION* 40 Installation notes Surface-mounted installation Seal between the hob and the work-top Damage caused by incorrect in- stallation.Using sealant under the hob couldresult in damage to the hob and theworktop if the hob ever needs to beremoved for servicing.Do not use sea...
Page 41 - Flush-fit installation
Installation *INSTALLATION* 41 Flush-fit installation Flush-fit installation is only possible innatural stone (granite, marble), solidwood and tiled worktops. Certainmodels are suitable for building intoglass worktops – please see the relev-ant label on the hob. When using aworktop made from any oth...
Page 42 - Installation dimensions – Surface-mounted; All dimensions are given in mm.
Installation *INSTALLATION* 42 Installation dimensions – Surface-mounted All dimensions are given in mm. KM 2354 a Front b Casing depth c Gas connection R ¹/₂ - ISO 7-1 (DIN EN 10226) d Mains connection box with mains connection cable, L = 2000 mm
Page 43 - Installation – surface-mounted; Preparing the worktop
Installation *INSTALLATION* 43 Installation – surface-mounted Preparing the worktop Create the worktop cut-out as shownin the hob diagram. Remember tomaintain the minimum safety dis-tances (see “Installation – Safety dis-tances”). Seal any cut surfaces on woodenworktops with a special varnish, s...
Page 44 - Installation dimensions – Flush
Installation *INSTALLATION* 44 Installation dimensions – Flush All dimensions are given in mm. KM 2355 a Front b Casing depth c Gas connection R ¹/₂ - ISO 7-1(DIN EN 10226) d Mains connection box with mainsconnection cable, L = 2000 mm e Stepped cut-out for natural stoneworktops Please observe the d...
Page 45 - Installation – flush-fit; Natural stone worktops
Installation *INSTALLATION* 45 Installation – flush-fit Natural stone worktops a Worktop b Hob c Gap As the ceramic glass and the worktopcut-out have a certain dimensional tol-erance, the size of the gap can vary. e Stepped cut-out Solid wood / tiled worktops a Worktop b Hob c Gap d Wooden frame ...
Page 47 - Installation in a stainless steel worktop
Installation *INSTALLATION* 47 Installation in a stainless steel worktop Risk of damage from incorrect connection. Incorrect installation can cause damage to the hob.The hob must only be installed by a Miele authorised and qualified person. Once welded in position it must still be recognisable as ...
Page 48 - Securing the hob; - The gas flame must not go out on the
Installation *INSTALLATION* 48 Securing the hob The brackets are suitable for securingthe hob in a flush-fit or onset installa-tion. The illustrations show the hob se-cured in an onset installation. Secure the hob using the bracketssupplied. Functional check After installing the hob, ignite allb...
Page 49 - Gas connection; Risk of explosion due to an in-
Installation *INSTALLATION* 49 Gas connection For any gas work in the UK alwaysuse a Gas Safe registered engineer. Risk of explosion due to an in- correct gas connection.If the gas connection is carried outincorrectly, it may result in gas leak-age.Connection to the gas supply mustonly be undertak...
Page 50 - Risk of explosion due to dam-
Installation *INSTALLATION* 50 Risk of heat damage. Gas connections, pipes and connec-tion cables can suffer damage if ex-posed to heat from the hob.After installation make sure thatneither the gas pipe nor the mainscable can come into contact with hotparts of the appliance and that thegas pipe an...
Page 51 - Connecting the hob
Installation *INSTALLATION* 51 Connecting the hob The hob is supplied with a conical ¹/₂"gas connection point. There are twoconnection options: - Fixed connection - Flexible connection in accordance with DIN 3383 Part 1, maximumlength 2000 mm. (Not for the UK.) Risk of explosion due to gas le...
Page 52 - Burner ratings; Small burner
Installation *INSTALLATION* 52 Burner ratings Nominal ratings Burner Gas type Highest setting Lowest setting kW g/h kW Small burner Natural gas HLiquid gas 1.01.0 – 73 0.270.21 Medium burner Natural gas HLiquid gas 1.71.7 – 124 0.30.3 Large burner Natural gas HLiquid gas 2.72.6 – 189 0.510.64 Wok Na...
Page 53 - Electrical connection; Total power rating
Installation *INSTALLATION* 53 Electrical connection All electrical work must be carried outby a suitably qualified and competentperson in strict accordance with currentlocal and national safety regulations (BS7671 in the UK). Connection must bemade via a switched socket. This willmake it easier for...
Page 54 - Disconnecting from the mains
Installation *INSTALLATION* 54 Disconnecting from the mains Risk of electric shock. There is a risk of electric shock if theappliance is connected to the mainssupply during repair or service work.After disconnection, ensure the ap-pliance cannot be switched back onby mistake. To disconnect the app...
Page 55 - Jet table; Changing the jets; Changing the main jets
Converting to another gas type *INSTALLATION* 55 Risk of explosion due to an in- correct conversion.If the conversion to another type ofgas is carried out incorrectly, it mayresult in gas leakage.Conversion from one type of gas toanother must only be undertaken byan approved and registered gas in-...
Page 57 - Functional check; Check all gas fittings for leaks.
Converting to another gas type *INSTALLATION* 57 Wok burner a Small jet with smaller diameter(e.g. for LPG: 0,23) b Small jet with larger diameter(e.g. for LPG: 0,52) Using a small screwdriver, unscrewthe two small jets in the gas fitting. Pull out the jets with a pair of pliers. Fit the corre...
Page 58 - Product data sheets; Information for domestic gas-fired hobs
Product data sheets 58 The following data sheets apply to the models described in this operating instruc-tion manual. Information for domestic gas-fired hobs In acc. with regulation (EU) No. 66/2014 MIELE Model name / identifier KM 2354 Number of gas burners 5 Energy efficiency per gas burner (EE ga...


 Miele WWD380 WCS PWash&Steam&9kg User Manual
 Miele W 1614 Manual
 Miele G 5266 SCVi SFP Active Plus User Manual
 Miele Classic C1 Turbo Team PowerLine - SBAN0 User Manual
![Miele PDR 307 [EL]](https://manualsarea.com/img/product/thumbs/48/ba/fd/bafde84806e8abc8b420f34eaf8fcd6e.webp) Miele PDR 307 [EL] User Manual
Miele PDR 307 [EL] User Manual Miele F 1911 Vi Manual
![Miele PDR 908 [EL MAR 3N AC 400V 50-60Hz]](https://manualsarea.com/img/product/thumbs/48/05/b7/05b705998b251f92b271e908423e1ecb.webp) Miele PDR 908 [EL MAR 3N AC 400V 50-60Hz] Installation Manual
Miele PDR 908 [EL MAR 3N AC 400V 50-60Hz] Installation Manual Miele K 9757 iD Manual


