Midea MAD50PS1QGR - User Manual
Midea MAD50PS1QGR Air Dryer – User Manual, read for free online in PDF format. We hope this helps you resolve any issues you may have. If you have further questions, please contact us through the contact form.


Table of Contents:
- Page 2 – Page 2; Read This Manual; Owner’s Manual; CAUTION; NOTICE
- Page 3 – Page 3; WARNING; SAFETY PRECAUTIONS
- Page 4 – Page 4
- Page 5 – Page 5; EXPLANATION OF SYMBOLS DISPLAYED ON THE UNIT
- Page 6 – Page 6; Product overview; UNIT SPECIFICATIONS AND FEATURES
- Page 7 – Page 7; SET UP INSTRUCTIONS
- Page 8 – Page 8; Positioning the Unit; INSTALLATION INSTRUCTIONS; Optional Caster Installation; block
- Page 9 – Page 9; Additional Setup and Usage Information
- Page 10 – Key Pad Features; OPERATING INSTRUCTIONS; Operating Instructions
- Page 12 – Other Features
- Page 13 – Removing Collected Water
- Page 16 – CARE AND CLEANING
- Page 17 – NESTING AND STORING INSTRUCTIONS
- Page 18 – TROUBLESHOOTING TIPS
- Page 19 – DECLARATION OF CONFORMITY; APP INSTRUCTIONS
- Page 20 – DOWNLOAD AND INSTALL THE APP
- Page 21 – CREATE YOUR ACCOUNT
- Page 22 – ADDITIONAL APP AND SMART HOME FUNCTIONS
- Page 23 – Declaration of conformity; be slightly different. The actual shape shall prevail.
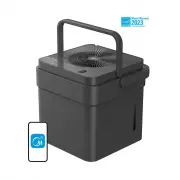
Cube Dehumidifier
version A - 12 - 2020
MAD20S1QWT
MAD35S1QWT
MAD50S1QWT
MAD50PS1QWT
MAD50PS1QGR
www.midea.com
USER MANUAL
en
MAD
Warning notices: Before using
this product, please read this
manual carefully and keep it
for future reference.
The design and specifications
are subject to change without
prior notice for product
improvement.
Rated voltage: 115V
Frequency: 60Hz
version E - 09 - 2022
"Loading the manual" means you need to wait until the file loads and becomes available for online reading. Some manuals are very large, and the time they take to appear depends on your internet speed.
Summary
Page 2 Read This Manual Inside you will find many helpful hints on how to use and maintain your Dehumidifier properly. A little preventive care on your part can save you a great deal of time and money over the life of your Dehumidifier. You’ll find many answers to common problems in the troubles...
Page 3 Saf ety Precautions To prevent injury to the user or personal and property damage, these instructions must be followed. Incorrect operation due to ignoring of instructions may cause harm or damage. The level of risk is shown by the following indications. WARNING This sy m bol indicates a ...
Page 4 Saf ety Precautions • Do not use in places where water m ay splash onto the unit. Water m ay enter the unit and degrade the insulation. It m ay cause an electric shock or fire. • Place the unit on a level, sturdy section of the floor. If the unit falls over, it m ay cause water to spill a...