Maytag MGR7661WB - Gas Range- User Manual
Maytag MGR7661WB - Gas Range– User Manual, read for free online in PDF format. We hope this helps you resolve any issues you may have. If you have further questions, please contact us through the contact form.



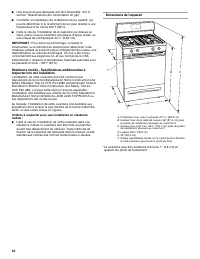
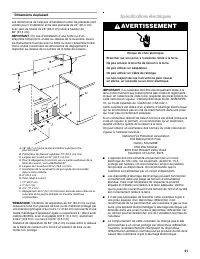
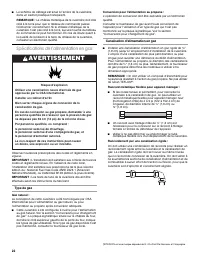
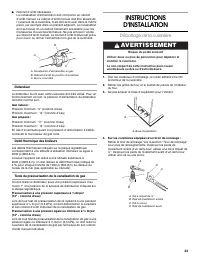
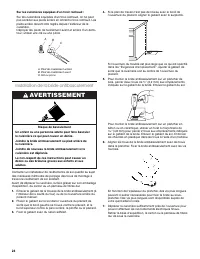
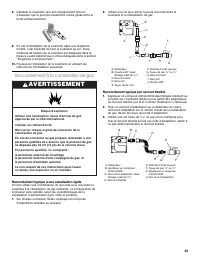
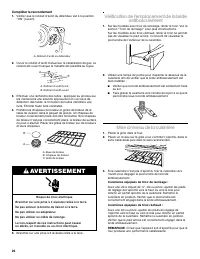
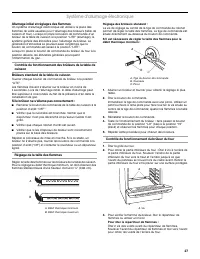
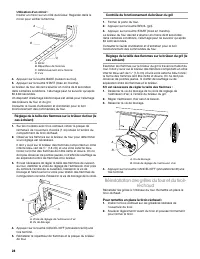
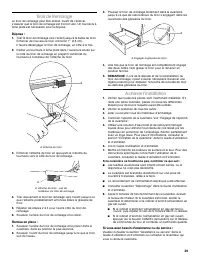
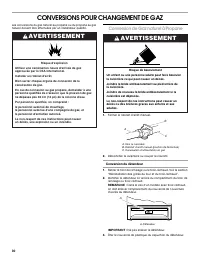
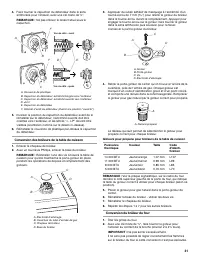
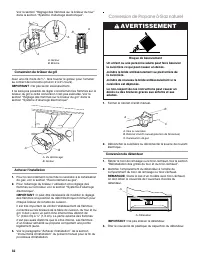
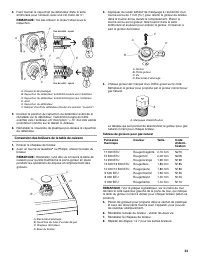
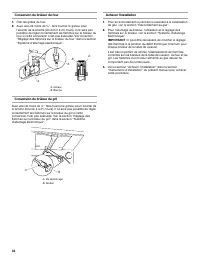
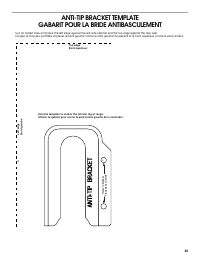

Table of Contents:
- Page 2 – WARNING: Gas leaks cannot always be detected by smell.; WARNING; Tip Over Hazard
- Page 3 – INSTALLATION REQUIREMENTS; Tools and Parts; Tools needed; Location Requirements; Mobile Home - Additional Installation Requirements; Mobile home installations require:
- Page 5 – Type of Gas
- Page 6 – Gas Pressure Regulator; INSTALLATION INSTRUCTIONS; Unpack Range; Remove oven racks and parts package from inside oven.; Excessive Weight Hazard
- Page 7 – Install Anti-Tip Bracket
- Page 8 – Make Gas Connection; Typical rigid pipe connection; Typical flexible connection; Complete Connection; Explosion Hazard
- Page 9 – Verify Anti-Tip Bracket Location; On models with a storage drawer, remove the storage drawer.; Level Range; Place level on rack and check levelness of range, first side to; Electronic Ignition System; Initial lighting and gas flame adjustments; Electrical Shock Hazard
- Page 10 – Check Operation of Oven Bake Burner; Adjust Oven Bake Burner Flame (if needed)
- Page 11 – Replace Oven Racks and; To Replace Warming Drawer:; Storage Drawer
- Page 12 – Complete Installation; If you need Assistance or Service:; GAS CONVERSIONS; LP Gas Conversion
- Page 13 – To Convert Gas Pressure Regulator; To Convert Surface Burners; NG
- Page 14 – Natural Gas Conversion
- Page 15 – LP
- Page 16 – To Convert Oven Bake Burner
- Page 17 – Notes
- Page 18 – SÉCURITÉ DE LA CUISINIÈRE; AVERTISSEMENT
- Page 19 – EXIGENCES D’INSTALLATION; Outillage et pièces; Outillage nécessaire; Emplacement d’installation; Risque de basculement
- Page 20 – Dimensions de l'appareil
- Page 21 – Dimensions du placard; Spécifications électriques; Risque de choc électrique
- Page 22 – Spécifications de l’alimentation en gaz; Type de gaz; Conversion pour l'alimentation au propane :; Canalisation d'alimentation en gaz; Raccord métallique flexible pour appareil ménager :
- Page 23 – INSTRUCTIONS; Déballage de la cuisinière; Ôter les matériaux d'emballage, le ruban adhésif et le film; Retirer les grilles de four et le sachet de pièces de l'intérieur; Risque du poids excessif
- Page 24 – Installation de la bride antibasculement
- Page 25 – Raccordement à la canalisation de gaz; Raccordement typique à une canalisation rigide; Raccordement typique par raccord flexible
- Page 26 – Compléter le raccordement; Vérification de l'emplacement de la bride; Mise à niveau de la cuisinière
- Page 27 – Système d'allumage électronique; Allumage initial et réglages des flammes; Réglage de la taille des flammes
- Page 28 – Contrôle du fonctionnement du brûleur du gril; Réinstallation des grilles du four et du tiroir-; Pour remettre en place le tiroir-réchaud :
- Page 29 – Tiroir de Remisage; Achever l’installation; Si vous avez besoin d'assistance ou de service :
- Page 30 – CONVERSIONS POUR CHANGEMENT DE GAZ; Conversion de Gaz naturel à Propane; Débrancher la cuisinière ou couper le courant.; Conversion du détendeur; Identifier le détendeur à l'arrière du compartiment du tiroir de
- Page 31 – Conversion des brûleurs de la table de cuisson
- Page 32 – Pour le raccordement correct de la cuisinière à la canalisation; Voir le paragraphe “Achever l'installation” de la section; Conversion de Propane à Gaz naturel; Débrancher la cuisinière ou déconnecter la source de courant; Ôter le couvercle de plastique du capuchon du détendeur.
- Page 34 – Voir la section “Achever l'installation” dans la section
INSTALLATION INSTRUCTIONS
30" (76.2 CM) FREESTANDING GAS RANGES
INSTRUCTIONS D’INSTALLATION DES CUISINIÈRES À GAZ
AUTOPORTANTES DE 30" (76,2 CM)
RANGE SAFETY
Table of Contents/Table des matières
RANGE SAFETY..............................................................................1
INSTALLATION REQUIREMENTS ................................................3
Tools and Parts ............................................................................3
Location Requirements ................................................................3
Electrical Requirements ...............................................................5
Gas Supply Requirements ...........................................................5
INSTALLATION INSTRUCTIONS ..................................................6
Unpack Range ..............................................................................6
Install Anti-Tip Bracket .................................................................7
Make Gas Connection..................................................................8
Verify Anti-Tip Bracket Location ..................................................9
Level Range ..................................................................................9
Electronic Ignition System............................................................9
Replace Oven Racks and Warming Drawer ..............................11
Storage Drawer ..........................................................................11
Complete Installation..................................................................12
GAS CONVERSIONS ....................................................................12
LP Gas Conversion ....................................................................12
Natural Gas Conversion .............................................................14
ANTI-TIP BRACKET TEMPLATE ................................................35
SÉCURITÉ DE LA CUISINIÈRE ................................................... 18
EXIGENCES D’INSTALLATION ................................................... 19
Outillage et pièces...................................................................... 19
Emplacement d’installation........................................................ 19
Spécifications électriques .......................................................... 21
Spécifications de l’alimentation en gaz ..................................... 22
INSTRUCTIONS D'INSTALLATION ............................................ 23
Déballage de la cuisinière .......................................................... 23
Installation de la bride antibasculement .................................... 24
Raccordement à la canalisation de gaz..................................... 25
Vérification de l'emplacement de la bride antibasculement ..... 26
Mise à niveau de la cuisinière .................................................... 26
Système d'allumage électronique ............................................. 27
Réinstallation des grilles du four et du tiroir-réchaud ............... 28
Tiroir de Remisage ..................................................................... 29
Achever l’installation .................................................................. 29
CONVERSIONS POUR CHANGEMENT DE GAZ ...................... 30
Conversion de Gaz naturel à Propane....................................... 30
Conversion de Propane à Gaz naturel....................................... 32
GABARIT POUR LA BRIDE ANTIBASCULEMENT.................... 35
IMPORTANT:
Installer: Leave installation instructions with the homeowner.
Homeowner: Keep installation instructions for future reference.
IMPORTANT :
Installateur : Remettre les instructions d'installation au propriétaire.
Propriétaire : Conserver les instructions d'installation pour référence ultérieure.
W10196160E
You can be killed or seriously injured if you don't immediately
You
can be killed or seriously injured if you don't follow
All safety messages will tell you what the potential hazard is, tell you how to reduce the chance of injury, and tell you what can
happen if the instructions are not followed.
Your safety and the safety of others are very important.
We have provided many important safety messages in this manual and on your appliance. Always read and obey all safety
messages.
This is the safety alert symbol.
This symbol alerts you to potential hazards that can kill or hurt you and others.
All safety messages will follow the safety alert symbol and either the word “DANGER” or “WARNING.”
These words mean:
follow instructions.
instructions.
DANGER
WARNING
"Loading the manual" means you need to wait until the file loads and becomes available for online reading. Some manuals are very large, and the time they take to appear depends on your internet speed.
Summary
2 WARNING: If the information in this manual is not followed exactly, a fire or explosion may result causing property damage, personal injury or death. – Do not store or use gasoline or other flammable vapors and liquids in the vicinity of this or any other appliance. – WHAT TO DO IF YOU SMELL GAS: ...
3 INSTALLATION REQUIREMENTS Tools and Parts Gather the required tools and parts before starting installation. Read and follow the instructions provided with any tools listed here. Tools needed Parts supplied Check that all parts are included. ■ Anti-tip bracket must be securely mounted to subfloor. ...
5 Electrical Requirements IMPORTANT: The range must be electrically grounded in accordance with local codes and ordinances, or in the absence of local codes, with the National Electrical Code, ANSI/NFPA 70 or Canadian Electrical Code, CSA C22.1. This range is equipped with an electronic ignition sys...





