Maytag MEW9530FZ - Manual
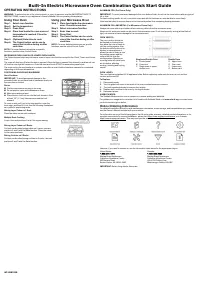
Maytag MEW9530FZ – Manual, read for free online in PDF format. We hope this helps you resolve any issues you may have. If you have further questions, please contact us through the contact form.
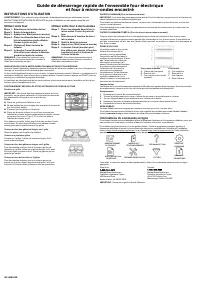

W11418533
B
Built-In Electric Microwave Oven Combination Quick Start Guide
OPERATING INSTRUCTIONS
WARNING:
To reduce the risk of fire, electric shock, or injury to persons, read the IMPORTANT SAFETY
INSTRUCTIONS, located in your appliance's Owner's Manual, before operating this appliance.
Using Your Oven
Step 1. Select oven function
Step 2. Set the temperature
Step 3. Press Start
Step 4. Place food inside the oven once set
temperature is reached. Close the
oven door.
Step 5. (Optional) Enter time to cook
Step 6. The Cancel button can be use to
cancel the function during or after
cook time.
NOTE:
For more detailed instructions on specific
functions, see the online Control Guide.
Using your Microwave Oven
Step 1. Place food inside the microwave
oven. Close the oven door.
Step 2. Select microwave function
Step 3. Enter time to cook
Step 4. Press Start
Step 5. The Cancel button can be use to
cancel the function during or after
cook time.
NOTE:
For more detailed instructions on specific
functions, see the online Control Guide.
MICROWAVE OVEN CANCEL OR LOWER OVEN CANCEL
The Cancel keypad stops any microwave oven or lower oven function except for the Clock, Timer, and Control
Lock.
The oven will also turn off when the door is opened. When the door is opened, the element(s) and fan will turn
off, but the oven light will remain on. Close the door and touch START to resume the preset cycle.
The oven cooling fan may continue to operate even after an oven function has been canceled or completed,
depending on the oven temperature.
POSITIONING RACKS AND BAKEWARE
Rack Positions
IMPORTANT:
To
avoid
permanent
damage
to
the
porcelain
finish,
do
not
place
food
or
bakeware
directly
on
the
oven
door
or
bottom.
Racks
■
Position racks before turning on the oven.
■
Do not position racks with bakeware on them.
■
Make sure racks are level.
■
Place food so it will not rise into the broil element. Allow
at least 1/2" (1.3 cm) between pans and the broil
element.
To move a rack, pull it out to the stop position, raise the
front edge, and then lift it out. Use the following illustrations
as a guide for positioning racks.
Baking Layer Cakes on 1 Rack
Place the cakes on the rack as shown.
Multiple Rack Cooking
2-rack: Use rack positions 2 and 5 for regular baking.
Baking Layer Cakes on 2 Racks
For best results when baking cakes on 2 racks, use rack
positions 2 and 5 with the Bake function. Place the cakes
on the racks as shown.
Baking Cookies on 2 Racks
For best results when baking cookies on 2 racks, use rack
positions 2 and 5 with the Bake function.
ALUMINUM FOIL (For Ovens Only)
IMPORTANT:
To avoid permanent damage to the oven bottom finish, do not line the oven bottom with any type of
foil or liner.
For best cooking results, do not cover entire oven rack with foil because air must be able to move freely.
Care must be taken to prevent aluminum foil and meat probes from contacting heating elements.
ALUMINUM FOIL AND METAL (For Microwave Ovens Only)
Always use oven mitts or pot holders when removing dishes from the microwave oven.
Aluminum foil and some metal can be used in the microwave oven. If not used properly, arcing (a blue flash of
light) can occur and cause damage to the microwave oven.
OVEN VENT(S)
The oven vent(s) should not
be blocked or covered since
they allow the inlet of fresh air
into the cooling system. Also,
the bottom vent should not be
blocked or covered since it
allows the inlet of fresh air into
the cooling system and the
outlet of hot air from the
cooling system. Blocking or
covering vents will cause poor
air circulation, affecting
cooking, cleaning and cooling
results.
Single and Double Oven
A. Control panel
B. Oven vent
C. Single oven or upper
double oven
Double Oven
D. Upper oven
E. Oven vent
F.
Lower oven
G. Bottom vent
OVEN LIGHTS
The oven lights are standard 40 W appliance bulbs. Before replacing, make sure the oven is cool and the
controls are turned Off.
To Replace:
1.
Disconnect power.
2.
Turn the glass bulb cover in the back of the oven counterclockwise to remove.
3.
Turn bulb counterclockwise to remove from socket.
4.
Replace bulb, and then bulb cover by turning clockwise.
5.
Reconnect power.
SABBATH
MODE:
The
Sabbath
Mode
sets
the
oven
to
remain
on
in
a
bake
setting
until
disabled.
For
guidance
on
usage
and
a
complete
list
of
models
with
Sabbath
Mode,
visit
www.star-k.org
or
contact
us
as
per
the
information
given
below.
Online
Ordering
Information
For
detailed
installation
instruction
and
maintenance
information,
winter
storage,
and
transportation
tips,
please
see
the
Owner’s
Manual
included
with
your
machine.
For
information
on
any
of
the
following
items,
the
full
cycle
guide,
warranty,
detailed
product
dimensions,
or
for
complete
instructions
for
use
and
installation,
please
visit
https://www.maytag.com/owners,
or
in
Canada
https://www.maytag.ca/owners.
This
may
save
you
the
cost
of
a
service
call.
However, if you need to contact us, use the information listed below for the appropriate region.
Canada:
1–800–688–2002
Maytag
Brand
Appliances
Customer
eXperience
Centre
200–6750
Century
Ave.
Mississauga,
Ontario
L5N
0B7
United
States:
1–800–344–1274
Maytag
Brand
Appliances
Customer
eXperience
Center
553
Benson
Road
Benton
Harbor,
MI
49022–2692
IMPORTANT:
Retain
this
guide
for
future
use.
"Loading the manual" means you need to wait until the file loads and becomes available for online reading. Some manuals are very large, and the time they take to appear depends on your internet speed.
Was this manual helpful?
About this manual
- Brand
- Maytag
- Model
- MEW9530FZ
- Document type
- Manual
- Language(s)
- English, Spanish, French
- Pages
- 3
- File size
- 1 MB
- Format
Ask a question
Related manuals
Popular Maytag Other



More Maytag Other models
 Maytag MER8800FZ2 User Manual
 Maytag MEW5530DDB Installation Manual
- Maytag MEW5627DDB Installation Manual
 Maytag MEW6527 Manual
 Maytag MEW6530DDS User Manual
- Maytag MEW6630DDW User Manual
 Maytag MFC2061HEB User Manual
- Maytag MFC2061KES Manual
 Maytag MFD2560HES User Manual
 Maytag MFD2561HES User Manual
 Maytag MFD2562VEM1 User Manual
 Maytag MFES6030RW Manual