Page 2 - Contents; ment; Appliance range of use; or a normal household setting. Only drinks such; Appliance at a glance
Contents 1 Appliance at a glance............................................ 2 1.1 Description of appliance and equipment.................. 2 1.2 Appliance range of use............................................. 2 1.3 Conformity................................................................ 3 1.4...
Page 3 - ance
freezer compartment. This includes, for example, using - in staff kitchens, bed and breakfast establish- ments, - by guests in country houses, hotels, motels and other accommodation, - for catering and similar services in the whole- sale trade. All other types of use are not permitted.Foreseeable mi...
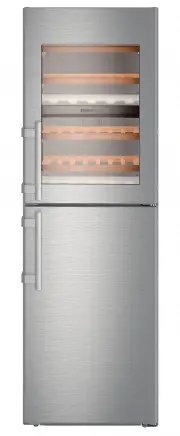
Page 4 - Example of food arrangement; Danger of tipping and falling:; General safety information
1.7 Example of food arrangement Fig. 3 1.8 Smart device The appliance is ready for integration into a smart home and for extended services. Other options can be selected with a SmartDeviceBox. This is acti- vated via the MyLiebherr customer portal. You will find more information about availability a...
Page 5 - Operating structure; Controls and displays
- Danger of tipping if the door is open if the appliance has not yet been installed properly. Danger of food poisoning: - Do not consume food which has been stored too long. Danger of frostbite, numbness and pain: - Avoid lasting skin contact with cold surfaces or refrigerated/frozen food or take pr...
Page 6 - Appliance options; Transporting the appliance; Putting into operation
The menu field gives access to the appliance options and settings. Selected options are also displayed. 3.3 Navigation Touch the menu to access the individual options. An audible signal sounds after confirming an option or a setting. The display switches to the home screen.The appliance is operated ...
Page 7 - Installing the appliance; Reversing the door
WARNING Risk of injury due to broken glass! In case of transport at an altitude of over 1500 m the glass panes of the door may break. The fragments have sharp edges and may cause serious injury. u Take appropriate protective action. 4.2 Installing the appliance WARNING Fire hazard due to dampness! I...
Page 8 - Remove the upper soft stop mechanism
q Torx® 15 (T15) q Slotted screwdriver q Open-ended wrench SW10 q Spirit level q Open-ended wrench supplied with the T25 tool q If necessary, a cordless screwdriver q Get a stepladder if necessary q If necessary, a second person for assembly NOTICE Risk of condensation damage for Side-by-Side applia...
Page 9 - Remove the bottom soft stop mechanism
Fig. 11 u Undo the soft stop mechanism screw with a T15 screwdriver approx. 14 mm. Fig. 11 (1) u Insert a screwdriver behind the soft stop mechanism on the handle side and rotate forwards. Fig. 11 (2) u Remove the soft stop mechanism. Fig. 11 (3) 4.3.2 Remove the bottom soft stop mechanism Fig. 12 u...
Page 11 - Moving the upper bearing parts to the
CAUTION Risk of injury if the door tips! u Take good hold of the door. u Set down the door carefully. u Carefully remove the protective cover. Fig. 20 (1) u Undo the bolt a little with a T15 screwdriver. Fig. 20 (2) u Hold the door and remove the bolts with your fingers. Fig. 20 (3) u Lift the door ...
Page 13 - 0 Moving the handles to the other side
u Undo the screws with a T25 screwdriver and remove the bearing bracket Fig. 29 (3) Fig. 30 u Remove the cover and fix it on the other side. Fig. 30 (1) u Place the bearing bracket on the other side and screw in with the aid of a T25 screwdriver. Start with screw 2 at the bottom in the middle. Fig. ...
Page 15 - 5 Fit the bottom soft stop mechanism
u Insert the holder with its cable into the opening. Fig. 35 (5) u Press the holder downwards until the tab clicks into place. Fig. 35 (6) u Insert the plugs. Fig. 35 (7) 4.3.13 Fitting the cable connection Fig. 36 u Engage the plug above the upper bearing bracket and care- fully place the cable str...
Page 16 - Water connection
4.3.16 Fit the top soft stop mechanism Fig. 40 u Slide the soft stop mechanism on the bearing bracket side at an angle into the slot as far as the limit stop. Fig. 40 (1) u Slide the unit in fully. w The unit is positioned correctly when the rib on the soft stop mechanism is in the guide in the hous...
Page 17 - Insertion into a row of kitchen units
- Water must be supplied to the appliance through a cold water pipe that complies with hygiene standards and can withstand the operating pressure. Use the stainless steel hose supplied (Length 1.5 m) Do not reuse old hoses. A 3 m hose is available as an optional extra. This must be professionally in...
Page 18 - Disposing of packaging; Connecting the appliance; Switching on the appliance
- Spacer ribs on the back of the appliance provide sufficient air ventilation. In the final appliance position, these must not be placed in recesses or cut-outs. - There must be a ventilation shaft with the depth Fig. 45 (D) at the back of the top cupboard over the entire width of the cupboard. - Th...
Page 19 - Setting the clean ventilation grid; Changing the temperature unit; Switching on the child safety device; Control
u Remove cover. Fig. 47 u FreshAir-Insert the filter in the cover and turn it clockwise. u Ensure that the filter clicks into place. u Replace the cover again. Setting the timer u Press menu. u Press the navigation arrows until the FreshAir filter is displayed. u Press the FreshAir filter symbol. u ...
Page 20 - Freezer compartment
5.4 Freezer compartment You can store frozen food, make ice cubes and freeze fresh food in the freezer compartment. 5.4.1 Freezing food The rating plate indicates the maximum quantity of fresh food you can freeze within 24 hours (see 1) under “Freezing capacity ... kg/24h”.Each drawer can hold a max...
Page 22 - Setting the temperature of the wine
NOTICE Blocked IceMaker and water outlet. Risk of damage to the IceMaker and the drawer outlet. u Put containers with a maximum height of 12 cm in the drawer under the IceMaker. Ensure that the IceMaker drawer is empty. u Put containers with a max. height of 12 cm in the drawer under the IceMaker. u...
Page 23 - Maintenance
The plus symbol is greyed out if it is pressed again after selecting the hottest temperature. The standby symbol is displayed on the screen. u Confirm the required temperature with OK. w The display switches to the home screen. w The selected temperature is displayed. w Up or down arrows indicate th...
Page 25 - Cleaning the IceMaker; Customer service; Malfunctions
u Only use a damp cloth to clean the telescopic rails. The grease in the runners is for lubrication purposes and must not be removed. After cleaning: u Wipe dry the appliance and items of equipment. u Connect the appliance and switch it on again. u Switch on SuperFrost (see 5.4.5) . When the tempera...
Page 26 - Messages
A quiet clicking noise. → The noise is produced whenever the refrigeration unit (motor) automatically switches on or off. u The sound is normal. A hum. It is briefly a little louder when the refrigeration unit (the motor) switches on. → The refrigeration increases automatically when the SuperFrost, ...
Page 27 - Switching the appliance off; Switch off the appliance from the menu; Decommissioning
Note Details on the message can be displayed again via the menu field. u Press menu. u Press the message symbol. u The display switches to the next message when you press one. After the last active message the display switches to the home screen. Door alarm An audible warning sounds if the door is o...
Page 28 - Taking the appliance out of service; 0 Disposing of the appliance; Disposing of the appliance
u Press menu. u Press the navigation arrows until the standby symbol is displayed. u Press OK. w The standby symbol flashes on the whole screen. The whole appliance is switched off. w After 10 minutes the standby symbol goes out. 9.1.2 Switch the wine cooler off You can switch off the wine cooler se...