Page 2 - TABLE OF CONTENTS
2 TABLE OF CONTENTS 3 PRODUCT FEATURES 4 IMPORTANT SAFETY INSTRUCTIONS 4 Safety Instructions for Installation 5 Safety Instructions for Connecting Electricity 6 Basic Safety Precautions 7 Grounding Instructions 8 PRODUCT OVERVIEW 8 Parts 9 Accessories 10 The Moving Hanger 10 The Pants Crease Care 11...
Page 3 - ENGLISH; PRODUCT FEATURES
3 PRODUCT FEATURES ENGLISH PRODUCT FEATURES REMOVE ODORS Use the Styler's Refresh cycle to quickly and easily remove odors from clothes. REFRESH CLOTHING OR ADD AN AROMA Infuse items with the aroma from your favorite dryer fabric softener sheets to keep clothes and accessories looking, feeling, and ...
Page 4 - IMPORTANT SAFETY INSTRUCTIONS; READ ALL INSTRUCTIONS BEFORE USING THE APPLIANCE.; WARNING; SAFETY INSTRUCTIONS FOR INSTALLATION
4 IMPORTANT SAFETY INSTRUCTIONS IMPORTANT SAFETY INSTRUCTIONS READ ALL INSTRUCTIONS BEFORE USING THE APPLIANCE. There are many important safety messages in this manual and on your appliance. Always read and obey all safety messages. WARNING To reduce the risk of fire or explosion, electric shock, pr...
Page 6 - USE
6 IMPORTANT SAFETY INSTRUCTIONS IMPORTANT SAFETY INSTRUCTIONS READ ALL INSTRUCTIONS BEFORE USING THE APPLIANCE. WARNING To reduce the risk of fire or explosion, electric shock, property damage, injury to persons or death when using this appliance, follow basic safety precautions, including the follo...
Page 7 - MAINTENANCE AND DISPOSAL; GROUNDING INSTRUCTIONS
7 IMPORTANT SAFETY INSTRUCTIONS ENGLISH WARNING To reduce the risk of fire or explosion, electric shock, property damage, injury to persons or death when using this appliance, follow basic safety precautions, including the following: • Do not open door during operation. The performance of the produc...
Page 8 - PRODUCT OVERVIEW; PARTS
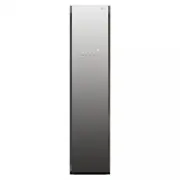
8 PRODUCT OVERVIEW PRODUCT OVERVIEW PARTS moving hanger interior light interior light shelf holder hot air circulation vent water drain tank water supply tank hooks for Pants Crease Care door* clip steam nozzle * The door swing can be reversed by the installer to fit the installation location. Pants...
Page 9 - ACCESSORIES; Included Accessories
9 PRODUCT OVERVIEW ENGLISH ACCESSORIES Included Accessories NOTE y Contact the store where the product was purchased or LG customer service at 1-800-243-0000 (1-888-542-2623 in Canada) if any accessories are damaged or missing. Accessories can be purchased separately online at http://www.lg.com/us y...
Page 10 - THE MOVING HANGER; CAUTION
10 PRODUCT OVERVIEW THE MOVING HANGER Hang clothes on the moving hanger using the hangers provided with the Styler, or use any plastic or metal hanger that hooks snugly into the indentations in the moving hanger. • Use the moving hanger for suits, coats, jackets, blouses, dresses, skirts, and pants ...
Page 11 - THE SHELF; CHOOSING STYLER FEATURES; item; • Do not use the shelf to store heavy items.
11 PRODUCT OVERVIEW ENGLISH THE SHELF Use the shelf when styling clothes or other items that are difficult to hang or that may be damaged by hang drying. • Use the shelf for stuffed toys, pillows, hats, and other accessories. • Use the shelf for sweaters, knits, lingerie, or delicate blouses that ca...
Page 12 - INSTALLATION; INSTALLATION OVERVIEW
12 INSTALLATION INSTALLATION INSTALLATION OVERVIEW Please read the following installation instructions first after purchasing this product or transporting it to another location. PRODUCT SPECIFICATIONS The appearance and specifications listed in this manual may vary due to constant product improveme...
Page 13 - UNPACKING THE STYLER; CHOOSING THE PROPER LOCATION; Electricity; Floor; Ambient temperature
13 INSTALLATION ENGLISH UNPACKING THE STYLER • Remove tape and any temporary labels from the Styler before using. Do not remove any warning labels, the model and serial number label, or the Tech Sheet that is located under the front of the Styler. • To remove any remaining tape or glue, rub the area...
Page 14 - INSTALLATION LOCATION REQUIREMENTS; Clearances; • Do not install the Styler on a hollow or flexible platform
14 INSTALLATION INSTALLATION LOCATION REQUIREMENTS WARNING Read all installation instructions completely before installing and operating the Styler. It is important to review this entire manual before installing and using the Styler. Clearances CAUTION • The floor must be level, with a maximum slope...
Page 15 - Installation Spacing for Recessed Area or Closet Installation; Recommended Installation Spacing
15 INSTALLATION ENGLISH For closet installation, with a door, minimum ventilation openings in the top and bottom of the door are required. Louvered doors with equivalent ventilation openings are acceptable. Closet Ventilation Requirements Closets with doors must have both an upper and lower vent t...
Page 16 - LEVELING THE STYLER; Position the Styler in the final location.; NOTE; locking
16 INSTALLATION LEVELING THE STYLER y The appliance is heavy. Two or more people are required when installing the Styler. Failure to follow this warning can cause serious injury or death. y To ensure that the Styler provides optimal performance, it must be level. To minimize vibration, noise, and un...
Page 17 - REVERSING THE DOOR; INSTALLING ON CARPETING; Leveling the Styler; USING NON-SKID PADS; Clean the floor to attach the non-skid; Take care when handling the carpet spikes.
17 INSTALLATION ENGLISH REVERSING THE DOOR It is possible to reverse the direction of the doorswing. This should be done by the installer at thetime of installation, if desired. WARNING Do not attempt to reverse the door swing yourself. If the direction of the door swing needs to be changed after in...
Page 18 - INSTALLING THE ANTI-TIP; INSTALLING CAP COVERS
18 INSTALLATION 3 Place the adhesive side of the non-skid pad on the fl oor. 4 Recheck the Styler's levelness. Push or rock the edges of the appliance gently to make sure that the Styler does not rock. If the Styler rocks, level the appliance again. • The pads may leave a sticky residue when they ar...
Page 19 - OPERATION; BEFORE USE; Connect the power supply.; Wash dirty clothes if necessary before putting them in the Styler.; Assemble the drip tray.
19 OPERATION ENGLISH OPERATION BEFORE USE Clean the Styler. Clean the Styler thoroughly and wipe off all dust that accumulated during shipping. See Maintenance , page 40. Do not plug in or operate the appliance until the interior and exterior have thoroughly dried. Connect the power supply. Check if...
Page 20 - USING THE STYLER
20 OPERATION USING THE STYLER 1 PREPARE ITEMS • Wash clothes first, if needed. • No heat-sensitive items or items that can be damaged by exposure to water. See Choosing Styler-Safe Clothing , page 21. • Place items on hangers or the shelf. • Fasten buttons and close zippers to keep items on moving h...
Page 21 - SORTING LOADS; fabric care labels that can be used with the; Fabric Care Labels; Grouping Similar Items; category non-Stylable items
21 OPERATION ENGLISH SORTING LOADS Fabric Care Labels Most articles of clothing feature fabric care labels that include instructions for proper care. Below are some of the symbols that are relevant to choosing appropriate items for the Styler. fabric care labels that can be used with the category la...
Page 22 - FABRIC CARE GUIDE
22 OPERATION FABRIC CARE GUIDE fabric clothes Refresh cycle Sanitary cycle Gentle Dry cycle comments reducing wrinkles removing odors nat ur al fibers veg etable fibers cotton towels, socks, underwear, jeans, sportswear, t-shirts, blankets Wrinkles may remain in 100% cotton fabrics. Iron after...
Page 24 - CHECKING THE FILTERS; Checking the Lint Filter; • Check that the sides are aligned; Changing the Aroma Sheet
24 OPERATION CHECKING THE FILTERS BEFORE EVERY LOAD Checking the Lint Filter Always make sure the lint filter is clean before starting a new load; a clogged lint filter will increase drying times. 1 Open the front grill and take out the lint filter. 2 Brush the filter with a soft brush or clean it w...
Page 25 - CHECKING THE WATER TANKS; Pull the handle of each tank forward to; Make sure the water supply tank is filled; Make sure the water drain tank is empty.; LOADING THE STYLER; accessory
25 OPERATION ENGLISH CHECKING THE WATER TANKS Check the water in the water tanks before use. The water supply tank must be filled with water before using the Styler. The Styler does not work without water. The water drain tank should be emptied before each use. 1 Pull the handle of each tank forward...
Page 26 - Hangers; Using the Moving Hanger
26 OPERATION Hangers The hangers that come with the Styler are for use with the Styler only. Any plastic or metal hanger that has a hook less than 5/32 in. (4 mm) thick and hooks snugly into the indentations in the moving hanger can be used in the Styler.• Do not use hangers with wool, knitwear, or ...
Page 27 - Opening and Closing the Pants Hanger; Hanging Pants On the Pants Hanger
27 OPERATION ENGLISH Opening and Closing the Pants Hanger 1 To open, fold the hook down toward the hanger blades to unlock and separate the blades. hook hanger blades crochet lames du cintre 2 Once pants are inserted, bring the blades together and rotate the hook up and away from the blades to lock ...
Page 28 - Shelf; • The shelf cannot be assembled by
28 OPERATION Shelf Use the shelf for clothes and items that cannot be placed on hangers. Do not stack items on the shelf. For best drying performance, use the shelf for a single item or smaller items with space between. Assembling the Shelf 1 Hold the shelf so that the gray trim is toward the front....
Page 29 - CONTROL PANEL; Control Panel Features; CYCLE COMPLETION INDICATOR; TIME DISPLAY
29 OPERATION ENGLISH CONTROL PANEL The control panel responds to touch using static electricity. A light touch is enough to operate it. Use a cloth when cleaning the controls to avoid contacting and activating the keys. Foreign substances on the control, wearing gloves, or touching the keys through ...
Page 31 - CYCLE GUIDE; Downloaded; Cycle Processes; • Preparing; • Steaming; • Sanitizing; • Drying
31 OPERATION ENGLISH CYCLE GUIDE Cycle Processes Cycle Setting Clothing / Fabric Type Est. time in Hr.: Min. Prepare Steam Sanitize Dry REFRESH C YCLE Normal suit, coat, school uniform, scarf, washable wool and knitwear, knitwear, outdoor/performance clothing, towels, underwear, t-shirts, socks, jea...
Page 32 - CHOOSING A CYCLE; Refresh Cycle; Time Dry; Downloadable Cycles
32 OPERATION CHOOSING A CYCLE Styler cycles are designed to fit a variety of situations. Select the cycle and setting that best match the load contents and desired results for maximum performance and fabric care. For best results, pay attention to garment care labels and choose a cycle that is appro...
Page 33 - CYCLE SETTINGS AND OPTIONS; Cycle Selector Icons; Selecting a Cycle; until the desired cycle and setting is; Changing Settings During a Cycle; to select the Downloaded cycle.
33 OPERATION ENGLISH CYCLE SETTINGS AND OPTIONS Cycle Selector Icons To change the settings during the cycle, touch Start/Pause to pause the cycle, then touch the relevant cycle selector icon to change settings. • Touch the Start/Pause button to activate the control panel. The cycle selected and the...
Page 34 - EXTRA FUNCTIONS; Locking the Controls; Touch and hold the Special Care icon for; Setting a Delayed Start Time; Touch Delay Start to set the start time of; • Do not open the door during operation.; Smart DiagnosisTM
34 OPERATION 34 EXTRA FUNCTIONS Some buttons also activate special functions, including Remote Start, Control Lock, Night Care, Smart Diagnosis, Delay Start, and Wi-Fi. See Smart Functions, page 36, for information on using Remote Start and Wi-Fi. Locking the Controls Use Control Lock to prevent unw...
Page 35 - Setting the Night Care Function
35 OPERATION ENGLISH Night Care Use the Night Care function to store items overnight or anytime items can't be removed soon after a cycle ends. Night Care periodically produces warm air to prevent condensation, keeping items warm and dry until they are removed. • Once set, the Night Care function st...
Page 36 - SMART FUNCTIONS; LG ThinQ Application; Before Using LG ThinQ; Installing the LG ThinQ
36 SMART FUNCTIONS SMART FUNCTIONS LG ThinQ Application The LG ThinQ application allows you to communicate with the appliance using a smartphone. Before Using LG ThinQ 1 Use a smartphone to check the strength of the wire- less router (Wi-Fi network) near the appliance. • If the distance between the ...
Page 38 - Open Source Software Notice Information; FCC Notice (For transmitter
38 SMART FUNCTIONS Open Source Software Notice Information To obtain the source code under GPL, LGPL, MPL, and other open source licenses, that is contained in this product, please visit http://opensource.lge.com. In addition to the source code, all referred license terms, warranty disclaimers and c...
Page 39 - Industry Canada Statement; including interference that may cause; IC Radiation Exposure Statement; SMART DIAGNOSISTM; LG ThinQ
39 SMART FUNCTIONS ENGLISH Industry Canada Statement (For transmitter module contained in this product This device complies with Industry Canada’s applicable licence-exempt RSSs. Operation is subject to the following two conditions: 1 This device may not cause interference; and2 This device must acc...
Page 40 - MAINTENANCE; REGULAR CLEANING; Cleaning the Interior and Exterior; • Do not spray water directly on the; Cleaning the Lint Filter; Cleaning the Aroma Filter
40 MAINTENANCE MAINTENANCE REGULAR CLEANING WARNING To reduce the risk of fire, electric shock, or injury to persons when using this appliance, follow basic precautions, including the following: y Unplug the Styler before cleaning to avoid the risk of electric shock. Failure to follow this warning c...
Page 42 - TROUBLESHOOTING; FAQS: FREQUENTLY ASKED QUESTIONS; What are aroma sheets and how do I use them?; Can I install the Styler on carpeting?
42 TROUBLESHOOTING TROUBLESHOOTING FAQS: FREQUENTLY ASKED QUESTIONS Q: What are aroma sheets and how do I use them? A: You can use your favorite brand of dryer fabric softener sheets in the aroma filter to infuse items with a refreshing aroma. The sheets will not soften garments or reduce static. To...
Page 43 - BEFORE CALLING FOR SERVICE; Operation; Problem
43 TROUBLESHOOTING ENGLISH BEFORE CALLING FOR SERVICE Your appliance is equipped with an automatic error-monitoring system to detect and diagnose problems at an early stage. If your appliance does not function properly or does not function at all, check the following before you call for service. Ope...
Page 45 - Performance
45 TROUBLESHOOTING ENGLISH Performance Problem Possible Cause Solutions Wrinkles at back of neck after cycle Item too large for hanger or fabric too delicate Use the right size hanger for the item so the fabric won't bunch up and cause wrinkles. Some fabrics are delicate and will bunch around the ha...
Page 51 - FRANÇAIS; Veuillez lire attentivement ce manuel d’instruction avant; MANUEL DU PROPRIÉTAIRE; STYLER
FRANÇAIS Veuillez lire attentivement ce manuel d’instruction avant d’utiliser l’appareil et gardez-le à portée de main pour référence à tout moment. MANUEL DU PROPRIÉTAIRE STYLER Copyright © 2017-2020 LG Electronics Inc. Tous droits réservés. S3*F** www.lg.com
Page 52 - TABLE DES MATIÈRES
2 TABLE DES MATIÈRES 3 CARACTÉRISTIQUES DU PRODUIT 4 CONSIGNES DE SÉCURITÉ IMPORTANTES 4 Consignes de sécurité pour linstallation 5 Consignes de sécurité pour le raccordement à lélectricité 6 Consignes de sécurité de base 7 Instructions de mise à la terre 8 PRÉSENTATION DE L’APPAREIL 8 Pièces 9 Ac...
Page 53 - CARACTÉRISTIQUES DU PRODUIT
3 CARACTÉRISTIQUES DU PRODUIT FRANÇAIS CARACTÉRISTIQUES DU PRODUIT ÉLIMINER LES ODEURS Utilisez le cycle de rafraîchissement du Styler pour éliminer rapidement et facilement les odeurs des vêtements. RAFRAÎCHIR LES VÊTEMENTS ET AJOUTER UN ARÔME Imprégnez les articles de larôme de vos feuilles dass...
Page 54 - AVERTISSEMENT; ATTENTION; CONSIGNES DE SÉCURITÉ POUR L; CONSIGNES DE SÉCURITÉ IMPORTANTES
4 CONSIGNES DE SÉCURITÉ IMPORTANTES VEUILLEZ LIRE TOUTES LES INSTRUCTIONS AVANT D’UTILISER L’APPAREIL. De nombreux messages de sécurité importants figurent dans ce manuel et sur votre appareil. Toujours lire et respecter tous les messages de sécurité. AVERTISSEMENT Pour réduire les risques d’incendi...
Page 55 - minimiser les risques d; CONSIGNES DE SÉCURITÉ POUR L’INSTALLATION
5 CONSIGNES DE SÉCURITÉ IMPORTANTES FRANÇAIS AVERTISSEMENT Pour votre sécurité, les informations contenues dans le présent manuel doivent être suivies pour minimiser les risques d incendie, d explosion ou d électrocution ou pour prévenir les dégâts matériels, les blessures corporelles ou la mo...
Page 56 - Pour réduire les risques d; UTILISATION; VEUILLEZ LIRE TOUTES LES INSTRUCTIONS AVANT D’UTILISER
6 CONSIGNES DE SÉCURITÉ IMPORTANTES AVERTISSEMENT Pour réduire les risques d incendie ou d explosion, d électrocution, de dommages matériels, de blessures corporelles ou de décès lors de l’utilisation de cet appareil, veuillez suivre les consignes de sécurité de base, y compris ce qui suit : C...
Page 57 - INSTRUCTIONS DE MISE À LA TERRE; ENTRETIEN ET ÉLIMINATION
7 CONSIGNES DE SÉCURITÉ IMPORTANTES FRANÇAIS AVERTISSEMENT Pour réduire les risques d incendie ou d’explosion, d électrocution, de dommages matériels, de blessures corporelles ou de décès lors de l utilisation de cet appareil, veuillez suivre les consignes de sécurité de base, y compris ce qui...
Page 58 - PIÈCES; PRÉSENTATION DE L’APPAREIL
8 PRÉSENTATION DE L’APPAREIL cintre mobile lumière intérieure lumière intérieure support d ’ étagère évent pour circulation d ’ air chaud réservoir d ’ évacuation de l'eau réservoir d ’ alimentation en eau crochets pour soin des plis de pantalon porte * buse de vapeur * Le sens d ’ ouverture de la p...
Page 59 - ACCESSOIRES; Accessoires inclus
9 PRÉSENTATION DE L’APPAREIL FRANÇAIS ACCESSOIRES Accessoires inclus REMARQUE y Contactez le magasin où lappareil a été acheté ou le service à la clientèle de LG au 1-800-243-0000 (1-888-542-2623 au Canada) en cas daccessoires endommagés ou manquants. Les accessoires peuvent être achetés séparémen...
Page 60 - CINTRE MOBILE
10 PRÉSENTATION DE L’APPAREIL CINTRE MOBILE Accrochez les vêtements sur le cintre mobile en utilisant les cintres fournis avec le Styler ou utilisez tout cintre en plastique ou métallique pouvant sinsérer parfaitement dans les indentations du cintre mobile. • Utilisez le cintre mobile pour les cost...
Page 61 - ÉTAGÈRE; CHOIX DES OPTIONS DU STYLER; article
11 PRÉSENTATION DE L’APPAREIL FRANÇAIS ÉTAGÈRE Utilisez létagère pour les accessoires ou autres articles difficiles à accrocher ou pour les articles qui risquent d’être endommagés si on les suspend pour sécher. • Utilisez létagère pour les jouets en peluche, les oreillers, les chapeaux et autres a...
Page 62 - APERÇU DE L
12 INSTALLATION Séchoir à linge à vapeur S3*F** Description Machine électrique pour lentretien des vêtements Exigences électriques Veuillez vous référer à la plaque signalétique pour les informations détaillées Dimensions 17 1/2 po (L) X 2 3 po (P) X 72 13 / 16 po (H), 39 ¾ po (P avec la por te ouv...
Page 63 - DÉBALLAGE DU STYLER; CHOIX DE L’EMPLACEMENT APPROPRIÉ; Électricité; Plancher; Température ambiante
13 INSTALLATION FRANÇAIS DÉBALLAGE DU STYLER • Retirez le ruban et toute étiquette temporaire du Styler avant de l’utiliser. N’enlevez pas les étiquettes dalerte, de modèle et de numéro de série ni la fiche technique située sur la partie inférieure avant du Styler. • Pour supprimer toute bande rest...
Page 64 - EXIGENCES RELATIVES À L; Espaces de dégagement; • N’installez pas le Styler sur une plate-forme creuse ou flexible; installez pas ou n
14 INSTALLATION EXIGENCES RELATIVES À L EMPLACEMENT D INSTALLATION AVERTISSEMENT Lisez entièrement les instructions dinstallation avant dinstaller et de mettre le Styler en marche. Il est important de parcourir intégralement ce manuel avant dinstaller et dutiliser le Styler. Espaces de dégag...
Page 65 - Espacement recommandé pour l’installation
15 INSTALLATION FRANÇAIS • Pour installation dans une garde-robe avec porte, les ouvertures minimales au-dessus et en dessous de la porte sont nécessaires. Les portes à claire dotées des ouvertures de ventilation équivalentes sont acceptables. Exigences de ventilation de la garde-robe Les garde-robe...
Page 66 - NIVELAGE DU STYLER; Installation sur du; REMARQUE; Réglez les pieds de nivellement de
16 INSTALLATION NIVELAGE DU STYLER y L’appareil est lourd. Il pourrait nécessiter deux personnes pour son déplacement. Le non-respect de cet avertissement pourrait causer des blessures graves ou la mort. y Pour sassurer que le Styler offre une performance optimale il doit être posé à niveau. Pour m...
Page 67 - INVERSION DU SENS; UTILISATION DES TAMPONS
17 INSTALLATION FRANÇAIS INVERSION DU SENS D’OUVERTURE DE LA PORTE Il est possible dinverser le sens douverture de la porte. Cela devrait être fait lors de l’installation par le personnel compétent, si nécessaire. INSTALLATION SUR DU TAPIS Si vous installez le Styler sur du tapis, suivez ces instr...
Page 69 - FONCTIONNEMENT; AVANT L; Branchez l; Assemblez le bac d
19 FONCTIONNEMENT FRANÇAIS FONCTIONNEMENT AVANT L UTILISATION Nettoyez le Styler. Nettoyez soigneusement le Styler et essuyez toute la poussière qui sest accumulée au cours de lexpédition. Consultez la section Entretien , en page 40 . Ne branchez pas ou ne faites pas fonctionner lappareil jusqu...
Page 70 - UTILISATION DU STYLER
20 FONCTIONNEMENT 1 PRÉPAREZ LES ARTICLES • Lavez dabord les vêtements, si nécessaire. • Aucun article sensible à la chaleur ni article pouvant être endommagé par l’exposition à leau. Consultez la section Choix de vêtements convenant au Styler , en page 21 . • Placez les articles sur les cintres o...
Page 71 - SÉLECTION DES; étiquettes d; catégorie
21 FONCTIONNEMENT FRANÇAIS SÉLECTION DES CHARGEMENTS Étiquettes d entretien des tissus La plupart des vêtements comportent des étiquettes d’entretien comprenant des instructions sur les soins à apporter aux tissus. Voici quelques-uns des symboles qui sont pertinents lors du choix des articles conv...
Page 72 - GUIDE D’ENTRETIEN DES TISSUS
22 FONCTIONNEMENT GUIDE D’ENTRETIEN DES TISSUS = oui § = lire l’étiquette tissu vêtements cycle de rafraîchissement cycle sanitaire cycle de séchage doux commentaires diminuer le froissement suppression des odeurs fibr es nat ur elles fibr es végétales coton serviettes, chaussettes, sous-vêtements...
Page 74 - VÉRIFICATION DES FILTRES; Vérification du filtre à charpie; • Assurez-vous que les côtés sont; Remplacement de la feuille; Conseil
24 FONCTIONNEMENT VÉRIFICATION DES FILTRES AVANT CHAQUE CHARGEMENT Vérification du filtre à charpie Assurez-vous toujours que le filtre à charpie est propre avant de commencer un nouveau cycle; un filtre à charpie bouché augmentera le temps de séchage. 1 Ouvrez la grille avant et sortez le filtre à ...
Page 75 - VÉRIFICATION DES; CHARGEMENT DU STYLER; essence ou à; accessoires
25 FONCTIONNEMENT FRANÇAIS VÉRIFICATION DES RÉSERVOIRS D EAU Vérifiez le niveau deau des réservoirs avant lutilisation. Le réservoir d’alimentation en eau doit être rempli deau avant dutiliser le Styler. Le Styler ne fonctionne pas sans eau. Le réservoir dévacuation de leau doit être vidé av...
Page 76 - Cintres; Utilisation du cintre mobile
26 FONCTIONNEMENT Cintres Les cintres qui accompagnent le Styler sont à utiliser avec le Styler seulement. Tout cintre en plastique ou en métal disposant dun crochet de moins de 5/32 po (4 mm) dépaisseur pouvant sinsérer à lintérieur des indentations du cintre mobile peut être utilisé dans le St...
Page 77 - Ouverture et fermeture du cintre pour
27 FONCTIONNEMENT FRANÇAIS Ouverture et fermeture du cintre pour pantalons 1 Pour ouvrir, pliez le crochet vers le bas, vers les lames de suspension, pour déverrouiller et séparer les lames. crochet lames du cintre crochet lames du cintre 2 Une fois le pantalon inséré, rassemblez les lames et faites...
Page 78 - Étagère; Assemblage de l’étagère
28 FONCTIONNEMENT Étagère Utilisez létagère pour les vêtements et les articles qui ne peuvent être placés sur des cintres. Ne posez aucun objet sur létagère. Pour de meilleurs résultats durant le cycle de séchage, ne placez quun seul article sur létagère ou encore deux articles de petite taille,...
Page 79 - PANNEAU DE CONTRÔLE; Fonctionnalités du panneau de contrôle
29 FONCTIONNEMENT FRANÇAIS PANNEAU DE CONTRÔLE Le panneau de contrôle répond au toucher en utilisant l’électricité statique. Il suffit de leffleurer pour le faire fonctionner. Utilisez un chiffon lors du nettoyage des touches de commande pour éviter de toucher et dactiver les touches. Les touches ...
Page 80 - Diagnosis
30 FONCTIONNEMENT SPECIAL CARE/*CONTROL LOCK (ENTRETIEN PARTICULIER/*VERROUILLAGE DES COMMANDES) Appuyez sur licône pour sélectionner un cycle dentretien particulier. Appuyez plusieurs fois sur cette touche pour basculer entre les paramètres.Le cycle téléchargé par défaut est le cycle Prêt à le...
Page 81 - GUIDE DES CYCLES; Étapes du cycle; • Préparation; • Étuvage; • Désinfection; • Séchage
31 FONCTIONNEMENT FRANÇAIS GUIDE DES CYCLES Étapes du cycle Cycle Réglage Type de vêtement/tissu Temps estimé en h:min Prépar- ation Étuvage Désin- fection Sé chage CY CLE DE RAFRAÎCHIS SEMENT Normal Tailleurs, manteaux, uniformes scolaires, foulards, laine, tricot, vêtements d extérieur/costumes,...
Page 82 - CHOIX DU CYCLE; Cycle de rafraîchissement; Temps de séchage; Téléchargement; Cycles téléchargeables
32 FONCTIONNEMENT CHOIX DU CYCLE Les cycles du Styler sont conçus pour sadapter à un éventail de situations. Choisissez le cycle et le réglage qui correspondent le mieux au contenu du chargement et aux résultats attendus pour une performance optimale et un meilleur entretien des vêtements. Pour obt...
Page 83 - PARAMÈTRES ET OPTIONS DES; Icônes de sélection du cycle; • Appuyez sur la touche Démarrage/Pause; Sélection d’un cycle
33 FONCTIONNEMENT FRANÇAIS PARAMÈTRES ET OPTIONS DES CYCLES Icônes de sélection du cycle Pour modifier les paramètres pendant un cycle, appuyez sur Démarrage/Pause pour interrompre le cycle, puis touchez l’icône de sélection du cycle désiré pour en modifier les paramètres. • Appuyez sur la touche Dé...
Page 84 - FONCTIONS PARTICULIÈRES; Verrouillage des commandes
34 FONCTIONNEMENT FONCTIONS PARTICULIÈRES Quelques touches activent également des fonctions particulières, y compris le verrouillage des commandes. Verrouillage des commandes Utilisez le verrouillage des commandes pour éviter toute utilisation indésirable du Styler ou pour conserver les paramètres d...
Page 85 - Cycle de nuit; Réglage de la fonction Cycle de nuit
35 FONCTIONNEMENT FRANÇAIS Cycle de nuit Servez-vous de la fonction Cycle de nuit afin de ranger des articles pour la nuit ou quand certains articles ne peuvent pas être retirés immédiatement après la fin d un cycle. Le Cycle de nuit diffuse de l air chaud de façon régulière pour empêcher la con...
Page 86 - FONCTIONS; Application LG ThinQ; Avant d’utiliser l’application LG; Installation de l’application LG
36 FONCTIONS INTELLIGENTES FONCTIONS INTELLIGENTES Application LG ThinQ L’application LG ThinQ vous permet de communiquer avec l’appareil à l’aide d’un téléphone intelligent. Avant d’utiliser l’application LG ThinQ 1 Utilisez un téléphone intelligent pour vérifier la force du signal du routeur sans ...
Page 87 - Caractéristiques de l’application; Smart Diagnosis; Surveillance de la consommation
37 FONCTIONS INTELLIGENTES FRANÇAIS Caractéristiques de l’application LG ThinQ Smart Diagnosis MC Cette fonction fournit des renseignements utiles pour diagnostiquer et résoudre les problèmes avec l’appareil en se basant sur le profil d’utilisation. Surveillance de la consommation d’énergie Le cycle...
Page 88 - Renseignements sur l; Avis de la FCC (Pour module émetteur
38 FONCTIONS INTELLIGENTES Renseignements sur l avis de logiciel ouvert Pour obtenir le code source sous la licence GPL, LGPL, MPL, et d'autres licences de logiciels libres, qui sont contenues dans ce produit, veuillez visitez http://opensource.lge.com. En complément du code source, tous les terme...
Page 89 - Cet appareil ne doit pas provoquer; Fonctionnalité Smart; Power pour allumer
39 FONCTIONS INTELLIGENTES FRANÇAIS Avis d’Industrie Canada (pour le module de transmission compris dans e produit) Cet appareil est conforme aux normes CNR d’Industrie Canada applicables aux appareils radio exempts de licence. Son fonctionnement est sujet aux deux conditions suivantes : 1 Cet appar...
Page 90 - ENTRETIEN; NETTOYAGE RÉGULIER; Débranchez le Styler avant de le net-
40 ENTRETIEN ENTRETIEN NETTOYAGE RÉGULIER Nettoyage intérieur et extérieur Un entretien approprié de votre Styler peut prolonger sa durée de vie. AVERTISSEMENT Pour réduire le risque dincendie, délectrocution ou de blessures lors de lutilisation de cet appareil, prenez certaines précautions de ba...
Page 92 - DÉPANNAGE; FOIRE AUX QUESTIONS; Qu’est-ce que les feuilles d; Est-ce que je peux installer le Styler sur du tapis?
42 DÉPANNAGE DÉPANNAGE FOIRE AUX QUESTIONS Q : Qu’est-ce que les feuilles d arôme et comment les utiliser? R : Vous pouvez utiliser votre marque préférée de feuille dassouplissant dans le filtre darôme pour infuser les articles avec un arôme rafraîchissant. Les feuilles nassoupliront pas le tis...
Page 93 - AVANT D’APPELER LE SERVICE; Fonctionnement; Symptômes
43 DÉPANNAGE FRANÇAIS AVANT D’APPELER LE SERVICE Votre appareil est équipé dun système automatique de surveillance derreur pour détecter et diagnostiquer les problèmes à un stade précoce. Si votre appareil ne fonctionne pas correctement ou ne fonctionne pas du tout, vérifiez les points suivants av...
Page 95 - Codes d’erreurs
45 DÉPANNAGE FRANÇAIS Performance Symptômes Cause probable Solutions Des plis à larrière du cou après un cycle Vêtement trop grand pour le cintre ou tissu trop délicat Utilisez un cintre dune taille convenant au vêtement pour éviter que le tissu se retrousse, causant des plis. Certains tissus sont...
Page 96 - GARANTIE LIMITÉE DU STYLER DE LG (CANADA)
46 GARANTIE GARANTIE LIMITÉE DU STYLER DE LG (CANADA) AVIS D'ARBITRAGE : LA PRÉSENTE GARANTIE LIMITÉE CONTIENT UNE DISPOSITION SUR L'ARBITRAGE QUI EXIGE QUE LE RÈGLEMENT DES DIFFÉRENDS ENTRE VOUS ET LG S’EFFECTUE PAR ARBITRAGE EXÉCUTOIRE PLUTÔT QUE DEVANT UN TRIBUNAL, À MOINS QUE LES LOIS DE VOTRE P...
Page 99 - MANUAL DEL PROPIETARIO
ESPAÑOL Lea con atención este manual del propietario antes de poner el aparato en funcionamiento y téngalo siempre a mano para futuras referencias. MANUAL DEL PROPIETARIO STYLER Copyright © 2017-2020 LG Electronics Inc. Todos los Derechos Reservados. S3*F** www.lg.com
Page 100 - TABLA DE CONTENIDOS
2 TABLA DE CONTENIDOS 3 CARACTERÍSTICAS DEL PRODUCTO 4 INSTRUCCIONES IMPORTANTES DE SEGURIDAD 4 Instrucciones de seguridad para la instalación 5 Instrucciones de seguridad para la conexión eléctrica 6 Precauciones básicas de seguridad 7 Instrucciones de conexión a tierra 8 DESCRIPCIÓN DEL PRODUCTO 8...
Page 101 - CARACTERÍSTICAS DEL PRODUCTO
3 CARACTERÍSTICAS DEL PRODUCTO ESPAÑOL CARACTERÍSTICAS DEL PRODUCTO ELIMINE OLORES Utilice el ciclo refrescante del Styler para eliminar los olores rápida y fácilmente de la ropa. REFRESQUE LA ROPA O AÑADA UN AROMA Perfume la ropa con láminas de aroma de su suavizante para telas favorito para que la...
Page 102 - INSTRUCCIONES IMPORTANTES DE SEGURIDAD; LEA TODAS LAS INSTRUCCIONES ANTES DE USAR EL APARATO.; ADVERTENCIA; INSTRUCCIONES DE SEGURIDAD PARA LA INSTALACIÓN
4 INSTRUCCIONES IMPORTANTES DE SEGURIDAD INSTRUCCIONES IMPORTANTES DE SEGURIDAD LEA TODAS LAS INSTRUCCIONES ANTES DE USAR EL APARATO. Hay muchos mensajes importantes de seguridad en este manual y en el aparato. Lea y obedezca siempre todos los mensajes de seguridad. ADVERTENCIA Para reducir el riesg...
Page 104 - USO
6 INSTRUCCIONES IMPORTANTES DE SEGURIDAD INSTRUCCIONES IMPORTANTES DE SEGURIDAD LEA TODAS LAS INSTRUCCIONES ANTES DE USAR EL APARATO. ADVERTENCIA Para reducir el riesgo de incendio o explosión, descarga eléctrica, daños a la propiedad, lesiones personales o la muerte al usar este aparato, siga las p...
Page 105 - INSTRUCCIONES DE CONEXIÓN A TIERRA
7 INSTRUCCIONES IMPORTANTES DE SEGURIDAD ESPAÑOL ADVERTENCIA Para reducir el riesgo de incendio o explosión, descarga eléctrica, daños a la propiedad, lesiones personales o la muerte al usar este aparato, siga las precauciones básicas de seguridad, incluyendo las siguientes: • Limpie el filtro de pe...
Page 106 - DESCRIPCIÓN DEL PRODUCTO; PIEZAS
8 DESCRIPCIÓN DEL PRODUCTO DESCRIPCIÓN DEL PRODUCTO PIEZAS colgador enmovimiento Luz interior Luz interior Soporte de repisa Ventilación para la circulación del aire caliente Tanque de drenado de agua Tanque de suministro de agua Ganchos para el cuidado de los pliegues de pantalones Puerta* Boquilla...
Page 107 - ACCESORIOS; Accesorios incluidos
9 DESCRIPCIÓN DEL PRODUCTO ESPAÑOL ACCESORIOS Accesorios incluidos NOTE y Comuníquese con la tienda donde compró el producto o con el servicio al cliente de LG llamando al 1-800-243-0000 (en Canadá al 1-888-542-2623) si los accesorios están dañados o si falta alguno de ellos. Los accesorios se puede...
Page 108 - LA PERCHA MÓVIL; PRECAUCIÓN
10 DESCRIPCIÓN DEL PRODUCTO LA PERCHA MÓVIL Cuelgue la ropa en la percha móvil utilizando los soportes suministrados con el Styler, o utilice cualquier percha de plástico o metal que enganche perfectamente en las hendiduras de la percha móvil. • Utilice la percha móvil para trajes, abrigos, chaqueta...
Page 109 - EL ESTANTE; SELECCIÓN DE CARACTERÍSTI-; artículo
11 DESCRIPCIÓN DEL PRODUCTO ESPAÑOL EL ESTANTE Utilice el estante cuando acondicione ropa u otros artículos que son difíciles de colgar o que puedan ser dañados por el secado en perchas. • Utilice el estante para juguetes de peluche, almohadas, sombreros y otros accesorios. • Utilice el estante para...
Page 110 - INSTALACIÓN; DESCRIPCIÓN GENERAL DE LA INSTALACIÓN
12 INSTALACIÓN INSTALACIÓN DESCRIPCIÓN GENERAL DE LA INSTALACIÓN Lea las siguientes instrucciones de instalacion despues de comprar este producto o al transportarlo a otro lugar. ESPECIFICACIONES DEL PRODUCTO La apariencia y las especificaciones que se enumeran en este manual pueden variar debido a ...
Page 111 - DESEMBALAJE DEL STYLER; SELECCIÓN DE LA UBICACIÓN ADECUADA; Electricidad; Suelo; Temperatura ambiente
13 INSTALACIÓN ESPAÑOL DESEMBALAJE DEL STYLER • Retire la cinta y las etiquetas temporales del Styler antes de usar. No quite las etiquetas de advertencia, la etiqueta del modelo y el número de serie, o la hoja de especificaciones técnicas que se encuentra debajo de la parte delantera del Styler. • ...
Page 112 - REQUISITOS PARA LA UBICACIÓN DE LA INSTALACIÓN; Espacios libres; • No instale el Styler en una plataforma hueca o flexible
14 INSTALACIÓN REQUISITOS PARA LA UBICACIÓN DE LA INSTALACIÓN ADVERTENCIA Lea todas las instrucciones de instalación por completo antes de instalar y operar el Styler. Es importante revisar todo el manual antes de instalar y utilizar el Styler. Espacios libres PRECAUCIÓN • El suelo debe estar nivela...
Page 113 - Espaciamiento de instalación recomen-
15 INSTALACIÓN ESPAÑOL • Para la instalación de clóset, con una puerta, se requieren aberturas de ventilación mínimas en la parte superior e inferior de la puerta. Puertas tipo persianas con aberturas de ventilación equivalentes son aceptables. Requisitos de ventilación del armario Los armarios con ...
Page 114 - NIVELACIÓN DEL STYLER; NOTA; Tuerca de
16 INSTALACIÓN NIVELACIÓN DEL STYLER y El aparato es pesado. Cuando se instala el Styler se necesitan dos o más personas. El in-cumplimiento de esta advertencia puede causar lesiones graves o la muerte. y Para asegurar que el Styler ofrezca un rendimiento óptimo, debe estar nivelado. Para minimizar ...
Page 115 - INVERSIÓN DE LA PUERTA; USO DE ALMOHADILLAS; Limpie el suelo para colocar las; Ajuste el nivel después de posicionar el
17 INSTALACIÓN ESPAÑOL INVERSIÓN DE LA PUERTA Es posible invertir la dirección de la apertura de la puerta. Esto debe ser realizado por el instalador en el momento de la instalación. INSTALACIÓN EN ALFOMBRAS Si se instala el Styler sobre alfombras, siga estas instrucciones. 1 Mueva la unidad a su ub...
Page 117 - FUNCIONAMIENTO; ANTES DE USAR; Conecte la fuente de alimentación.; Instale la bandeja de goteo.
19 FUNCIONAMIENTO ESPAÑOL FUNCIONAMIENTO ANTES DE USAR Limpie el Styler. Limpie el Styler a fondo y quite todo el polvo que se acumuló durante el envío. Consulte Mantenimiento , página 40. No enchufe ni opere el aparato hasta que el interior y el exterior se hayan secado completamente. Conecte la fu...
Page 118 - UTILIZACIÓN DEL STYLER; FIN DEL CICLO
20 FUNCIONAMIENTO UTILIZACIÓN DEL STYLER 1 PREPARE LOS ARTÍCULOS • Lave la ropa primero, si es necesario. • No se permiten los artículos sensibles al calor o que puedan ser dañados por la exposición al agua. Consulte Selección de ropa resistente al Styler , página 21. • Coloque los artículos en perc...
Page 119 - CLASIFICACIÓN DE CARGAS; Etiquetas de cuidado de telas; Agrupación de artículos similares
21 FUNCIONAMIENTO ESPAÑOL CLASIFICACIÓN DE CARGAS Etiquetas de cuidado de telas La mayoría de la ropa con etiquetas sobre el cuidado de telas incluye instrucciones para el cuidado apropiado. A continuación se presentan algunos de los símbolos relevantes para la selección de los elementos adecuados p...
Page 120 - GUÍA PARA EL CUIDADO DE TELAS
22 FUNCIONAMIENTO GUÍA PARA EL CUIDADO DE TELAS tela ropas Ciclo refrescante Ciclo de desinfección Ciclo de secado suave comentarios reducción de arrugas eliminación de olores fibr as nat ur ales fibr as v eg etales algodón toallas, calcetines, ropa interior, pantalones vaqueros, ropa deportiva, cam...
Page 121 - GUÍA PARA EL CUIDADO DE TELAS (CONTINUACIÓN)
23 FUNCIONAMIENTO ESPAÑOL tela ropas Ciclo refrescante Ciclo de desinfección Ciclo de secado suave comentarios reducción de arrugas eliminación de olores fibr as sintéticas o ar tificiales acetato forros de trajes, blusas, corbatas, pijamas acrílico ropa interior térmica, prendas de punto ...
Page 122 - REVISIÓN DE FILTROS; Revisión del filtro de pelusas; • Compruebe que las partes estén; Cambio de la lámina de aroma
24 FUNCIONAMIENTO REVISIÓN DE FILTROS ANTES DE CADA CARGA Revisión del filtro de pelusas Asegúrese siempre de que el filtro de pelusa esté limpio antes de iniciar una nueva carga; un filtro de pelusa obstruido aumentará el tiempo de secado. 1 Abra la rejilla delantera y saque el filtro de pelusas. 2...
Page 123 - REVISIÓN DE LOS TANQUES; CARGA DEL STYLER
25 FUNCIONAMIENTO ESPAÑOL REVISIÓN DE LOS TANQUES DE AGUA Revise el agua en los tanques de agua antes de su uso. El tanque de suministro de agua debe estar lleno de agua antes de usar el Styler. El Styler no funciona sin agua. El tanque de drenaje de agua se debe vaciar antes de cada uso. 1 Tire de ...
Page 124 - Perchas; Uso de la percha móvil
26 FUNCIONAMIENTO Perchas Las perchas que vienen con el Styler son para usar únicamente con el Styler. Cualquier percha de plástico o metal que tenga un gancho de menos de 5/32 pulgadas (4 mm) de grosor y ganchos instalados en las hendiduras de la percha móvil se pueden utilizar en el Styler.• No ut...
Page 126 - Estante; Almacenamiento de perchas
28 FUNCIONAMIENTO Estante Utilice el estante para ropa y artículos que no puedan colocarse en perchas. No apile artículos en el estante. Para un mejor rendimiento del secado, utilice el estante para un solo artículo o artículos más pequeños con un espacio entre ellos. Montaje del estante 1 Sostenga ...
Page 127 - PANEL DE CONTROL; Características del panel de control
29 FUNCIONAMIENTO ESPAÑOL PANEL DE CONTROL El panel de control responde al tacto usando electricidad estática. Un leve toque es suficiente para hacerlo funcionar. Utilice un paño para limpiar los controles y así evitar el contacto y la activación de las teclas. Sustancias foráneas en el control, el ...
Page 129 - GUÍA DE CICLOS; Procesos del ciclo
31 FUNCIONAMIENTO ESPAÑOL GUÍA DE CICLOS Procesos del ciclo Ciclo Ajuste Ropa/Tipo de tela Tiempo de finalización en hr.: min. Preparar Vaporizar Desinfectar Secar CICL O REFRESCANTE Normal traje, abrigo, uniforme escolar, bufanda, lana, prendas de punto, ropa de alto rendimiento/aire libre, toallas...
Page 130 - ELECCIÓN DE UN CICLO; Ciclo refrescante; Desinfección profunda; Ciclo de secado suave; Tiempo de secado; Descargado; Ciclos descargables
32 FUNCIONAMIENTO ELECCIÓN DE UN CICLO Los ciclos del Styler están diseñados para adaptarse a una variedad de situaciones. Seleccione el ciclo y el ajuste que mejor coincida con el contenido de carga y los resultados deseados para el máximo rendimiento y cuidado de la ropa. Para obtener los mejores ...
Page 131 - CONFIGURACIONES Y; Iconos selectores de ciclo; • Toque el botón Inicio/Pausa para activar el; Selección de ciclo; Selección de los ciclos descargados
33 FUNCIONAMIENTO ESPAÑOL CONFIGURACIONES Y OPCIONES DEL CICLO Iconos selectores de ciclo Para cambiar los ajustes durante el ciclo, pulse Inicio/Pausa para pausar el ciclo; a continuación, toque el icono de selección de ciclos correspondiente para cambiar la configuración. • Toque el botón Inicio/P...
Page 132 - FUNCIONES ESPECIALES; Bloqueo de controles; Configuración de un horario de; • No abra la puerta durante el
34 FUNCIONAMIENTO FUNCIONES ESPECIALES Algunos botones también activan funciones especiales, incluyendo el bloqueo de controles. Bloqueo de controles Utilice el bloqueo de controles para prevenir el uso no deseado del Styler o para mantener la configuración de ciclo y que no sea cambiada mientras el...
Page 133 - Cuidado nocturno; Configuración de la función Cuidado; Ponga la ropa en el Styler.
35 FUNCIONAMIENTO ESPAÑOL Cuidado nocturno Use la función Cuidado nocturno para guardar prendas durante la noche o cuando las prendas no puedan sacarse justo después de que el ciclo haya finalizado. Cuidado nocturno produce aire caliente de forma periódica para evitar la condensación y mantener las ...
Page 134 - Aplicación LG ThinQ; Previo a utilizar LG ThinQ; Instalando la aplicación LG ThinQ
36 FUNCIONES INTELIGENTES FUNCIONES INTELIGENTES Aplicación LG ThinQ La aplicación LG ThinQ le permite comunicarse con el electrodoméstico usando un teléfono inteligente. Previo a utilizar LG ThinQ 1 Utilice un teléfono inteligente para verificar la potencia del enrutador (Red Wi-Fi) cerca del elect...
Page 135 - Funciones de la aplicación LG
37 FUNCIONES INTELIGENTES ESPAÑOL Funciones de la aplicación LG ThinQ Smart Diagnosis™ Esta función brinda información útil para diagnosticar y resolver problemas con el producto conforme a su patrón de uso. Monitoreo de energía El uso de energía de la lavadora se ve afectado por los ciclos y las op...
Page 136 - Información de anuncio de programas de; Aviso de la FCC (para el módulo
38 FUNCIONES INTELIGENTES Información de anuncio de programas de código abierto Para obtener el código fuente correspondiente GPL, LGPL, MPL y otras licencias de código abierto que contiene este producto, visite http://opensource.thesignaturekitchen.com. Además del código fuente, podrá descargar las...
Page 137 - este dispositivo no debe causar; Función Smart Diagnosis TM; Power para encender el
39 FUNCIONES INTELIGENTES ESPAÑOL Declaración de Industry Canada (Para el módulo transmisor contenido en este producto) Este dispositivo cumple con los RSS para dispositivos exentos de licencia de Industry Canada. La operación está sujeta a las dos siguientes condiciones: 1 este dispositivo no debe ...
Page 138 - MANTENIMIENTO; LIMPIEZA FRECUENTE; Limpieza del interior y exterior; Limpieza del filtro de pelusas; Limpieza del filtro de aroma
40 MANTENIMIENTO MANTENIMIENTO LIMPIEZA FRECUENTE ADVERTENCIA Para reducir el riesgo de incendios, descargas eléctricas o lesiones personales al usar el aparato, siga las precauciones básicas, incluidas las siguientes: y Desenchufe el Styler antes de limpiarlo para evitar el riesgo de descarga eléct...
Page 140 - SOLUCIÓN DE PROBLEMAS; FAQ; ¿Cuáles son las láminas de aroma y cómo puedo utilizarlas?; ¿Puedo poner pieles, cuero, o artículos de seda en el Styler?; ¿Puedo instalar el Styler sobre una alfombra?
42 SOLUCIÓN DE PROBLEMAS SOLUCIÓN DE PROBLEMAS FAQ S : PREGUNTAS FRECUENTES P: ¿Cuáles son las láminas de aroma y cómo puedo utilizarlas? R: Usted puede utilizar su marca favorita de láminas de suavizante en el filtro de aroma para perfumar las prendas con un aroma refrescante. Las láminas no suaviz...
Page 141 - ANTES DE LLAMAR AL SERVICIO TÉCNICO; Funcionamiento
43 SOLUCIÓN DE PROBLEMAS ESPAÑOL ANTES DE LLAMAR AL SERVICIO TÉCNICO Este aparato está equipado con un sistema automático de control de errores para detectar y diagnosticar problemas a tiempo. Si el aparato no funciona correctamente o no funciona, compruebe lo siguiente antes de llamar al servicio t...
Page 143 - Rendimiento
45 SOLUCIÓN DE PROBLEMAS ESPAÑOL Rendimiento Problema Causa posible Soluciones Hay arrugas en la parte pos-terior del cuello al finalizar el ciclo La prenda es demasiado grande para la percha o la tela es demasiado delicada Utilice el tamaño de percha adecuado para la prenda así la tela no se pliega...
Page 148 - For inquiries or comments,; Register your product Online!
1-800-243-00001-888-865-30261-888-542-2623 USA, Consumer User USA, Commercial User CANADA For inquiries or comments, visit www.lg.com or call: www.lg.com Register your product Online! LG Customer Information Center


 LG 2 Manual
 LG 3 Manual
 LG 4 42 2P PQ Q1 10 0* ** * 5 50 0P PQ Q1 10 0* ** * 4 42 2P PQ Q1 11 1* ** * 5 50 0P PQ Q1 11 1* ** * 4 42 2P PQ Q2 20 0* ** * 5 50 0P PQ Q2 20 0* ** * 4 42 2P PQ Q3 30 0* ** * 5 50 0P PQ Q3 30 0* ** * Manual
 LG 10 Manual
 LG 14HK701G-WP User Manual
 LG 14HQ701G-BP User Manual
 LG 15LC1R Manual
 LG 15LC1RB User Manual
 LG 15LS766A0UA User Manual
 LG 16MQ70 User Manual
 LG 16MR70 User Manual
 LG 17HK700G-WP User Manual
 LG 17HK701G-WP User Manual
 LG 19EN33S Manual