Page 2 - TABLE OF CONTENTS
TABLE OF CONTENTS 2 3 IMPORTANT SAFETY INSTRUCTIONS 3 READ ALL INSTRUCTIONS BEFORE USE 3 WARNING 7 INSTALLATION 7 Product Overview 7 Installation Requirements 9 OPERATION 9 Control Panel 9 Before Use 11 Quick Start and Stop 12 Manual Cooking 12 Cooking Mode 17 Cookware Guide 18 Cooking Guide 20 SMAR...
Page 3 - IMPORTANT SAFETY INSTRUCTIONS; READ ALL INSTRUCTIONS BEFORE USE; Safety Messages; WARNING; Technical Safety
3 IMPORTANT SAFETY INSTRUCTIONS ENGLISH IMPORTANT SAFETY INSTRUCTIONS READ ALL INSTRUCTIONS BEFORE USE Safety Messages Your safety and the safety of others are very important. We have provided many important safety messages in this manual and on your appliance. Always read and follow all safety mess...
Page 4 - Operation
4 IMPORTANT SAFETY INSTRUCTIONS - Do not immerse cord or plug in water. Keep cord away from heated surfaces.- Do not let cord hang over edge of table or counter. • To reduce the risk of fire in the oven cavity: - Do not overcook food. Carefully attend appliance when paper, plastic, or other combusti...
Page 5 - Maintenance
5 IMPORTANT SAFETY INSTRUCTIONS ENGLISH • The appliance and its accessible parts become hot during use. Care should be taken to avoid touching heating elements inside the oven. Children must be kept away unless continuously supervised. • Do not use recycled paper products. They may contain impuritie...
Page 6 - SAVE THESE INSTRUCTIONS; FEDERAL COMMUNICATIONS COMMISSION RADIO FREQUENCY
6 IMPORTANT SAFETY INSTRUCTIONS SAVE THESE INSTRUCTIONS • Use care when cleaning the vent-hood filter. Corrosive cleaning agents, such as lye-based oven cleaners, may damage the filter. • Suitable for use above both gas and electric cooking equipment 36 inches wide or less. Radio/TV/Wireless Equipme...
Page 7 - INSTALLATION; Product Overview; Front View; Specifications; Installation Requirements; Installation Location
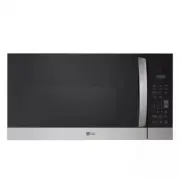
7 INSTALLATION ENGLISH INSTALLATION Product Overview Front View a Vent Grille b Location of Model Number c Control Panel d Grease Filter e Cooking Guide f Cooktop Light g Glass Turntable h Window with Metal Shield i Safety Door Lock System Accessories Accessories will vary depending on the model pur...
Page 8 - Grounding Instructions
8 INSTALLATION • Attach the 2 lag screws supporting the oven to a vertical, 2" x 4" wall stud. • DO NOT mount the microwave oven to an island or peninsula cabinet. • Be sure that the upper cabinet and rear wall structures can support 150 lb. plus the weight of any items you place inside the ...
Page 9 - OPERATION; Control Panel; Control Panel Features; Before Use; Setting the Clock
9 OPERATION ENGLISH OPERATION Control Panel The actual control panel may differ from model to model. Control Panel Features a Display Shows the time of day, cooking time settings, and selected cooking functions. b AUTO TOUCH Select various Auto Cooking functions. See Cooking Mode section. c Clock Se...
Page 10 - Control Lock; Kitchen Timer
10 OPERATION 2 Press the number keys to set the correct time of day, and press START/Enter . NOTE • To reset the clock mode, press Clock or unplug the power cord and plug it back in. Control Lock Use this safety feature to lock the control panel before cleaning the oven or to prevent children from u...
Page 11 - Microwave Power Levels; Quick Start and Stop; Using Quick Start
11 OPERATION ENGLISH Setting the Vent Fan Speed When the fan is on, press 2 Speed repeatedly to change the vent fan speed.• The fan speed will change in sequence from High to Low. Setting the Timed Ventilation Press Auto Timeset repeatedly to set the time before the vent fan automatically turns off....
Page 12 - Manual Cooking; Using Manual Cooking; Cooking for 5 Minutes, 30 Seconds at; Using Express Cook; Using Multi-Stage Cooking; Cooking Mode; Auto Reheat Mode; Auto Reheat Menu
12 OPERATION Manual Cooking Using Manual Cooking Unless you are using the auto cooking functions, the cook time and power level must be set manually. Cooking for 5 Minutes, 30 Seconds at 80% Power 1 Press Cook Time . 2 Press the number keys to set the cook time ( 5:30 ). 3 Press Power Level . 4 Pres...
Page 13 - Auto Cook Mode; Auto Cook Menu
13 OPERATION ENGLISH • 2 Soup / Sauce (1 - 4 cups) - Cookware: Microwave-safe bowl- Food temperature: Refrigerated- Instructions: Cover with vented plastic wrap. After cooking, stir and let stand for 3 minutes. • 3 Casserole (1 - 4 cups) - Cookware: Microwave-safe bowl- Food temperature: Refrigerate...
Page 14 - Popcorn Mode; Popcorn Menu; Potato Mode; Potato Menu; Vegetable Mode; Vegetable Menu
14 OPERATION - Instructions: After cooking, stir to complete reheating WARNING • Be careful when handling the container. Microwave heating of beverages can result in delayed eruptive boiling. Therefore, care must be taken when handling the container. Popcorn Mode Prepare microwave popcorn simply and...
Page 15 - Beverage Mode; Beverage Menu; Defrost Mode; Defrost Menu
15 OPERATION ENGLISH - Instructions: Add water (1 - 2 cups: 2 tbsp water, 3 - 4 cups: 4 tbsp water). Cover with vented plastic wrap. After cooking, let stand for 3 minutes. • 4 Canned vegetable (1 - 4 cups) - Cookware: Microwave-safe bowl or casserole- Food temperature: Room- Instructions: Cover wit...
Page 16 - Soften Mode; Soften Menu; Melt Mode; Melt Menu
16 OPERATION When the oven beeps, turn food over. After defrosting, let stand for 30 minutes. • 3 Fish (0.1 - 6.0 lbs) - Fish: Fillets, whole steaks- Shellfish: Crab meat, lobster tails, shrimp, scallops When the oven beeps, turn food over. After defrosting, let stand for 5-10 minutes. • 4 Bread (0....
Page 17 - Cookware Guide; Microwave-Safe Cookware
17 OPERATION ENGLISH - Food temperature: Room- Instructions: Unwrap and place food in oven. After heating, stir to complete melting. Cookware Guide Microwave-Safe Cookware Use microwavable cookware.• Ovenproof Glass - Ovenproof glassware that is treated for high intensity heat so it is heat-resistan...
Page 18 - Testing Cookware before Use; Cooking Guide; Cooking Tips
18 OPERATION • Wood - Wood bowls and boards will dry out and may split or crack when you use them in the microwave oven. - Baskets react in the same way. • Tightly Covered Cookware - Be sure to leave openings for steam to escape from covered containers. - Pierce plastic pouches of vegetables or othe...
Page 19 - Precautions
19 OPERATION ENGLISH foods cooks more quickly than the lower portion. - Shaping : Place the thickest portions of foods like meat, poultry or fish toward the outside of the cookware to help them cook more evenly. If possible, shape foods into thin rounds or rings. • Foods with Skin, Shell or Membrane...
Page 20 - SMART FUNCTIONS; Smart Diagnosis; Feature; Using LG ThinQ to Diagnose Issues
20 SMART FUNCTIONS SMART FUNCTIONS Smart Diagnosis TM Feature This feature is only available on models with the c or d logo. Use this feature to help you diagnose and solve problems with your appliance. NOTE • For reasons not attributable to LGE’s negligence, the service may not operate due to exter...
Page 21 - MAINTENANCE; Cleaning; Cleaning the Interior; Cleaning the Grease Filters
21 MAINTENANCE ENGLISH MAINTENANCE Cleaning Cleaning the Interior 1 Use a damp cloth to clean the surfaces of the door and wipe out crumbs between the door and the frame. 2 Remove greasy spatters with a soapy cloth and then rinse and dry.• Wipe spatters immediately with a wet paper towel, especially...
Page 22 - Replacing Parts; Replacing the Charcoal Filter
22 MAINTENANCE 4 To reinstall, slide the filter in on the back side and push it upward to secure it. NOTE • Do not operate the hood without the filters in place. Replacing Parts Replacing the Charcoal Filter If your oven is vented inside, the charcoal filter should be replaced every 6 to 12 months, ...
Page 23 - TROUBLESHOOTING; FAQs; Frequently Asked Questions
23 TROUBLESHOOTING ENGLISH TROUBLESHOOTING FAQs Frequently Asked Questions Q: Will the oven be damaged if it operates while empty? A: Yes. Never operate the oven while it is empty or without the glass tray. Q: Does microwave energy pass through the viewing screen in the door? A: No. The metal screen...
Page 25 - Before Calling for Service
25 TROUBLESHOOTING ENGLISH Before Calling for Service Operation Problem Possible Cause & Solution Microwave oven does not start Power cord is unplugged, door is open, or cooking time has not been set. • Plug in power cord or check for a blown circuit fuse or a tripped main circuit breaker.• Clos...
Page 26 - LIMITED WARRANTY; USA; TERMS AND CONDITIONS; THIS LIMITED WARRANTY DOES NOT COVER:
26 LIMITED WARRANTY LIMITED WARRANTY USA TERMS AND CONDITIONS ARBITRATION NOTICE: THIS LIMITED WARRANTY CONTAINS AN ARBITRATION PROVISION THAT REQUIRES YOU AND LG ELECTRONICS ("LG") TO RESOLVE DISPUTES BY BINDING ARBITRATION INSTEAD OF IN COURT, UNLESS YOU CHOOSE TO OPT OUT. IN ARBITRATION, ...
Page 27 - NOT COVERED BY WARRANTY
27 LIMITED WARRANTY ENGLISH • Damage or failure of the Product resulting from operating the Product in a corrosive atmosphere or contrary to the Product owner’s manual. • Damage or failure of the Product caused by accidents, pests and vermin, lightning, wind, fire, floods, acts of nature, or any oth...
Page 29 - PROCEDURE FOR RESOLVING DISPUTES:
29 LIMITED WARRANTY ENGLISH PROCEDURE FOR RESOLVING DISPUTES: ALL DISPUTES BETWEEN YOU AND LG ARISING OUT OF OR RELATING IN ANY WAY TO THIS LIMITED WARRANTY OR THE PRODUCT SHALL BE RESOLVED EXCLUSIVELY THROUGH BINDING ARBITRATION, AND NOT IN A COURT OF GENERAL JURISDICTION. BINDING ARBITRATION MEANS...
Page 32 - For inquiries or comments,
LG Customer Information Center Register your product Online! www.lg.com For inquiries or comments, visit www.lg.com or call: 1-800-243-0000 U.S.A. 1-888-542-2623 CANADA