Page 2 - WARRANTY; LG Refrigerator / Freezer Warranty Period
1 WARRANTY Visit our web site http://www.lg.com LG Electronics LIMITED WARRANTY United States of America LG Electronics will repair or at its option replace, without charge, your product which proves to be defective in material or workmanship under normal use during the warranty period listed below ...
Page 3 - GARANTÍA; Período de Garantía del Refrigerador/Congelador LG; LA GARANTIA ANTERIOR NO APLICA A :; NÚMEROS DE ASISTENCIA AL CLIENTE:
2 GARANTÍA Visite nuestro sitio web http://www.lg.com LG Electronics GARANTÍA LIMITADA Estados Unidos de América LG Electronics reparará o en su defecto reemplazará sin cargo, el producto defectuoso en material o mano de obra bajo uso normal durante el período de garantía que se menciona a continuac...
Page 4 - Requirements for Ground Connection 5; TABLE OF CONTENTS
3 GARANTÍA Warranty 1-2 English Version 3 Spanish Version 30 Important Safety Instructions 4-5 Requirements for Ground Connection 5 Parts and Features 6-7 Refrigerator Installation 8-14 Unpacking 8 Installation 8 Installation of Base Grille 8 How to remove and Install the Refrigerator Doors 9-12 How...
Page 5 - KEEP THESE INSTRUCTIONS
4 This manual contains several important safety notices. Always read and obey all of the following safety messages. This is the safety alert symbol. This symbol is a warning to potential dangers that could cause death, injury or damage to you, others or the product. All safety messages will follow a...
Page 6 - CHILDREN MAY BECOME TRAPPED
5 IMPORTANT SAFETY INSTRUCTIONS This appliance is not intended for use by children, persons with physical or mental disabilities, persons with reduced sensory or mental capacity, or persons with lack of experience or know-how, unless they have supervision or instruction in relation to the use of the...
Page 7 - PARTS AND FEATURES; Drawer Model
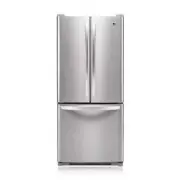
6 PARTS AND FEATURES Drawer Model Read this section to familiarize yourself with the parts and features of your new refrigerator. NOTE: This guide covers different models. Your refrigerator could have some or all of the features and parts listed below. The location of some of the parts may not corre...
Page 10 - HOW TO REMOVE AND INSTALL THE REFRIGERATOR DOORS; Removing Refrigerator Door; REFRIGERATOR INSTALLATION
9 HOW TO REMOVE AND INSTALL THE REFRIGERATOR DOORS For moving the refrigerator through a house door, it might be necessary to remove refrigerator and freezer door handles. IMPORTANT: Before starting, turn off and unplug the refrigerator. Remove all food and the racks from the doors. TOOLS YOU MIGHT ...
Page 11 - Left Door
10 • Loose the grounding screw (7) and the pins (8) located over the hinge, after, lift the hinge and remove it (9). • Remove the door and place it over its inner face to avoid scratching. 2. To install the refrigerator doors Right Door • Take the door and place it gently over the pin of the hinge (...
Page 12 - To remove the refrigerator handle
11 REFRIGERATOR INSTALLATION • Be sure that the hook (11) located in the upper part of the door) matches with the splitter of the refrigerator (12). Check that the sealing patch of the door ends leveled with the refrigerator and that it isn’t bended. Left Door • Place the hinge in its original posit...
Page 14 - Installing the Pull Out Drawer
13 REFRIGERATOR INSTALLATION • With both hands, hold the center of the bar and push it in so that it is fit to both rails simultaneously. CAUTION: When removing the drawer, do not hold the handle. If it comes off, it could cause personal injury. CAUTION: To place the drawer on the floor, take care n...
Page 15 - CLOSING AND ALIGNING THE DOORS; Closing the Doors
14 REFRIGERATOR INSTALLATION USING YOUR REFRIGERATOR CLOSING AND ALIGNING THE DOORS Closing the Doors Your refrigerator has two front leveling screws, one on the right and one on the left. If your refrigerator seems unstable or if you would like the doors to close more easily, simply adjust the incl...
Page 16 - USING YOUR REFRIGERATOR; ENSURING PROPER AIR CIRCULATION; Do not; DOOR ALARM; Refrigerator Control: Position 1 to 7 (32 °F to 47 °F
15 USING YOUR REFRIGERATOR ENSURING PROPER AIR CIRCULATION In order to obtain stable temperature, the air must flow between the freezer and refrigerator sections. As shown in the illustration below, the cold air enters through the bottom part and circulates upward. This air returns below the freezer...
Page 17 - ADJUSTING CONTROL SETTINGS
16 USING YOUR REFRIGERATOR USING YOUR REFRIGERATOR ADJUSTING CONTROL SETTINGS Give the refrigerator time to cool down completely before adding food. It is best to wait 24 hours before adding food to the refrigerator. The mid-settings indicated in the previous section should be correct for normal hou...
Page 18 - Do not keep bottles in the freezer; WARNING; REFRIGERATOR SECTION
17 USING YOUR REFRIGERATOR Packaging Recommendations: • Use sealed plastic containers. • Use plastic containers with a smooth surface. • Package with aluminum foil of high resistance. • Wrap with paper layered with plastic. • Use water proof plastic. • Use recommended plastic bags to store frozen fo...
Page 19 - In order to remove a shelf from a metal frame; FROZEN MEAT COMPARTMENT/ CHEF FRESH; To remove the Frozen Meat Compartment; CRISPER HUMIDITY CONTROL (in some models); “High”; CRISPER HUMIDITY CONTROL; Removing the glass
18 USING YOUR REFRIGERATOR USING YOUR REFRIGERATOR Sliding Shelves (in some models) You can slide some of the shelves in your refrigerator towards inside or outside like explained below. • To slide the shelf towards the outside: Pull towards you, figure A. • To slide the shelf towards the inside: Pu...
Page 20 - CRISPER COVER WITH INTERIOR LATTICE (in
19 USING YOUR REFRIGERATOR Removing the Vegetable Drawer / Crisper • Slip out the drawer towards the outside until it stops (1). • Slightly lift the front part and pull the rest (2), in order to completely remove the drawer. • To relocate the drawer slip out towards the front until it stops. CRISPER...
Page 22 - EXPLOSION HAZARD; ELECTRICAL SHOCK HAZARD; ELECTRIC SHOCK HAZARD
21 REFRIGERATOR CARE AND CLEANING 11 1 2 WARNING EXPLOSION HAZARD Do not use flammable cleaners. Not following these instructions can cause death, explosion or fire. The refrigerator, as well as the freezer, do their own de-freezing. This process does not prevent the build up of contaminants, theref...
Page 23 - Replacing the Freezer light; POWER INTERRUPTIONS; REMEMBER; WHEN GOING ON VACATION; “Closing and Aligning Doors”.; REFRIGERATOR CARE AND CLEANING
22 Replacing the Freezer light • Unplug the refrigerator. • Unlock the cover of the light bulb using your thumbs (1). • Remove the light bulb and replace it with a new one. • Take the cover (2), lock the hooks of it (3) and push it upwards (4). • Plug the refrigerator back in. POWER INTERRUPTIONS 1....
Page 24 - PERSONAL INJURY HAZARD; OPERATING INSTRUCTIONS; Identify your ice maker type.; NORMAL SOUNDS
23 REFRIGERATOR CARE AND CLEANING ABOUT THE AUTOMATIC ICE MAKER NOTE: The automatic Ice maker is only included in some models. Check your specifications of your refrigerator. WARNING PERSONAL INJURY HAZARD Avoid contact with any moving parts of the ejector mechanism or with the heater that releases ...
Page 25 - CONNECTING THE WATER LINE; BEFORE START; • A cold water source.; INSTALLATION INSTRUCTIONS
24 CONNECTING THE WATER LINE NOTE: It is necessary to have a water source when both water and/or ice dispensers are available in your product. BEFORE START The water source is not guaranteed by the refrigerator manufacturer. Follow instructions carefully in order to reduce damage. Air located inside...
Page 26 - DRILL A HOLE FOR THE VALVE
25 CONNECTING THE WATER LINE CONNECTING THE WATER LINE 3. DRILL A HOLE FOR THE VALVE Drill a 1/4” (6,35 mm) diameter hole in the water pipeline. Remove jagged edges produces after perforation. Make sure water does not reach the drill. Not performing the 1/4” (6,35 mm) perforation can lead to a low o...
Page 27 - OPEN THE BYPASS VALVE; ON
26 • Remove the ring plug (1) from the valve located at the top of such device. • Place compression nut and the ferule at the end of the pipeline. Insert pipeline into the connection valve as far as possible. Hold tightly while holding pipeline. Compression Nut 1/4” Ferule Hold on to the pipe from t...
Page 28 - UNDERSTANDING SOUNDS YOU MAY HEAR
27 CONNECTING THE WATER LINE TROUBLESHOOTING GUIDE UNDERSTANDING SOUNDS YOU MAY HEAR Your new refrigerator might produce certain noises that your previous refrigerator did not. It is normal if you worry. Most of the new sounds you will be hearing are actually normal and expected. Hard surfaces like ...
Page 29 - TROUBLESHOOTING GUIDE
28 Problem Possible Causes Solutions IT LOOKS LIKE THE COMPRESSOR MOTOR STAYS ON TOO LONG • The replaced refrigerator was an older model. • The room temperature is hotter than usual. • The door is being opened very often or there has been a big amount of food in storage. • The refrigerator is plugge...
Page 31 - CANADA; LG Customer Information Center
1-800-243-0000 1-888-865-3026 1-888-542-2623 USA, Consumer User USA, Commercial User CANADA LG Customer Information Center www.lg.com Register your Product Online!