Page 2 - TABLE OF CONTENTS
2 TABLE OF CONTENTS TABLE OF CONTENTS 3 IMPORTANT SAFETY INSTRUCTIONS 3 WHAT TO DO IF YOU SMELL GAS 4 BASIC SAFETY PRECAUTIONS 4 CALIFORNIA SAFE DRINKING WATER AND TOXIC ENFORCEMENT ACT 5 GROUNDING INSTRUCTIONS 5 SAFETY INSTRUCTIONS FOR INSTALLATION 6 SAFETY INSTRUCTIONS FOR STEAM FUNCTIONS 7 SAFETY...
Page 3 - ENGLISH; IMPORTANT SAFETY INSTRUCTIONS; READ ALL INSTRUCTIONS BEFORE USE; WARNING; DANGER; WARNING
3 ENGLISH IMPORTANT SAFETY INSTRUCTIONS IMPORTANT SAFETY INSTRUCTIONS READ ALL INSTRUCTIONS BEFORE USE W WARNING For your safety, the information in this manual must be followed to minimize the risk of fire or explosion, electric shock, or to prevent property damage, injury to persons, or death. You...
Page 8 - SPECIAL FEATURES
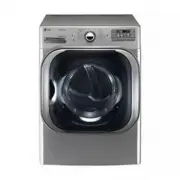
8 SPECIAL FEATURES SPECIAL FEATURES LARGEST PREMIUM SIZE The ultra-large stainless steel drum offers superior durability. EASY-ACCESS REVERSIBLE DOOR The wide-opening door provides easy access for loading and unloading. The door hinge can be reversed to adjust for installation location. STEAM FUNCTI...
Page 9 - INTRODUCING YOUR DRYER; Parts; NOTE
9 ENGLISH INTRODUCING YOUR DRYER INTRODUCING YOUR DRYER Parts Accessories Power Cord Location (Gas Models) Gas Connection Location (Gas Models) Exhaust DuctOutlet Terminal BlockAccess Panel(Electric Models) NOTE t$POUBDU-($VTUPNFS4FSWJDFBU JO$BOBEBJGBOZBDDFTTPSJFTBSFNJTTJOHt'PSZPVSTBGFUZBOEGPSFYUFOE...
Page 10 - Control panel features; Operation
10 INTRODUCING YOUR DRYER Control panel features W WARNING: To reduce the risk of fire, electric shock, or injury to persons, read this entire manual, including the Important Safety Instructions, before operating this dryer. LED Display Cycle Selector Knob Start/Pause Button Power Button Dry Level B...
Page 11 - Time and status display
11 ENGLISH INTRODUCING YOUR DRYER Time and status display Time and status display shows the settings, estimated time remaining, options, and status messages for your dryer. When the dryer is turned on, the light in the display will illuminate. Button %FTDSJQUJPO &45*."5&%5*.&3&.&...
Page 12 - INSTALLATION INSTRUCTIONS; Installation steps
12 INSTALLATION INSTRUCTIONS INSTALLATION INSTRUCTIONS Installation steps Checking and choosing the proper location Leveling the dryer Venting the Dryer Plugging in the power cord and grounding Connecting Gas Dryers (Gas Dryer Type) Exhaust check test (Refer to page 30.) Test run 120V 240V(USA) 230V...
Page 13 - Installation location requirements; Clearances; INSTALLATION SPACING FOR RECESSED AREA OR CLOSET INSTALLATION
13 ENGLISH INSTALLATION INSTRUCTIONS Installation location requirements W WARNING 3FBEBMMJOTUBMMBUJPOJOTUSVDUJPOTDPNQMFUFMZCFGPSFJOTUBMMJOHBOEPQFSBUJOHZPVSESZFS It is important that you review this entire manual before installing and using your dryer. Detailed instructions concerning electrical conn...
Page 15 - Installation with optional pedestal base or stacking kit; RECOMMENDED INSTALLATION SPACING FOR CABINET INSTALLATION; CLOSET VENTILATION REQUIREMENTS
15 ENGLISH INSTALLATION INSTRUCTIONS Installation with optional pedestal base or stacking kit RECOMMENDED INSTALLATION SPACING FOR CABINET INSTALLATION t For cabinet installation with a door, minimum ventilation openings in the top of the cabinet are required. *Required spacing **For side or bottom ...
Page 16 - Leveling the dryer
16 Leveling the dryer W WARNING t5PSFEVDFUIFSJTLPGJOKVSZUPQFSTPOTBEIFSFUPBMMJOEVTUSZ SFDPNNFOEFETBGFUZQSPDFEVSFTJODMVEJOHUIFVTFPG MPOHTMFFWFEHMPWFTBOETBGFUZHMBTTFT Failure to follow this warning can cause serious injury or death. t5IFBQQMJBODFTBSFIFBWZ5XPPSNPSFQFPQMFBSFSFRVJSFE XIFOJOTUBMMJOHUIFESZF...
Page 17 - To remove the door
17 ENGLISH 0QFOUIFEPPSUPSFWFSTF $IFDLTDSFXTUPSFNPWF -FGU3JHIU 3FNPWFGPVSEVNNZTDSFXTCZESJWFS To remove the door 3FNPWFUXPTDSFXTBOEEJTBTTFNCMZ-BUDI )PMEPOUIFIJOHFXIJMFSFNPWFTDSFXTPGIJOHF UPQSFWFOU EPPSESPQQJOH 3FNPWFEPPSGSPNDBCJOFUDPWFS Open Door INSTALLATION INSTRUCTIONS Hinge Dummy Screw Remove Door...
Page 18 - To install the door
18 4DSFXEPXOGPVSEVNNZTDSFXTSJHIUTJEF $IFDLUIBUUIFEPPSDMPTFTBOEMBUDIFTQSPQFSMZ Move door to left side and insert a hinge to hinge hole. )PMEPOIJOHFXIJMFTDSFXEPXOBIJOHF UPQSFWFOUEPPSESPQQJOH *OTFSUMBUDIUPSJHIUTJEFBOEJOTUBMMTDSFXT Latch Screw Hinge Dummy Screw To install the door Hinge Screw Swing Door...
Page 19 - Changing the dryer vent location; OPTION 1: SIDE VENTING
19 ENGLISH Changing the dryer vent location 3FNPWFUIFSFBSFYIBVTUEVDUSFUBJOJOHTDSFX1VMMPVUUIF exhaust duct. OPTION 1: SIDE VENTING 1SFTTUIFUBCTPOUIFLOPDLPVUBOEDBSFGVMMZSFNPWFUIF LOPDLPVUGPSUIFEFTJSFEWFOUPQFOJOH SJHIUTJEFWFOUJOHJTOPUBWBJMBCMFPOHBTNPEFMT1SFTTUIFBEBQUFSEVDUPOUPUIF blower housing and sec...
Page 20 - Venting requirement
20 Venting requirement W WARNING To reduce the risk of fire, electric shock, or injury to persons when using this appliance, follow basic precautions, including the following: t %POPUDSVTIPSDPMMBQTFEVDUXPSL Failure to follow these instructions can result in fire or death. t %POPUBMMPXEVDUXPSLUPSFTUP...
Page 21 - ROUTING AND CONNECTING DUCTWORK; Ductwork
21 ENGLISH INSTALLATION INSTRUCTIONS Venting requirement %FEVDUGU NGPSFBDIBEEJUJPOBMFMCPX*UJTOPUSFDPNNFOEFEUPVTFNPSFUIBOGPVS¡FMCPXT ROUTING AND CONNECTING DUCTWORK Follow the guidelines below to maximize drying performance and reduce lint buildup and condensation in the ductwork. Ductwork and fittin...
Page 22 - Connecting gas dryers; Electrical Requirements for Gas Models Only
22 INSTALLATION INSTRUCTIONS Connecting gas dryers W WARNING To reduce the risk of fire, electric shock, or injury to persons when using this appliance, follow basic precautions, including the following: Electrical Requirements for Gas Models Only W WARNING To reduce the risk of fire, electric shock...
Page 23 - Connecting the Gas Supply
23 ENGLISH Connecting gas dryers (cont.) W WARNING To reduce the risk of fire, electric shock, or injury to persons when using this appliance, follow basic precautions, including the following: t *OTUBMMBUJPOBOETFSWJDFNVTUCFQFSGPSNFECZBRVBMJGJFE JOTUBMMFSTFSWJDFBHFODZPSUIFHBTTVQQMJFS Failure to do s...
Page 24 - Connecting electric dryers; Electrical Requirements for Electric Models Only
24 Connecting electric dryers W WARNING To help prevent fire, electric shock, serious injury, or death, the wiring and grounding must conform to the latest edition of the /BUJPOBM&MFDUSJDBM$PEF"/4*/'1"BOEBMMBQQMJDBCMFMPDBM regulations. Please contact a qualified electrician to check your...
Page 25 - USA only
25 ENGLISH INSTALLATION INSTRUCTIONS Connecting electric dryer(cont.) USA only W WARNING t $POOFDUUIFQPXFSDPSEUPUIFUFSNJOBMCMPDL$POOFDUFBDI QPXFSDPSEXJSFUPUIFUFSNJOBMCMPDLTDSFXUIBUIBTUIF TBNFDPMPSFEXJSF'PSFYBNQMFDPOOFDUUIFCMBDLQPXFS DPSEXJSFUPUIFUFSNJOBMCMPDLTDSFXXJUIUIFCMBDLXJSF 'BJMVSFUPGPMMPXUIFT...
Page 26 - Four-Wire connection for electric dryers: Direct wire
26 INSTALLATION INSTRUCTIONS Connecting electric dryer(cont.) USA only W WARNING t $POOFDUUIFQPXFSDPSEUPUIFUFSNJOBMCMPDL$POOFDUFBDI QPXFSDPSEXJSFUPUIFUFSNJOBMCMPDLTDSFXUIBUIBTUIF TBNFDPMPSFEXJSF'PSFYBNQMFDPOOFDUUIFCMBDLQPXFS DPSEXJSFUPUIFUFSNJOBMCMPDLTDSFXXJUIUIFCMBDLXJSF 'BJMVSFUPGPMMPXUIFTFJOTUSVD...
Page 28 - Three-Wire connection for electric dryers: Direct wire
28 INSTALLATION INSTRUCTIONS Connecting electric dryer(cont.) USA only W WARNING t $POOFDUUIFQPXFSDPSEUPUIFUFSNJOBMCMPDL$POOFDUFBDI QPXFSDPSEXJSFUPUIFUFSNJOBMCMPDLTDSFXUIBUIBTUIF TBNFDPMPSFEXJSF'PSFYBNQMFDPOOFDUUIFCMBDLQPXFS DPSEXJSFUPUIFUFSNJOBMCMPDLTDSFXXJUIUIFCMBDLXJSF 'BJMVSFUPGPMMPXUIFTFJOTUSVD...
Page 29 - Special requirements for; Final installation check; Testing dryer heating
29 ENGLISH INSTALLATION INSTRUCTIONS Special requirements for manufactured or mobile homes Any installation in a manufactured or mobile home must comply with the Manufactured Home Construction and Safety Standards 5JUMF$'31BSUPS4UBOEBSE$"/$4";.)BOE local codes and ordinances. If you are unce...
Page 31 - Error Code; Temperature sensor failure; HS; Humidity Sensor failure.; or; t3FTFUDJSDVJUCSFBLFSPSSFQMBDFGVTF
31 ENGLISH INSTALLATION INSTRUCTIONS Installation test (Exhaust check) (cont.) 3FTUSJDUFEPS#MPDLFE"JSGMPX Avoid long runs or runs with multiple elbows or bends. Excess or crushed transition duct Too many elbows or exhaust too long Check for blockages and lint buildup. Make sure the ductwork is n...
Page 32 - Operating the dryer
32 HOW TO USE Operating the dryer 563/0/5)&%3:&3 Press the POWER button to turn on the dryer. The cycle LEDs will illuminate and a signal will TPVOEJGUVSOFEPO3FGFSUPQBHF 3 #&(*/$:$-& Press the START/PAUSE button to begin the cycle. The cycle can be paused at any time either by PQFOJO...
Page 33 - Sensor Dry Cycles; Cycle guide
33 ENGLISH HOW TO USE Sensor Dry Cycles Sensor Dry cycles utilize LG’s unique dual sensor system to detect and compare the moisture level in clothes and in the air and adjust the drying time as needed to ensure superior results. The dryer automatically sets the dryness level and temperature at the r...
Page 34 - Sorting load; Loading the Dryer; Fabric Care Labels
34 HOW TO USE Following are instructions for starting and using your new dryer. Please refer to specific sections of this manual for more detailed information. Check the lint filter before every load Always make sure the lint filter is clean before starting a new load; a clogged lint filter will inc...
Page 35 - Cycle setting buttons; DRY LEVEL
35 ENGLISH HOW TO USE Cycle setting buttons SENSOR DRY cycles have preset settings that are selected automatically. MANUAL DRY cycles have default settings, but you may also customize the settings using the cycle setting buttons. Press the button for that option to view and select other settings. DR...
Page 36 - Special functions; RACK DRY
36 HOW TO USE Special functions The option buttons also activate special functions, including $)*-%-0$,3"$,%3: Press and hold the option button marked with the special function RACK DRY 6TF3"$,%3:XJUIJUFNTTVDIBTXPPMTXFBUFSTTJMLBOEMJOHFSJF UIBUTIPVMEESZGMBU3"$,%3:DBOBMTPCFVTFEXJUIJUFNTUIB...
Page 37 - Custom program; To Recall a Custom Program:; Steam functions; To Fill the Steam Feeder
37 ENGLISH HOW TO USE Custom program If you have a special combination of settings that you use frequently, you can save these settings as a CUSTOM PROGRAM. * To Save a Custom Program: 5VSOPOUIFESZFSBOEUVSOUIFDZDMFTFMFDUPSLOPCUPTFMFDUUIF desired cycle. 6TFUIFDZDMFTFUUJOHCVUUPOTUPBEKVTUUIFTFUUJOHTGPS...
Page 39 - Steam cycle guide
39 ENGLISH Steam functions (cont.) W WARNING t %POPUPQFOUIFESZFSEPPSEVSJOHTUFBNDZDMFT Failure to follow this warning can cause serious injury or death. t %POPUGJMMUIFTUFBNGFFEFSXJUIHBTPMJOFESZDMFBOJOH TPMWFOUTPSPUIFSGMBNNBCMFPSFYQMPTJWFTVCTUBODFT Failure to do so can result in death, explosion, fire...
Page 40 - MAINTENANCE; Regular cleaning; Cleaning the Exterior; Cleaning the Interior
40 MAINTENANCE MAINTENANCE Regular cleaning W WARNING To reduce the risk of fire, electric shock, or injury to persons when using this appliance, follow basic precautions, including the following: t 6OQMVHUIFESZFSCFGPSFDMFBOJOHUPBWPJEUIFSJTLPGFMFDUSJD TIPDL Failure to follow this warning can cause s...
Page 41 - Before calling for service
41 ENGLISH TROUBLESHOOTING Before calling for service Your dryer is equipped with an automatic error-monitoring system to detect and diagnose problems at an early stage. If your dryer does not function properly or does not function at all, check the following before you call for service. 1SPCMFN 1PT...
Page 44 - USING SMARTDIAGNOSIS
44 USING SMARTDIAGNOSIS TM USING SMARTDIAGNOSIS TM *GZPVFYQFSJFODFQSPCMFNTXJUIZPVSESZFSDBMM JO$BOBEB'PMMPXUIFDBMMDFOUFSBHFOUTJOTUSVDUJPOT and do the following steps when requested: 1SFTTUPUVSOPOUIFESZFS%POPUQSFTTBOZPUIFSCVUUPOT 8IFOJOTUSVDUFEUPEPTPCZUIFDBMMDFOUFSBHFOUQMBDFUIFNPVUIQJFDFPGZPVSQIPOFWFS...
Page 45 - Stacking kit installation; This stacking kit includes:
45 ENGLISH OPTIONAL ACCESSORIES Stacking kit installation This stacking kit includes: t5XP TJEFSBJMTt0OF GSPOUSBJMt'PVS TDSFXT Tools Needed for Installation: t1IJMMJQTTDSFXESJWFS To ensure safe and secure installation, please observe the following instructions. W WARNING t *ODPSSFDUJOTUBMMBUJPODBODB...
Page 47 - LG DRYER LIMITED WARRANTY - Canada; Dryer; BSUTBOE-BCPS JOUFSOBMGVODUJPOBMQBSUTPOMZ; Write your warranty information below:
47 ENGLISH WARRANTY t3FQMBDFNFOUQSPEVDUTBOEQBSUTBSFXBSSBOUFEGPSUIFSFNBJOJOHQPSUJPOPGUIFPSJHJOBMXBSSBOUZQFSJPEPSOJOFUZ EBZTXIJDIFWFSJTHSFBUFSt3FQMBDFNFOUQSPEVDUTBOEQBSUTNBZCFOFXPSSFNBOVGBDUVSFE t-("VUIPSJ[FE4FSWJDF$FOUFSXBSSBOUJFTUIFJSSFQBJSXPSLGPSUIJSUZ EBZT LG CANADA’S SOLE LIABILITY IS LIMITED...
Page 49 - LG Customer Information Center
1-800-243-0000 USA 1-888-542-2623 CANADA LG Customer Information Center Register your product Online! www.lg.com