Page 3 - WHAT TO DO IF YOU SMELL GAS:; READ ALL INSTRUCTIONS BEFORE USE; Your Safety and the safety of others is very important.; WARNING
1. Do not try to light a match or cigarette, or turn on any gas or electrical appliance. 2. Do not touch any electrical switches. Do not use any phone in your building. 3. Clear the room, building, or area of all occupants. 4. Immediately call your gas supplier from a neighbor’s phone. Follow the ga...
Page 4 - For your safety, the information in this manual must be; CALIFORNIA SAFE DRINKING WATER AND TOXIC ENFORCEMENT ACT
READ ALL INSTRUCTIONS BEFORE USE w WARNING For your safety, the information in this manual must be followed to minimize the risk of fi re or explosion, electric shock, or to prevent property damage, personal injury, or loss of life. CALIFORNIA SAFE DRINKING WATER AND TOXIC ENFORCEMENT ACT This act r...
Page 5 - GROUNDING INSTRUCTIONS; SAFETY INSTRUCTIONS FOR INSTALLATION
GROUNDING INSTRUCTIONS This appliance must be grounded. In the event of malfunction or breakdown, grounding will reduce the risk of electric shock by providing a path of least resistance for electric current. This appliance must be equipped with a cord having an equipment-grounding conductor and a g...
Page 6 - SAFETY INSTRUCTIONS FOR STEAM FUNCTIONS
READ ALL INSTRUCTIONS BEFORE USE SAFETY INSTRUCTIONS FOR INSTALLATION w WARNING For your safety, the information in this manual must be followed to minimize the risk of fi re or explosion, electric shock, or to prevent property damage, personal injury, or loss of life. Exhaust/Ducting: • GasdryersMU...
Page 7 - SAFETY INSTRUCTIONS FOR CONNECTING ELECTRICITY; SAVE THESE INSTRUCTIONS
7 SAFETY INSTRUCTIONS FOR CONNECTING ELECTRICITY • Do not, under any circumstances, cut or remove the ground prong from the power cord. To prevent personal injury or damage to the dryer, the electrical power cord must be plugged into a properly grounded outlet. • For personal safety, this dryer must...
Page 8 - SPECIAL FEATURES
SPECIAL FEATURES 1 EASY-TO-USE CONTROL PANEL Rotate the Cycle Selector Knob to select the desired dry cycle. Add cycle options or adjust settings with the touch of a button. 2 3 4 EASY-ACCESS REvERSIBLE DOOR Wide-opening door provides easy access for loading and unloading. Door swing can be reversed...
Page 9 - Rear of Dryer; KEY PARTS AND COMPONENTS; DRYING RACK; Included Accessories
1 2 LEvELING FEET Four leveling feet (two in the front, and two in the back) adjust to improve dryer stability on uneven floors. FRONT-MOUNT LINT FILTER Front-mounted lint filter allows for easy access and cleaning after every load. Terminal Block Access Panel (Electric Models) Rear of Dryer Power C...
Page 11 - Required Dimensions for Installation; OPTIONAL ACCESSORIES
INSTALLATION WITH OPTIONAL PEDESTAL BASE OR STACKING KIT IMPORTANT: If you are installing your dryer using an optional pedestal base or stacking kit, please refer to Optional Accessories in this manual or to the instructions for your pedestal or stacking kit before proceeding with the installation. ...
Page 12 - pedestal
LEvELING THE DRYER REvERSING THE DOOR SWING The swing of the dryer door can be reversed to fit your installation location. • All four leveling feet must rest solidly on the floor. Gently push on the top corners of the dryer to make sure that the dryer does not rock from corner to corner. If you are ...
Page 13 - CHANGING THE DRYER vENT LOCATION; OPTION 1: Side venting
CHANGING THE DRYER vENT LOCATION Your new dryer is shipped to vent to the rear. It can also be configured to vent to the bottom or side (right-side venting is not available on gas models). An adapter kit, part number 383EEL9001B, may be purchased from your LG retailer. This kit contains the necessar...
Page 14 - vENTING THE DRYER
vENTING THE DRYER • Do not crush or collapse ductwork. Failure to follow these instructions can result in fi re or death. • Do not allow ductwork to rest on or contact sharp objects. Failure to follow these instructions can result in fi re or death. • If connecting to existing ductwork, make sure it...
Page 15 - Routing and Connecting Ductwork; must; Ductwork
Correct Venting Incorrect Venting Routing and Connecting Ductwork Follow the guidelines below to maximize drying performance and reduce lint buildup and condensation in the ductwork. NOTE: Ductwork and fittings are NOT included and must be purchased separately. • Use 4-in. (10.2 cm) diameter rigid o...
Page 16 - Electrical Requirements for Gas Models Only; CONNECTING GAS DRYERS
Electrical Requirements for Gas Models Only • Do not, under any circumstances, cut or remove the third (ground) prong from the power cord. Failure to follow this warning can result in fire, explosion, or death. • For personal safety, this dryer must be properly grounded. Failure to follow this warni...
Page 18 - Electrical Requirements for Electric Models Only; CONNECTING ELECTRIC DRYERS
18 Electrical Requirements for Electric Models Only • This dryer must be connected to a grounded metal, permanent wiring system, or an equipment-grounding conductor must be run with the circuit conductors and connected to the equipment-grounding terminal or lead on the dryer. Failure to do so can re...
Page 19 - Four-Wire Connection for Electric Dryers: Power Cord
19 Remove the terminal block access cover on the upper back of the dryer. Install a UL-listed strain relief into the power cord through-hole; then thread a UL-listed, 30A, 240V, 4-wire, #10 AWG-minimum copper conductor power cord through the strain relief. 1 Transfer the dryer’s ground wire from beh...
Page 20 - Four-Wire Connection for Electric Dryers: Direct Wire; copper; codes prohibit grounding through the neutral conductor.
CONNECTING ELECTRIC DRYERS (cont.) Remove 5 in. (12.7 cm) of the outer covering from the wire. Remove 5 inches of insulation from the ground wire. Cut off approximately 1 1 ⁄ 2 in. (3.8 cm) from the other three wires and strip 1 in. (2.54 cm) insulation from each wire. Bend the ends of the three sho...
Page 21 - Three-Wire Connection for Electric Dryers: Power Cord
21 Remove the terminal block access cover on the upper back of the dryer. Install a UL-listed strain relief into the power cord through-hole; then thread a UL-listed, 30A, 240V, 3-wire, #10 AWG-minimum copper conductor power cord through the strain relief. 1 Attach the two hot leads of the power cor...
Page 22 - Three-Wire Connection for Electric Dryers: Direct Wire
22 CONNECTING ELECTRIC DRYERS (cont.) Remove 3 1 ⁄ 2 in. (8.9 cm) of the outer covering from the wire. Strip 1 in. (2.54 cm) insulation from each wire. Bend the ends of the three wires into a hook shape. 1 Attach the two hot leads of the power cord to the outer terminal block screws. Attach the neut...
Page 23 - Testing Dryer Heating; GASMODELS; Checking Airflow; FINAL INSTALLATION CHECK; SPECIAL REQUIREMENTS FOR MANUFACTURED OR MOBILE HOMES
Testing Dryer Heating GASMODELS Close the dryer door, press the ON/OFF switch to turn the dryer on, and start the dryer on a heat setting. When the dryer starts, the igniter should ignite the main burner. NOTE: If all air is not purged from the gas line, the gas igniter may turn off before the main ...
Page 24 - To activate the duct condition test cycle:; NOTE: Dryer heating test must be performed; DUCT CONDITION TESTING; Correct Venting
Your dryer features FlowSense ™ , an innovative sensing system that automatically detects blockages and restrictions in dryer ductwork. Keeping ductwork clean of lint build-up and free of restrictions allows clothes to dry faster and reduces energy use.NOTE: When the dryer is fi rst installed, this ...
Page 25 - SORTING LOADS; CHECK THE LINT FILTER BEFORE EvERY LOAD; LOADING THE DRYER
• Check all pockets to make sure that they are empty. Items such as clips, pens, coins, and keys can damage both your dryer and your clothes. Flammable objects such as lighters or matches could ignite, causing a fire. Failure to do so can result in fire, explosion, or death. • Never dry clothes that...
Page 26 - CONTROL PANEL FEATURES; Important Warning: To reduce the risk of fire,
CONTROL PANEL FEATURES Following are instructions for starting and using your new dryer. Please refer to specific sections of this manual for more detailed information. Important Warning: To reduce the risk of fire, electricshock,orinjurytopersons,readthisentiremanual,includingtheImportantSafety Ins...
Page 27 - CYCLE GUIDE; SENSOR DRY Cycles; STEAM CYCLE / SENSOR DRY
CYCLE GUIDE The cycle guide below shows the options and recommended fabric types for each cycle. NOTE: To protect your garments, not every dry level, temperature, or option is available with every cycle. SENSOR DRY Cycles SENSOR DRY cycles utilize LG’s unique dual sensor system to detect and compare...
Page 28 - THE DISPLAY
THE DISPLAY The display shows the settings, estimated time remaining, options, and status messages for your dryer. ESTIMATED TIME REMAINING When the START/PAUSE button is pressed, the display will indicate the estimated time remaining for the selected drying cycle. 1 2 3 CYCLE COMPLETION INDICATOR W...
Page 29 - OPERATING THE DRYER
Select any additional cycle options, such as REDUCE STATIC (*DAMP DRY BEEP), EASY IRON, CUSTOM PROGRAM, WRINKLE CARE (*RACK DRY), BEEPER ON/OFF by pressing the button For that option. OPERATING THE DRYER Press the ON/OFF button to turn on the dryer. The lights around the cycle selector knob will ill...
Page 30 - CYCLE SETTING BUTTONS; TIME DRY; CYCLE OPTION BUTTONS; To Add Cycle Options to a Cycle:
CYCLE SETTING BUTTONS SENSOR DRY cycles have preset settings that are selected automatically and cannot be changed. MANUAL DRY cycles have default settings, but you may also customize the settings using the cycle setting buttons. Press the button for that option to view and select other settings. NO...
Page 31 - SPECIAL FUNCTIONS; DAMP DRY BEEP
SPECIAL FUNCTIONS The option buttons also activate special functions, including DAMP DRY BEEP, ChILD LOCK, and RACK DRY. Press and hold the option button marked with the special function for 3 seconds to activate. * DAMP DRY BEEP With this option, the dryer will beep when the load is approximately 8...
Page 32 - CUSTOM PROGRAM; To Save a Custom Program:; BEFORE USING THE STEAM FUNCTIONS; To Fill the Steam Feeder; IMPORTANTNOTESABOUTSTEAMCYCLES
MAX CUSTOM PROGRAM If you have a special combination of settings that you use frequently, you can save these settings as a CUSTOM PROGRAM. * To Save a Custom Program: Turn on the dryer and turn the cycle selector knob to select the desired cycle. Use the cycle setting buttons to adjust the settings ...
Page 33 - STEAM FUNCTIONS; Using the STEAM FRESH; STEAMFRESh
Fill the steam feeder to MAX with water. Place the steam feeder in the drawer, then push in the drawer until it clicks into place. STEAM FUNCTIONS LG’s new steam technology allows you to inject fabrics with a swirling jet of hot steam to refresh clothes, reduce static, and make ironing easier. Simpl...
Page 34 - STEAM CYCLE GUIDE; IMPORTANTNOTESABOUTSTEAMCYCLES:; STEAM FRESH; STEAM OPTION
STEAM CYCLE GUIDE IMPORTANTNOTESABOUTSTEAMCYCLES: • Steam may not be clearly visible during the Steam Cycles. This is normal. • Do not use STEAM FRESh ™ with items such as wool, blankets, leather jackets, silk, wet clothes, lingerie, foam products, or electric blankets. • For best results, load arti...
Page 35 - Cleaning the Exterior; REGULAR CLEANING; Cleaning the Interior
Cleaning the Exterior Proper care of your dryer can extend its life. The outside of the machine can be cleaned with warm water and a mild, nonabrasive household detergent. Immediately wipe off any spills with a soft, damp cloth. IMPORTANT: Do not use methylated spirits, solvents, or similar products...
Page 36 - BEFORE CALLING FOR SERVICE
Problem Possible Causes Solutions Dryer does not heat • House fuse is blown, circuit breaker has tripped, or power outage has occurred. • Gas supply or service turned off (gas models only). • Reset circuit breaker or replace fuse. Do not increase fuse capacity. If the problem is a circuit overload, ...
Page 37 - BEFORE CALLING FOR SERvICE; Problem
BEFORE CALLING FOR SERvICE (cont.) Problem Possible Causes Solutions Drying time is not consistent • Heat settings, load size, or dampness of clothing is not consistent. • The drying time for a load will vary depending on the heat setting, the type of heat used (electric, natural, or LP gas), the si...
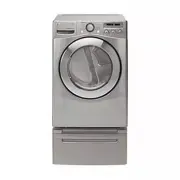
Page 39 - Pedestal; Color; Stacking Kit; StackingKit
OPTIONAL ACCESSORIES For these and other LG products, contact your local LG dealer, or visit our Web site at us.lge.com . Pedestal Give your LG washer and dryer a boost with matching 14-inch high pedestals. They feature a storage drawer for added convenience. 14" Pedestal Color WDP3W White WDP3V...
Page 40 - PEDESTAL INSTALLATION; Tools Needed for Installation:
w WARNING To ensure safe and secure installation, please thoroughly follow the instructions below. PEDESTAL INSTALLATION Tools Needed for Installation: • Phillips-head screwdriver• Wrench (supplied) •Incorrectinstallationcancauseserious accidents. • The appliances are heavy. Two or more people are r...
Page 42 - This stacking kit includes:; STACKING KIT INSTALLATION
This stacking kit includes: • Two (2) side rails• One (1) front rail• Four (4) screws To ensure safe and secure installation, please observe the following instructions. 1 Make sure the surface of the washer is clean and dry. Remove paper backing from the tape on one of the stacking kit side brackets...
Page 43 - Description
STACKING KIT INSTALLATION (cont.) 3 Place the dryer on top of the washer by fitting the dryer feet into the side brackets as illustrated. Avoid finger injuries; do not allow fingers to be pinched between the washer and dryer. Slowly slide the dryer toward the back of the washer until the side bracke...
Page 44 - TO CONTACT LG ELECTRONICS; Dryer drum 10 years limited warranty; LG DRYER LIMITED WARRANTY - USA; Product Registration Information
44 Your LG Dryer will be will repaired or replaced, at LG’s option, if it proves to be defective in material or workmanship under normal use, during the warranty period (“Warranty Period”) set forth below, effective from the date (“Date of Purchase”) of original consumer purchase of the product. Thi...
Page 45 - LG DRYER LIMITED WARRANTY - Canada; For complete warranty details and customer; Dryer
45 • Replacement products and parts are warranted for the remaining portion of the original warranty period or ninety (90) days, whichever is greater.• Replacement products and parts may be new or remanufactured.• LG Authorized Service Center warranties their repair work for thirty (30) days. LG CAN...
Page 47 - Su Seguridad y la de los demás son de suma importancia.; ADVERTENCIA; Por su seguridad, debe seguir la información; LEA TODAS LA INSTRUCCIONES ANTES DE USAR; Nointenteencenderuncigarrilloo; QUÉ HACER SI HUELE GAS:
Su Seguridad y la de los demás son de suma importancia. En este manual y en su electrodoméstico figuran muchos mensajes importantes de seguridad. Lea y cumpla siempre con todos los mensajes de seguridad. Éste es el símbolo de alerta de seguridad.El mismo alerta sobre potenciales riesgos de muerte o ...
Page 48 - Por su seguridad, se debe seguir la información; pRECAUCIONES BÁSICAS DE SEGURIDAD
lEY EJECUTIvA pARA lA SEGURIDAD DEl AGUA pOTABlE Y lOS TÓXICOS DE CAlIFORNIA (CAlIFORNIA SAFE DRINKING WATER AND TOXIC ENFORCEmENT ACT) Esta ley requiere que el gobernador de California publique un listado de sustancias conocidas en el estado que causan cáncer, defectos congénitos u otras lesiones r...
Page 49 - INSTRUCCIONES DE CONEXIÓN A TIERRA; INSTRUCCIONES ImpORTANTE pARA lA INSTAlACIÓN; Para reducir el riesgo de incendio, descargas eléctricas o
LEA TODAS LA INSTRUCCIONES ANTES DE USAR INSTRUCCIONES DE CONEXIÓN A TIERRA Este electrodoméstico deberá estar conectado a tierra. En caso de avería o mal funcionamiento, la conexión a tierra reducirá el riesgo de descargas eléctricas al brindar un camino con una resistencia menor para la corriente ...
Page 51 - GUARDE ESTAS INSTRUCCIONES; Bajoningunacircunstancia,corteoquite; INSTRUCCIONES ImpORTANTE pARA CONECTAR lA ElECTRICIDAD
GUARDE ESTAS INSTRUCCIONES • Bajoningunacircunstancia,corteoquite la tercera pata (puesta a tierra) del cable eléctrico. Para evitar heridas a nivel personal o daños sobre la secadora, el cable de corriente eléctrica debe estar conectado en una conexión a tierra en condiciones adecuadas. • Por motiv...
Page 52 - CARACTERÍSTICAS ESpECIAlES
5 INDICADOR DEl SISTEmA DE SENSOR DE BlOQUEO DE CONDUCTO FlOW SENSE ™ El sistema de sensor de bloqueo de conducto FlowSense ™ detecta y lo alerta sobre bloqueos y la tubería, lo cual reduce el flujo de escape de la secadora. Esto puede mejorar el funcionamiento y ayudar a minimizar el número de llam...
Page 53 - Parte trasera de; pIEZAS Y COmpONENTES ClAvE; ESTANTE DE SECADO; Accesorios incluidos
1 2 pATAS NIvElADORAS Cuatro patas niveladoras (dos en la parte frontal y dos en la trasera) ajustables para mejorar la estabilidad de la secadora en pisos desnivelados. FIlTRO DE pElUSA mONTADO Al FRENTE El filtro de pelusa montado al frente permite un fácil acceso y limpieza después de cada carga....
Page 55 - Dimensiones requeridas para; ACCESORIOS OpCIONAlES; Kit de apilado; Adquirido por separado)
INSTAlACIONES CON lA BASE pEDESTAl O KIT DE ApIlADO OpCIONAlES IMPORTANTE: Si está instalando su secadora con una base de pedestal o un kit de apilado opcionales, consulte la sección de Accesorios opcionales incluida en este manual o las instrucciones de su pedestal o kit de apilado antes de continu...
Page 57 - OpCIÓN 1: ventilación lateral; ADvERTENCIA
CÓmO CAmBIAR lA UBICACIÓN DEl CONDUCTO DE vENTIlACIÓN DE lA SECADORA Su secadora está equipada de fábrica para ventilar en la parte trasera. También puede configurarse para ventilar en la parte inferior o lateralmente (no está disponible la ventilación del lado derecho en los modelos a gas). Puede a...
Page 58 - CONEXIÓN DEl CONDUCTO DE vENTIlACIÓN DE lA SECADORA
CONEXIÓN DEl CONDUCTO DE vENTIlACIÓN DE lA SECADORA • Noaplastenidobleelsistemadeconducto. Si no se siguen estas instrucciones se podrá producir incendio o muerte. • Nopermitaqueelsistemadeconductose asientesobreobjetospuntiagudosnientre en contacto con los mismos. Si no se siguen estas instruccione...
Page 59 - Direccionamiento y conexión del; deberá; Sistema de conducto
Ventilación de escape correcta Ventilación de escape incorrecta Direccionamiento y conexión del sistema de conducto de escape Siga las pautas indicadas más abajo para maximizar el desempeño de secado y reducir la acumulación de pelusa en el sistema de conducto. NOTA: El sistema de conducto y las con...
Page 60 - CONEXIÓN DE SECADORAS A GAS; Requisitos eléctricos para modelos a gas únicamente
60 CONEXIÓN DE SECADORAS A GAS Requisitos eléctricos para modelos a gas únicamente • Bajo ninguna circunstancia, corte o quite la tercera pata (puesta a tierra) del cable eléctrico. Si no se cumple con esto se podrá producir una explosión, incendio o muerte. • Por motivos de seguridad personal, la s...
Page 61 - Conexión del suministro de gas
• La instalación y el mantenimiento deben proveerse por un instalador calificado, agencia de mantenimiento o compañía de gas. Si no se cumple con esto se podrá producir una explosión, incendio o muerte. • Use únicamente un conector de acero inoxidable nuevo y un conector certificado por AGAnuevo. Si...
Page 62 - Requisitos eléctricos únicamente para modelos eléctricos; Se requiere una conexión de 4 hilos en; CÓmO CONECTAR lAS SECADORAS ElÉCTRICAS
62 Requisitos eléctricos únicamente para modelos eléctricos • Cualquier instalación en una vivienda móvil o prefabricada debe realizarse de conformidad con los Estándares de seguridad y construcción de viviendas prefabricadas, Título 24 CFR, Parte 32-80 o estándar CAN/CSA0Z240 MH y con los códigos y...
Page 63 - listado; listado por UL con un conductor de cobre; unflujodecorrientecortooexcesivo.
63 Quite la cubierta de acceso al bloque terminal localizado en la parte superior trasera de la secadora. Instale un protector de tensión listado por UL en el orificio de pase del cable eléctrico; luego pase un cable eléctrico conductor de cobre Núm. 10 AWGdeporlomenos4hilos,30A,240V, listado por UL...
Page 67 - MODELOSAGAS; Revisión del flujo de aire; REvISIÓN DE INSTAlACIÓN FINAl; REQUISITOS ESpECIAlES pARA vIvIENDAS mÓvIlES O pREFABRICADAS
Comprobación del calentamiento de la secadora MODELOSAGAS Cierre la puerta de la secadora, apriete el interruptor ON/OFF para encender la secadora, e iniciar la secadora en un ajuste de calor. Cuando inicia la secadora, el encendedor deberá encender el quemador principal. NOTA: Si no se purga todo e...
Page 68 - Para activar el ciclo de evaluación del; NOTA: La comprobación del calentamiento; SISTEMA DE EVALUACIÓN DEL ESTADO DEL CONDUCTO; Ventilación
La secadora incluye FlowSense ™ , un sistema de sensor innovador que detecta en forma automática bloqueos y restricciones en la tubería de su secadora. Mantener la tubería sin acumulación de pelusa y libre de restricciones hace posible que la ropa se seque más rápido, reduce el uso de corriente. NOT...
Page 69 - CÓmO CARGAR DE lA SECADORA; ClASIFICACIÓN DE CARGAS; Etiquetas de mantenimiento de las telas; REvISE El FIlTRO DE pElUSA ANTES DE CADA CARGA; dañarsusecadoraosusprendas.Losobjetos
CÓmO CARGAR DE lA SECADORA Secado a máquina Seco Planchado permanente/ antiarrugas Suave/ delicado No secar a máquina No secar (utilizado junto a “no lavar”) Normal ClASIFICACIÓN DE CARGAS Etiquetas de mantenimiento de las telas La mayoría de las prendas de vestir tienen etiquetas de mantenimiento d...
Page 70 - CARACTERÍSTICAS DEl pANEl DE CONTROl; Advertencia importante: Para reducir el
CARACTERÍSTICAS DEl pANEl DE CONTROl BOTÓN DE ENCENDIDO/ApAGADO (ON/OFF) Apriete el botón para encender la secadora. Apriete nuevamente para apagar la secadora. NOTA: Apretar el botón de ENCENDIDO/ APAGADO durante un ciclo cancelará ese ciclo y borrará cualquier ajuste de carga. pERIllA SElECTORA DE...
Page 71 - GUÍA DE CICLOS; Ciclos de SECADO CON SENSOR
GUÍA DE CICLOS La guía de ciclos indicada más abajo muestra las opciones y tipos de telas recomendadas para cada ciclo. Jeans, prendas pesadas 25 Ajustable Ajustable Ajustable Ajustable Ajustable Ajustable Ajustable Ajustable Ajustable Ajustable Ajustable 32 34 Media Baja Ultra baja Alta Baja Normal...
Page 72 - lA pANTAllA
4 1 TIEmpO RESTANTE ESTImADO (ESTImATED TImE REmAINING) Cuando se presiona el botón START/PAUSE (inicio/pausa), la pantalla indicará el tiempo restante estimado para el ciclo de secado seleccionado. 3 INDICADOR DE SEGURO INFANTIl (CHIlD lOCK) Cuando se ha fijado el seguro infantil, aparecerá el indi...
Page 73 - FUNCIONAmIENTO DE lA SECADORA
FUNCIONAmIENTO DE lA SECADORA Apriete el botón encendido/apagado (ON/ OFF) para encender la secadora. Las luces alrededor de la perilla selectora de ciclos se iluminarán. Gire la perilla selectora al ciclo deseado. La pantalla mostrará los ajustes preseleccionados de nivel de secado (DRY LEVEL), Tem...
Page 74 - BOTONES DE AJUSTE DE CICLOS; CONTROL DEL TEMPERATURA; BOTONES DE OPCIÓN DE CICLOS; Para añadir opciones de ciclo al ciclo:
BOTONES DE AJUSTE DE CICLOS Los ciclos de SECADO CON SENSOR tienen ajustes preprogramados que se seleccionan automáticamente y no pueden cambiarse. Los ciclos de SECADO MANUAL tienen ajustes predeterminados, pero pueden personalizarse usando los botones de ajustes de ciclos. Apriete el botón de esa ...
Page 75 - BIp DE SECADO HÚmEDO; FUNCIONES ESpECIAlES; para instalar el estante de secado
* BIp DE SECADO HÚmEDO (DAmp DRY BEEp) Con esta opción, la secadora emitirá un pitido cuando la carga esté seca en un 80% aproximadamente. Esto le permite quitar elementos livianos que se secan más rápido que le gustaría planchar o colgar mientras todavía están apenas húmedos. Presione y sostenga el...
Page 76 - pROGRAmA pERSONAlIZADO; para guardar un programa personalizado:; ANTES DE USAR lAS FUNCIONES DE vApOR; para llenar el alimentador de vapor; NOTASIMPORTANTESSOBRECICLOSDEVAPOR
pROGRAmA pERSONAlIZADO Si tiene una combinación especial de ajustes que usa con frecuencia, puede guardar estos ajustes a manera de programa personalizado (CUSTOM PROGRAM). * para guardar un programa personalizado: Encienda la secadora y gire la perilla selectora de ciclos para seleccionar el ciclo ...
Page 77 - FUNCIONES DE vApOR; Cómo usar el ciclo STEAm FRESH; para usar el ciclo STEAm FRESH
Llene el alimentador de vapor con agua. Coloque el alimentador de vapor en el cajón y presione el cajón hasta que se trabe en su lugar. FUNCIONES DE vApOR La nueva tecnología de vapor de LG le permite inyectar las telas con un chorro giratorio de vapor caliente para refrescar las prendas, reducir la...
Page 78 - Cómo usar las opciónes de vapór
Cómo usar las opciónes de vapór La opción REDUCE STATIC (reducir estática) inyecta vapor al final del ciclo de secado para reducir la electricidad estática producida por la fricción de telas. Modifique el tiempo del ciclo presionando el botón MORE TIME (más tiempo) o LESS TIME (menos tiempo). La pan...
Page 79 - GUÍA DE CIClO DE vApOR; NOTASIMPORTANTESSOBRELOSCICLOS
ALTA RESISTENCIA ALGODÓN/TOALLAS NORMAL PLANCHADO PERMANENTE DELICADOS ULTRA DELICADOS STEAM FRESH™ (20 min.) STEAM FRESH™ (10 min.) + REDUCCIÓN DE ESTÁTICA + REDUCCIÓN DE ESTÁTICA + REDUCCIÓN DE ESTÁTICA + PLANCHADO FÁCIL + PLANCHADO FÁCIL + PLANCHADO FÁCIL STEAM FRESH™ (12 min.) Secado temporizado...
Page 80 - lImpIEZA REGUlAR
limpieza del exterior El mantenimiento adecuado de su secadora podría prolongar su vida útil. El exterior de la unidad puede limpiarse con agua tibia y un detergente de jabón medio, no abrasivo.Limpie inmediatamente cualquier clase de fuga, con un trapo suave y húmedo. IMPORTANTE: No use alcohol des...
Page 81 - ANTES DE llAmAR A mANTENImIENTO
problema Causas posibles Soluciones La secadora no calienta • El fusible del hogar está quemado, el cortacircuitos se ha accionado, o ha ocurrido una interrupción eléctrica. • Se ha apagado el suministro o servicio de gas (solo modelos a gas). • Reactive el disyuntor o cambie el fusible. No aumente ...
Page 82 - problema
ANTES DE llAmAR A mANTENImIENTO (cont.) problema Causas posibles Soluciones El tiempo de secado no es constante • Los ajustes de calor, el tamaño de la carga o la humedad de las prendas no son constantes. • El tiempo de secado para una carga variará dependiendo del ajuste de calor, tipo de calor uti...
Page 85 - Kit de
ACCESORIOS OpCIONAlES Para estos y otros productos LG, llame a su distribuidor LG local, o visite nuestro sitio Web en us.lge.com . pedestal Incremente el desempeño de su lavadora LG con los pedestales de 35,5 centímetros (14 pulgadas) de alto correspondientes. Proveen un cajón de almacenamiento par...
Page 86 - Herramientas necesarias para la; INSTAlACIÓN DEl pEDESTAl; Nopermitaquelosniñosjueguenenel; El accesorio de pedestal incluye:
Para asegurar la instalación segura, siga cuidadosamente las siguientes instrucciones. Herramientas necesarias para la instalación: • Destornillador Phillips• Llave (provista) INSTAlACIÓN DEl pEDESTAl w ADVERTENCIA • La instalación incorrecta puede causar accidentes graves. • Los electrodomésticos s...
Page 87 - INSTALACIÓN DEL PEDESTAL; Cómo Usar las Almohadillas
INSTALACIÓN DEL PEDESTAL (cont.) 5 Bajar Afloje las tuercas en las 4 patas niveladoras del pedestal hasta que pueda girarlos con la llave. Gire en el sentido de las manecillas del reloj o al contrario para bajar hasta vez que el pedestal esté nivelado y todas las 4 patas estén apoyadas firmemente en...
Page 88 - INSTAlACIÓN DEl KIT DE ApIlADO; Noutilizarelkitdeapiladoconunsecadora
INSTAlACIÓN DEl KIT DE ApIlADO Este kit de apilado incluye: • Dos (2) rieles laterales.• Un (1) riel frontal.• Cuatro (4) tornillos. Para asegurar la instalación segura, siga las siguientes instrucciones. 1 Asegúrese de que la superfi cie de la lavadora esté limpia y seca. Quite el papel de respaldo...
Page 89 - Descripción; DImENSIONES Y ESpECIFICACIONES ClAVE
INSTAlACIÓN DEl KIT DE ApIlADO (cont.) 3 Coloque la secadora sobre la lavadora haciendo coincidir las patas en las abrazaderas laterales como se indica. Evite lesionarse los dedos; no deje que los dedos queden atrapados entre la lavadora y la secadora. Deslice despacio la secadora hacia la parte tra...
Page 90 - Un año; GARANTÍA LIMITADA DE LA SECADORA LG – EE. UU.; para ubicar a su Centro de Mantenimiento Autorizado; PARA CONTACTAR A LG ELECTRONICS; Información de registro del producto
90 Su secadora LG será reparada o reemplazada, a discreción de LG, si se comprueba que existe un defecto en el material o la mano de obra bajo condiciones de uso normales, durante el período de garantía (“Período de garantía”) establecido más abajo, vigente desde la fecha (“Fecha de compra”) de la c...
Page 93 - AVERTISSEMENT; Votre sécurité et la sécurité des autres sont très importantes.; DANGER; CE QU’IL FAUT FAIRE SI VOUS DÉTECTEZ UNE; LISEZ TOUTES LES DIRECTIVES AVANT
w AVERTISSEMENT Pour votre sécurité, vous devez suivre l’information contenue dans ce manuel afin de réduire les risques d’incendie et d’explosion, de choc électrique, ainsi que pour éviter les dommages matériels, les blessures corporelles, ou un décès. Votre sécurité et la sécurité des autres sont ...
Page 94 - Pour votre sécurité, vous devez suivre; pRéCAUTIONS DE SéCURITé DE BASE
LISEZ TOUTES LES DIRECTIVES AVANT D’UTILISER L’APPAREIL w AVERTISSEMENT Pour votre sécurité, vous devez suivre l’information contenue dans ce manuel afi n de réduire les risques d’incendie et d’explosion, de choc électrique, ainsi que pour éviter les dommages matériels, les blessures corporelles, ou...
Page 95 - INSTRUCTIONS DE MISE À LA TERRE; Installezetentreposezlasécheuseàunendroitoùelle
LISEZ TOUTES LES DIRECTIVES AVANT D’UTILISER L’APPAREIL INSTRUCTIONS DE MISE À LA TERRE pRéCAUTIONS DE SéCURITé pOUR L’INSTALLATION w AVERTISSEMENT : Afin de réduire les risques d’incendie, de choc électrique, ou les blessures corporelles lorsque vous utilisez des électroménagers, vous devez toujour...
Page 96 - pRéCAUTIONS DE SéCURITé pOUR L’INSTALLATION; CONSIGNE DE SECURITE pOUR LES FONCTIONS VApEUR
w AVERTISSEMENT : Afin de réduire les risques d’incendie, de choc électrique, ou les blessures corporelles lorsque vous utilisez des électroménagers, vous devez toujours suivre les précautions de base, y compris ce qui suit : pRéCAUTIONS DE SéCURITé pOUR L’INSTALLATION Système d’évacuation d’air/Con...
Page 97 - CONSERVEZ CES DIRECTIVES
INSTRUCTIONS DE SéCURITé pOUR LA RACCORDEMENT À L’éLECTRICITé • Ne coupez et ne retirez dans aucun cas la broche de mise à la terre du cordon d’alimentation. Branchez le cordon d’alimentation électrique dans une prise bien mise à la terre pour éviter des blessures corporelles ou des dommages à la sé...
Page 98 - CARACTÉRISTIQUES SPÉCIALES
1 PANNEAU DE COMMANDE CONVIVIAL Faites pivoter le bouton sélecteur de cycle au cycle désiré. Ajoutez des options ou ajustez les paramètres de cycles au moyen d’une simple touche. 2 3 PORTE RÉVERSIBLE À ACCÈS FACILE Une porte à grande ouverture facilite l’accès au chargement et déchargement de l’appa...
Page 99 - Accessoires compris; COMpOSANTES ET pIÈCES pRINCIpALES; Dos de la sécheuse; pIEDS DE NIVELLEMENT; GRILLE DE SéCHAGE
Accessoires compris Grille de séchage 3 COMpOSANTES ET pIÈCES pRINCIpALES 1 Porte d’accès au bloc de jonction (modèles électriques) Dos de la sécheuse Emplacement du raccord à la canalisation de gaz (modèles à gaz) Sortie du conduit d’évacuation d’air pIEDS DE NIVELLEMENT Quatre pieds de nivellement...
Page 101 - Dimensions requises pour installation; piédestal; ACCESSOIRES EN OpTION
INSTALLATIONS AVEC pIéDESTAL OU TROUSSE D’EMpILAGE EN OpTION IMPORTANT: Si vous installez la sécheuse avec le piédestal ou la trousse d’empilage en option, consultez la section Accessoires en option dans ce manuel ou la section des directives relatives à votre piédestal ou à votre trousse d’empilage...
Page 102 - MISE À NIVEAU DE LA SéCHEUSE; INVERSION DE L’OSCILLATION DE LA pORTE
Ouvrez la porte de la sécheuse. Avec un tournevis cruciforme (Phillips), dévissez les 2 vis qui retiennent la charnière de la porte au coffrage de l’appareil. Dévissez les 4 vis du côté du loquet de la porte sur le coffrage et retirez le loquet. 1 Tournez la porte de sorte que la charnière soit inve...
Page 103 - OpTION 1 : Sortie d’air latérale
MODIFICATION DE L’EMpLACEMENT DE LA SORTIE D’AIR Votre nouvelle sécheuse est livrée avec une sortie d’air arrière. Il est possible d’en modifier la position pour obtenir une sortie d’air sous l’appareil ou sur le côté (la sortie d’air sur le côté droit n’est pas offerte sur les modèles à gaz). Une t...
Page 104 - VENTILATION DE LA SéCHEUSE; L’airdessécheusesàgazDOITêtreevacué
VENTILATION DE LA SéCHEUSE • N’écrasez pas et ne laissez pas le système de conduits s’affaisser. Tout non-respect de ces instructions peut entraîner un incendie ou la mort. • Ne laissez pas le système de conduits reposer contre ou toucher des objets tranchants. Tout non-respect de ces instructions p...
Page 105 - Acheminement et raccord du système; doit; Système d’évacuation d’air
Ventilation correcte Ventilation incorrecte Acheminement et raccord du système d’évacuation d’air Suivez les lignes directrices ci-dessous pour optimiser le rendement de l’appareil et réduire l’accumulation de charpies et de condensation dans les conduits. REMARQUE : Les conduits et raccords NE sont...
Page 106 - RACCORDEMENT DES SéChEuSES à GAz; Tension et fréquences exigés uniquement pour les modèles à gaz
106 RACCORDEMENT DES SéChEuSES à GAz • Alimentation en gaz requis : La sécheuse est expédiée de l’usine prête pour l’utilisation de gaz naturel. Elle peut être convertie pour une utilisation avec du gaz de PL (propane liquide). La pression du gaz ne doit pas dépasser 13 po (33 cm) de colonne d’eau. ...
Page 107 - Raccordement de l’alimentation en gaz; Installations en haute altitude; Branchement électrique; RACCORDEMENT DES SéCHEUSES À GAz
• L’installation et l’entretien doivent être effectués par un installateur qualifié, une agence de service, ou le fournisseur de gaz. Tout non- respect de ces instructions peut entraîner un incendie, une explosion, ou la mort. • Utilisez uniquement un tuyau flexible neuf en acier inoxydable et un no...
Page 108 - RACCORDEMENT DES SéCHEUSES éLECTRIQUES; ÊTREÀLATENSIONNOMINALEMAXIMALE
108 Tension et fréquences exigés uniquement pour les modèles électriques Exigences électriques particulières pour les maisons mobiles ou préfabriquées RACCORDEMENT DES SéCHEUSES éLECTRIQUES w AVERTISSEMENT : Pour aider à empêcher des incendies, des électrocutions, des blessures graves, ou des décès,...
Page 109 - MODÈLESÀGAZ; Vérification du débit d’air; VéRIFICATION FINALE DE L’INSTALLATION; EXIGENCES pARTICULIÈRES pOUR LES MAISONS MOBILES OU
Essai du module de chauffage de la sécheuse MODÈLESÀGAZ Fermez la porte de la sécheuse, appuyez sur le bouton de ON/OFF (mise en marche/arrêt) pour démarrer l’appareil réglé à un cycle de séchage à la chaleur. Au démarrage de la sécheuse, le dispositif d’allumage devrait enflammer le brûleur princip...
Page 110 - éVALUATION DE L’éTAT DU CONDUIT D’éVACUATION; Circulation d’air; Pour mettre en marche le cycle de test du conduit
éVALUATION DE L’éTAT DU CONDUIT D’éVACUATION Circulation d’air correcte Circulation d’air bloquée Éviter les longs tuyaux ou les tuyaux comportant plusieurs coudes. Vérifier l’existence de blocages et d’accumulation de charpie. S’assurer que le conduit d’évacuation n’est pas écrasé. Votre sécheuse e...
Page 111 - CHARGEMENT DE LA SéCHEUSE; TRIAGE DES BRASSéES; VéRIFICATION DU FILTRE À CHARpIE AVANT TOUT LA BRASSéE
CHARGEMENT DE LA SéCHEUSE Séchage par culbutage Sec Pressage permanent/ infroissable Cycle doux/ délicat Ne pas sécher par culbutage Ne pas sécher (action mentionnée conjointement avec « ne pas laver ») Normal TRIAGE DES BRASSéES étiquettes d’entretien des tissus La plupart des vêtements possèdent d...
Page 112 - CARACTéRISTIQUES DU pANNEAU DE COMMANDE; Avertissement important : Pour réduire le
CARACTéRISTIQUES DU pANNEAU DE COMMANDE Voici les instructions de mise en marche et d’utilisation de votre sécheuse. Veuillez consulter des sections particulières de ce manuel pour de plus amples informations. Avertissement important : Pour réduire le risque d’incendie, d’électrocution, ou de blessu...
Page 113 - GUIDE DE CYCLE
GUIDE DE CYCLE Le guide de cycle ci-dessous illustre les options et les types de tissus recommandés pour chaque cycle. REMARQUE : Pour protéger vos vêtements, les différentes options de niveau de séchage, température, ou autres ne sont pas toutes disponibles avec chacun des cycles. CYCLES SéCHAGE Á ...
Page 114 - AFFICHEUR
AFFICHEUR L’affi cheur ACL illustre les réglages, le temps restant estimé, les options et les messages d’état de votre sécheuse. Lorsque la sécheuse est en marche, l’affi cheur s’illuminera. TEMPS RESTANT ENVIRON (ESTIMATED TIME REMAINING) Lorsque le bouton MARCHE/PAUSE (START/ PAUSE) est enfonce, l...
Page 115 - FONCTIONNEMENT DE LA SÉCHEUSE
FONCTIONNEMENT DE LA SÉCHEUSE Appuyez sur le bouton MARCHE/ÉTEINT (ON/OFF) pour mettre en marche la secheuse. Les lumieres autour du bouton selecteur de cycle s’allumeront. Tournez le bouton selecteur au cycle desire. L’afficheur montrera les parametres preprograme NIVEAU DE SÉCHAGE (DRY LEVEL), LA ...
Page 116 - Pour ajouter des options de cycles; BOUTON DE OPTIONS DE CYCLE; CONTRÓLE DE TEMPÉRATURE
Pour ajouter des options de cycles à un cycle : Mettez en marche la sécheuse et tournez le bouton sélecteur de cycle au cycle désiré. Utilisez les boutons de réglage de cycle pour ajuster les paramètres de ce cycle. Appuyez sur le ou les boutons d'options de cycles afin de sélectionner les paramètre...
Page 117 - FONCTIONS SpéCIALES; VERROUILLAGE pOUR ENFANTS; Installation de la grille de séchage
FONCTIONS SpéCIALES Les boutons d’options activent egalement des fonctions speciales comme BIP SÉCHAGE HUMIDE (DAMP DRY BEEP), VERROUILLAGE POUR ENFANTS (CHILD LOCK), SÉCHAGE SUR PANIER (RACK DRY). Appuyez et maintenez enfonce le bouton d’option marque de la fonction speciale pendant 3 secondes pour...
Page 118 - Sauvegarde d’un programme Spécial :; AUTRES FONCTIONS; FONCTIONS DE VApEUR; Remplissage de l’alimentation de vapeur; IMPORTANTESREMARQUESSURLESCYCLESVAPEUR:
pROGRAMME SpéCIAL (CUSTOM pROGRAM) Si vous utilisez une combinaison particuliere de parametres que vous utilisez frequemment, il est possible de les sauvegarder en tant que PROGRAMME SPÉCIAL (CUSTOM PROGRAM). * Sauvegarde d’un programme Spécial : 1 2 3 4 * Rappel d’un programme Spécial : Mettez la s...
Page 119 - Le Cycle STEAM FRESH; Ajout de VApEUR à un Cycle Standard :; Utilisation des Options Vapeur :; Utilisation du cycle STEAM SANITARY
FONCTIONS DE VApEUR (suite) La nouvelle technologie a vapeur de LG vous permet d’envoyer un jet de vapeur tourbillonnante dans les tissus dans le but de rafraichir les vetements, reduire l’electricite statique et faciliter le repassage. Selectionnez simplement le cycle RAFRAICHVAPEUR MC (STEAM FRESH...
Page 120 - GUIDE DU CYCLE VAPEUR; FONCTIONS DE VAPEUR; IMPORTANTES REMARQUES SUR LES CYCLES VAPEUR :; excepté
GUIDE DU CYCLE VAPEUR • La vapeur n’est pas visible pendant les Cycles Vapeur. C’est normal. • Ne pas utiliser STEAM FRESH MC sur les articles suivants : les lainages, les couvertures, les vestes en cuir, la soie, les vêtements humides, les produits en mousse ou les couvertures chauffantes. • Pour d...
Page 121 - Nettoyage de l’extérieur; NETTOYAGE RéGULIER; Nettoyage de l’intérieur; Nettoyage autour et sous la sécheuse; nettoyer votre sécheuse.
IMPORTANTESREMARQUESSURLESCYCLESVAPEUR: 121 Nettoyage de l’extérieur Un entretien adéquat de votre sécheuse peut prolonger sa durée de vie utile. L’extérieur de la machine peut être nettoyé à l’eau chaude, avec un détergent ménager doux et non abrasif.Essuyez immédiatement tout déversement à l’aide ...
Page 122 - AVANT D’AppELER LE SERVICE
problèmes Causes possibles Solutions Sécheuse ne chauffe pas • Un fusible de maison a grillé, un disjoncteur s’est déclenché, ou il y a une panne de courant. • Alimentation en gaz fermé ou service coupé (uniquement pour les modèles à gaz). • Réinitialisez le disjoncteur ou remplacez le fusible. N’au...
Page 123 - problème
AVANT D’AppELER LE SERVICE (suite) problème Causes possibles Solutions Le temps de séchage n’est pas constant • Les paramètres de séchage, la taille de la brassée, et le taux d’humidité des vêtements ne sont pas constants. • Le temps de séchage d’une charge varie selon le paramètre de chaleur, le ty...
Page 126 - Piédestal; Trousse d’empilage; Trousse
piédestal Donnez à votre machine à laver et sécheuse LG un coup de pouce grâce aux piédestaux de 14 po. Ils offrent un tiroir de rangement pour une commodité accrue. Piédestal de 14 po Couleur WDP3W Blanc WDP3V Acier de Graphite WDP3R WDP3N WDP3S Trousse d’empilage Si l’espace est restreint, utilise...
Page 127 - INSTALLATION DU pIéDESTAL; Outils requis pour l’installation :; Le piédestal accessoire comprend :
w AVERTISSEMENT • Une installation incorrecte peut entraîner des accidents graves. • Les appareils électroménagers sont lourds. Deux personnes ou plus sont nécessaires à une installation sécuritaire du piédestal. Tout non-respect de ces instructions peut entraîner des blessures du dos ou d’autres bl...
Page 128 - INSTALLATION DU PIÉDESTAL
3 4 Positionnez la sécheuse sur le piédestal. Assurez-vous que les pieds à l’avant et à l’arrière de la machine se logeront en les positions correctes. Les pieds de la sécheuse se logeront dans les positions les plus intérieures tel qu’illustré. 5 Desserrez les contre-écrous des quatre pieds de nive...
Page 129 - La trousse d’empilage comprend :; INSTALLATION DE LA TROUSSE D’EMpILAGE
w AVERTISSEMENT • Une installation incorrecte peut entraîner des accidents graves. • Le poids de la sécheuse et la hauteur de l’installation rendent la procédure d’empilage trop risquée pour une personne seule. Deux personnes ou plus sont nécessaires à une installation sécuritaire de la trousse d’em...
Page 130 - SpéCIFICATIONS ET DIMENSIONS pRINCIpALES
SpéCIFICATIONS ET DIMENSIONS pRINCIpALES ModèlesdesécheuseDLEX2501W,DLEX2501R,DLEX2501S,DLEX2501V DLGX2502W,DLGX2502R,DLGX2502S,DLGX2502V Description Sécheuse de vapeur Tension et Voyez la plaque signalétique pour les informations detaillés. fréquence exigées* Alimentation en gaz* GN : 4-10.5 po CE....
Page 131 - GARANTIE LIMITÉE DE LA SÉCHEUSE LG - Canada; Pour obtenir tous les détails sur la garantie et; Sécheuse
131 • Les produits et pièces de remplacement sont garantis pour la portion restante de la période de garantie originale ou quatre-vingt-dix (90) jours, selon la période la plus longue. • Les produits et pièces de remplacement peuvent être neufs ou remanufacturés. • Le centre de service autorisé LG g...