Page 2 - ENGLISH; IMPORTANT SAFETY INSTRUCTIONS; WARNING; Wash hands after handling.
ENGLISH 2 IMPORTANT SAFETY INSTRUCTIONS y y Do not use this apparatus near water. Short-circuit Breaker Power Supply y y Clean only with a dry cloth. Short-circuit Breaker Power Supply y y Do not block any ventilation openings. Install in accordance with the manufacturer’s instructions. Short-circui...
Page 4 - Warning; Grounding
ENGLISH 4 IMPORTANT SAFETY INSTRUCTIONS y y Warning - To reduce the risk of fire or electrical shock, do not expose this product to rain, moisture or other liquids. Do not touch the TV with wet hands. Do not install this product near flammable objects such as gasoline or candles, or expose the TV to...
Page 5 - Cleaning; Dot Defect
ENGLISH 5 IMPORTANT SAFETY INSTRUCTIONS y y Cleaning When cleaning, unplug the power cord and wipe gently with a soft cloth to prevent scratching. Do not spray water or other liquids directly on the TV as electric shock may occur. Do not clean with chemicals such as alcohol, thinners or benzine. y y...
Page 6 - For USA and Canada
ENGLISH 6 IMPORTANT SAFETY INSTRUCTIONS DISPOSAL (Hg lamp only used in LCD TVs) The fluorescent lamp used in this product contains a small amount of mercury. Do not dispose of this product with general household waste. Disposal of this product must be carried out in accordance to the regulations of ...
Page 7 - Viewing 3D Imaging
ENGLISH 7 IMPORTANT SAFETY INSTRUCTIONS Viewing 3D Imaging WARNING Viewing Environment y y Viewing Time- When watching 3D contents, take 5 - 15 minute breaks every hour. Viewing 3D contents for a long period of time may cause headache, dizziness, fatigue or eye strain. Those that have a photosensiti...
Page 8 - CAUTION
ENGLISH 8 IMPORTANT SAFETY INSTRUCTIONS CAUTION Viewing Environment y y Viewing Distance- Maintain a distance of at least twice the screen diagonal length when watching 3D contents. If you feel discomfort in viewing 3D contents, move further away from the TV. Viewing Age y y Infants / Children- Usag...
Page 9 - LICENSES
ENGLISH 9 LICENSES / OPEN SOURCE SOFTWARE NOTICE LICENSES Supported licenses may differ by model. For more information about licenses, visit www.lg.com. Manufactured under license from Dolby Laboratories. “Dolby” and the double-D symbol are trademarks of Dolby Laboratories. HDMI, the HDMI logo and H...
Page 10 - TABLE OF CONTENTS; NOTE
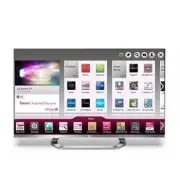
ENGLISH 10 TABLE OF CONTENTS TABLE OF CONTENTS y y Image shown may differ from your TV. y y Your TV’s OSD (On Screen Display) may differ slightly from that shown in this manual. y y The available menus and options may differ from the input source or product model that you are using. y y New features...
Page 11 - INSTALLATION PROCEdURE; ASSEMBLING ANd PREPARING; Unpacking
ENGLISH 11 ASSEMBLING AND PREPARING INSTALLATION PROCEdURE 1 Open the package and make sure all the accessories are included. 2 Attach the stand to the TV set. 3 Connect an external device to the TV set. 4 Make sure the network connection is available. You can use the TV network functions only when ...
Page 13 - Optional Extras
ENGLISH 13 ASSEMBLING AND PREPARING Optional Extras Optional extras can be changed or modified for quality improvement without any notification.Contact your dealer for buying these items.These devices only work with certain models. AN-MR300 Magic remote control AG-F2**, AG-F3** Cinema 3D glasses The...
Page 14 - Parts and buttons
ENGLISH 14 ASSEMBLING AND PREPARING Parts and buttons Button Description / (^ / v) Scrolls through the saved channels. / (+ / -) Adjusts the volume level. (OK ⊙ ) Selects the highlighted menu option or confirms an input. (SETTINGS) Accesses the main menus, or saves your input and exits the menus. (I...
Page 15 - Lifting and moving the TV
ENGLISH 15 ASSEMBLING AND PREPARING Lifting and moving the TV When moving or lifting the TV, read the following to prevent the TV from being scratched or damaged and for safe transportation regardless of its type and size. y y Avoid touching the screen at all times, as this may result in damage to t...
Page 16 - Setting up the TV; Attaching the stand
ENGLISH 16 ASSEMBLING AND PREPARING y y When attaching the stand to the TV set, place the screen facing down on a cushioned table or flat surface to protect the screen from scratches. CAUTION 2 Setting up the TV Put your TV on a pedestal stand and mount the TV on a table or wall. Attaching the stand...
Page 18 - Mounting on a table
ENGLISH 18 ASSEMBLING AND PREPARING Mounting on a table 1 Lift and tilt the TV into its upright position on a table. - Leave a 10 cm (4 inch) (minimum) space from the wall for proper ventilation. 10 cm 10 cm 10 cm 10 cm (4 inches) 2 Connect the power cord to a wall outlet. y y Do not place the TV ne...
Page 19 - Tidying cables; Cable management clip
ENGLISH 19 ASSEMBLING AND PREPARING Securing the TV to a wall (optional) 1 Insert and tighten the eye-bolts, or TV brackets and bolts on the back of the TV. - If there are bolts inserted at the eye-bolts position, remove the bolts first. 2 Mount the wall brackets with the bolts to the wall. Match th...
Page 20 - Mounting on a wall
ENGLISH 20 ASSEMBLING AND PREPARING Mounting on a wall Attach an optional wall mount bracket at the rear of the TV carefully and install the wall mount bracket on a solid wall perpendicular to the floor. When you attach the TV to other building materials, please contact qualified personnel.We recomm...
Page 21 - MAKING CONNECTIONS; Connecting to an antenna or cable; Copper wire
ENGLISH 21 MAKING CONNECTIONS MAKING CONNECTIONS Connect various external devices to the TV and switch input modes to select an external device. For more information of external device’s connection, refer to the manual provided with each device. Available external devices are: HD receivers, DVD play...
Page 22 - Connecting to a HD receiver, DVD, or VCR player; HDMI Connection; HDMI is the best way to connect a device.
ENGLISH 22 MAKING CONNECTIONS Connecting to a HD receiver, DVD, or VCR player Connect a HD receiver, DVD, or VCR player to the TV and select an appropriate input mode. HDMI Connection HDMI is the best way to connect a device. Transmits the digital video and audio signals from an external device to t...
Page 23 - DVI to HDMI Connection
ENGLISH 23 MAKING CONNECTIONS DVI to HDMI Connection Transmits the digital video signal from an external device to the TV. Connect the external device and the TV with the DVI-HDMI cable as shown in the following illustration. To transmit an audio signal, connect an audio cable. (RGB/HDMI-PC) AUDIO (...
Page 24 - Connecting to a mobile phone; Mobile phone
ENGLISH 24 MAKING CONNECTIONS Connecting to a mobile phone Mobile High-definition Link (MHL) is an interface for transmitting digital audiovisual signals from mobile phones to television sets. y y Connect the mobile phone to the HDMI/DVI IN 4 (MHL) port to view the phone screen on the TV. y y This o...
Page 25 - Component Connection; IN
ENGLISH 25 MAKING CONNECTIONS Component Connection Transmits analog video and audio signals from an external device to the TV. Connect the external device and the TV with a component cable as shown in the following illustration. y y If cables are installed incorrectly, it could case the image to dis...
Page 26 - Composite Connection
ENGLISH 26 MAKING CONNECTIONS Composite Connection Transmits analog video and audio signals from an external device to the TV. Connect the external device and the TV with the composite cable as shown in the following illustration. y y If you have a mono VCR, connect the audio cable from the VCR to t...
Page 27 - Connecting to a PC; HDMI Connection, DVI to HDMI Connection or RGB Connection; Method A: HdMI Connection; PC
ENGLISH 27 MAKING CONNECTIONS Connecting to a PC y y It is recommended to use the HDMI connection for the best image quality. y y Depending on the graphics card, DOS mode video may not work if a HDMI to DVI Cable is in use. y y In PC mode, there may be noise associated with the resolution, vertical ...
Page 28 - Method B: dVI to HdMI Connection; Method C: RGB Connection
ENGLISH 28 MAKING CONNECTIONS Method B: dVI to HdMI Connection (RGB/HDMI-PC) AUDIO (RGB/DVI) AUDIO 2 3 1 (ARC) 4 (MHL) / DVI IN AUDIO OUT DVI OUT (*Not Provided) (*Not Provided) PC Method C: RGB Connection RGB OUT (PC) AUDIO OUT (PC) RGB (RGB/HDMI-PC) AUDIO (PC) RGB (RGB/DVI) AUDIO (*N ot P ro vided...
Page 29 - Connecting to an Audio System; Digital Optical Audio Connection; Digital Audio System
ENGLISH 29 MAKING CONNECTIONS Connecting to an Audio System You may use an optional external audio system instead of the built-in speaker. y y If you use an optional external audio device instead of the built-in speaker, set the TV speaker feature to off. NOTE Digital Optical Audio Connection Transm...
Page 30 - Connecting to a USB; US; USB IN; USB
ENGLISH 30 MAKING CONNECTIONS Connecting to a USB Connect a USB storage device such as a USB flash memory, external hard drive, or a USB memory card reader to the TV and access the Smart Share menu to use various multimedia files. y y To use a HDD device, make sure that it is connected to the USB IN...
Page 31 - REMOTE CONTROL; Magic Remote Control Functions
ENGLISH 31 REMOTE CONTROL REMOTE CONTROL Magic Remote Control Functions When the message “Magic remote control battery is low. Change the battery.” is displayed, replace the battery. To replace batteries, open the battery cover, replace batteries (1.5 V AA) matching and ends to the label inside the ...
Page 32 - Registering Magic Remote Control; How to use Magic Remote Control
ENGLISH 32 REMOTE CONTROL Registering Magic Remote Control The Magic Remote Control operates by pairing with your TV. Once you purchased the TV, please register the Magic remote control as follows; How to register the Magic Remote Control (Wheel) To register automatically, turn the TV on and press t...
Page 33 - WATCHING TV; Turning the TV on for the first
ENGLISH 33 WATCHING TV WATCHING TV Turning the TV on for the first time When you turn the TV on for the first time, the Initial setting screen appears. Select a language and customize the basic settings. 1 Connect the power cord to a power outlet. 2 In Standby mode, press the power button on the rem...
Page 34 - User Guide; USING THE USER GUIdE
ENGLISH 34 USING THE USER GUIDE User Guide allows you to more easily access the detailed TV information. 1 Press HOME button to access the HOME menu. 2 Select User Guide and press the Wheel (OK) . User Guide User Guide CHANNEL Setting PICTURE, SOUND Setting OPTION LG SMART Function Advabced Functi...
Page 35 - SPECIFICATIONS
ENGLISH 35 SPECIFICATIONS SPECIFICATIONS Product specifications may be changed without prior notice due to upgrade of product functions. Power requirement USA, Canada, Mexico: AC 120 V ~ 50 / 60 Hz Other Country: AC 100 - 240 V ~ 50 / 60 Hz Television System NTSC-M, ATSC, 64 & 256 QAM Program Co...
Page 39 - MAINTENANCE; Cleaning Your TV; Power cord; TROUBLESHOOTING
ENGLISH 39 MAINTENANCE & TROUBLESHOOTING MAINTENANCE Cleaning Your TV Clean your TV regularly to keep the best performance and to extend the product lifespan. y y Make sure to turn the power off and disconnect the power cord and all other cables first. y y When the TV is left unattended or unuse...
Page 43 - Congratulations on your purchase! As you enjoy your new product,; THE ISSUE
CHILD SAFETY: It Makes A Difference How and Where You Use Your Flat Panel Display Congratulations on your purchase! As you enjoy your new product, please keep these safety tips in mind: THE ISSUE y The home theater entertainment experience is a growing trend and larger flat panel displays are popula...
Page 44 - LG Customer Information Center; Register your product Online!; The model and serial number of the TV is located
LG Customer Information Center For inquires or comments, visit www.lg.com or call; 1-800-243-0000 USA, Consumer User 1-888-865-3026 USA, Commercial User 1-888-542-2623 CANADA Register your product Online! www.lg.com The model and serial number of the TV is located on the back and one side of the TV....