LEVOIT HEAPHULVSUS0030 - User Manual
LEVOIT HEAPHULVSUS0030 Humidifier – User Manual, read for free online in PDF format. We hope this helps you resolve any issues you may have. If you have further questions, please contact us through the contact form.


Table of Contents:
- Page 3 – S A F E T Y I N F O R M A T I O N; General Safety; Customer Support; Caution: Risk of Leaks and; R E A D A N D S AV E T H E S E
- Page 4 – handle the power cord or; do not; use; Do not; bypass
- Page 5 – G E T T I N G T O K N O W Y O U R S M A R T H U M I D I F I E R; Back
- Page 6 – G E T T I N G S T A R T E D; Remove all packaging.
- Page 7 – CAUTION; fill with hot
- Page 8 – or Google Play Store.; V E S Y N C A P P S E T U P; Log In
- Page 9 – U S I N G Y O U R S M A R T H U M I D I F I E R; Plug in the humidifier.
- Page 10 – Button
- Page 11 – Remote Control; VeSync App Functions
- Page 12 – Important Tips; Never; pour water directly into the; Only; add water to the
- Page 13 – Place the aroma box into the humidifier.
- Page 14 – C A R E & M A I N T E N A N C E; Cleaning; Unplug the humidifier.
- Page 15 – To descale the humidifier:
- Page 17 – Cleaning the Aroma Pad
- Page 19 – Humidifier doesn’t turn on.; T R O U B L E S H O O T I N G
- Page 20 – If your problem is not listed,; Problem; Make sure the water tank is properly in place (see; Getting; Set mist level to a lower setting.; Clean the humidifier (see; Place the water tank properly on the base.
- Page 21 – V E S Y N C A P P T R O U B L E S H O O T I N G; My humidifier is offline.; Delete
- Page 23 – W A R R A N T Y I N F O R M A T I O N
- Page 24 – C U S T O M E R S U P P O R T; Arovast Corporation; Support Hours; A T T R I B U T I O N S
- Page 25 – N O T E S
- Page 27 – Connect with us @LevoitLifestyle
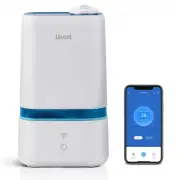
Smart Ultrasonic Cool Mist Humidifier
Model:
Classic 200S
Questions or Concerns?
Please contact us Mon–Fri, 9:00 am–5:00 pm PST/PDT
at
or at
(888) 726-8520
.
U S E R M A N U A L
"Loading the manual" means you need to wait until the file loads and becomes available for online reading. Some manuals are very large, and the time they take to appear depends on your internet speed.
Summary
3 S A F E T Y I N F O R M A T I O N • Only use the humidifier as described in this manual. • Place the humidifier and cord so that it will not be knocked over. Do not place near large pieces of furniture or in high-traffic areas. • When not in use, turn the humidifier off and disconnect from power b...
4 Plug & Cord • Ensure that the plug fits properly into a polarized socket. • Do not handle the power cord or plug with wet hands. Keep the plug and power cord away from liquids. • Your humidifier has a polarized plug (one prong is wider than the other), which fits into a polarized outlet only o...
5 G E T T I N G T O K N O W Y O U R S M A R T H U M I D I F I E R A. Nozzles B. Nozzle Cover C. Water Tank Handle D. Mist Outlet E. Water Tank F. Cleaning Brush G. Cleaning Brush Storage H. Base I. WiFi ® Button J. Control Button K. Insulation Ring L. Transducer M. Float Housing N. Float O. Mist Tub...