Kucht KRH3620A - User Manual
Kucht KRH3620A Range Hood – User Manual, read for free online in PDF format. We hope this helps you resolve any issues you may have. If you have further questions, please contact us through the contact form.


Table of Contents:
- Page 2 – FOR MORE DETAILS AND INFORMATION, PLEASE VISIT OUR WEBSITE; INSTALLATION GUIDE AND USER MANUAL; Safety Notice
- Page 3 – Warning
- Page 4 – Operative Mode; Electrical requirements and installation requirements; Power Requirements; neutral circuit or circuit ground.
- Page 5 – Before installing the hood; Examples and positioning possibilities ducts
- Page 7 – joist or stud, you must build a support
- Page 8 – Clearance Training; hood to the surface of the cooktop is Max 30”/ Min 27”(as figure showing)
- Page 9 – Installation; Ceiling pipe
- Page 10 – indicating the height of the bottom of the; Necessary Tools
- Page 11 – 3 Series range hood; Walled mounted fixed plated
- Page 13 – Installation dimension figure of 04 series range hood as below:
- Page 14 – 4 series range hood
- Page 16 – 1 series, 02 series range hood
- Page 18 – 5 series 48-inch range hood
- Page 20 – 6 Series 48 inch range hood
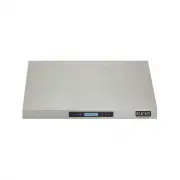
- Page 23 – Automatic activation control function of the sensor:; A0 button: Remote control signal lamp; Open The Fan; Keep your hood working during the cooking, and keep ventilating.; Control Panel Layout and Button Disposition
- Page 24 – Off immediately
- Page 25 – automatically but does not blink.; MAINTENANCE; WARNING; prominent warning device, such as a brightly colored label.; Grease filters; soap or dish detergent.
- Page 26 – while working to ensure no dust hood.; To avoid when choosing a detergent; Shut off the power
RANGE HOOD
www.kucht.com
INSTALLATION GUIDE AND USER MANUAL
BE A
PRO
IN YOUR KITCHEN
APPLICABLE MODEL: KRH3001U, KRH3601U, KRH4801U, KRH3002U, KRH3602U,
KRH4802U, KRH3003U, KRH3603U, KRH3004U, KRH3604U,
KRH3005U, KRH3605U, KRH4805U.
"Loading the manual" means you need to wait until the file loads and becomes available for online reading. Some manuals are very large, and the time they take to appear depends on your internet speed.
Summary
FOR MORE DETAILS AND INFORMATION, PLEASE VISIT OUR WEBSITE WWW.KUCHT.COM INSTALLATION GUIDE AND USER MANUAL Safety Notice Models approved for residential use only. Please read these instructions completely before starting. The installation of the appliance must respect all codes. Important: Save the...
FOR MORE DETAILS AND INFORMATION, PLEASE VISIT OUR WEBSITE WWW.KUCHT.COM INSTALLATION GUIDE AND USER MANUAL 6. When cutting or drilling into wall or ceiling, be sure not to damage electrical wiring or other access to public service. 7. Always evacuate outside the conduit system. To reduce the risk o...
FOR MORE DETAILS AND INFORMATION, PLEASE VISIT OUR WEBSITE WWW.KUCHT.COM INSTALLATION GUIDE AND USER MANUAL Operative Mode Always leave safety grills and filters in place. Without the presence of these blowers hair, fingers or clothing could catch. The manufacturer is not liable if the suggested ste...