Korting OKB 552 CFX - User Manual
Korting OKB 552 CFX Oven – User Manual, read for free online in PDF format. We hope this helps you resolve any issues you may have. If you have further questions, please contact us through the contact form.

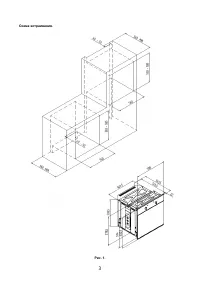
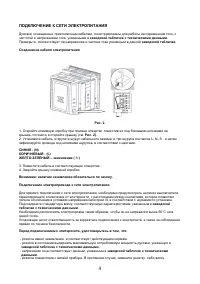
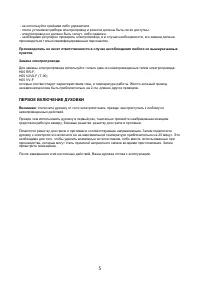
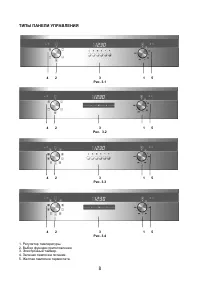
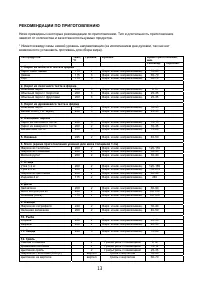
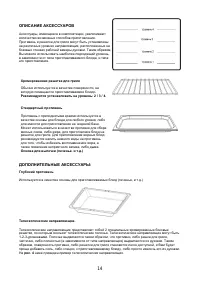

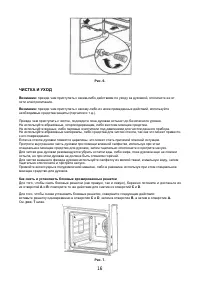
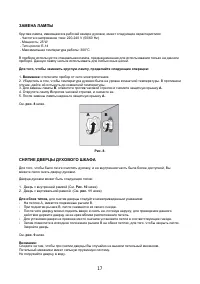

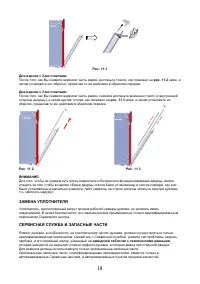
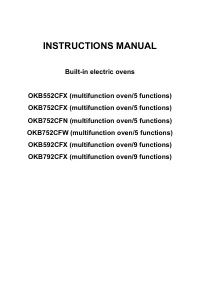


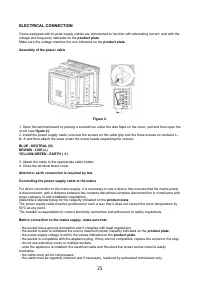

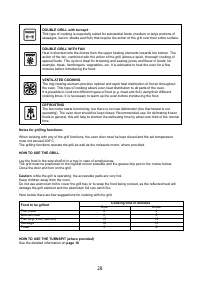
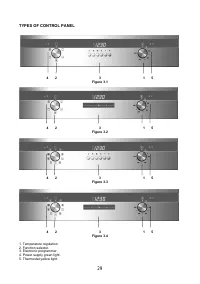

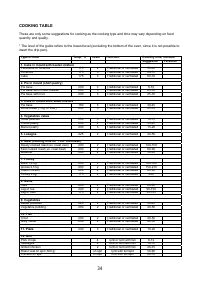
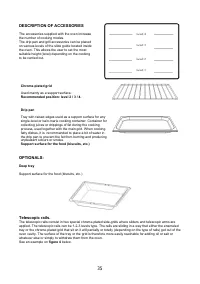
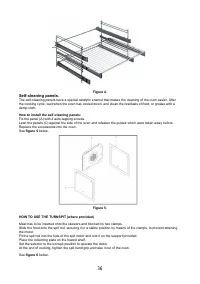
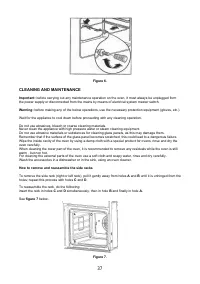
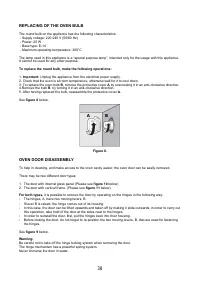
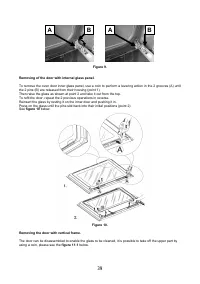


Table of Contents:
- Page 10 – Рис
- Page 19 – A B
- Page 22 – УТИЛИЗАЦИЯ; Упаковка
- Page 23 – INSTRUCTIONS MANUAL; Built-in electric ovens
- Page 25 – TECHNICAL CHARACRETISTICS
- Page 27 – ELECTRICAL CONNECTION
- Page 28 – BEFORE USING THE OVEN FOR THE FIRST TIME; Attention
- Page 29 – COOKING FUNCTIONS; MULTIFUNCTION OVEN 5 functions + OFF
- Page 32 – DESCRIPTION OF TYPES OF COOKING PROGRAMMERS
- Page 36 – COOKING TABLE
- Page 37 – DESCRIPTION OF ACCESSORIES; figure 4
- Page 40 – REPLACING OF THE OVEN BULB; To replace the round bulb, make the following operations:
- Page 41 – Removing the door with vertical frame.
- Page 42 – Figure
- Page 43 – DISPOSAL
РУКОВОДСТВО
ПО
ЭКСПЛУАТАЦИИ
Встраиваемые
электрические
духовые
шкафы
OKB552CFX (
многофункциональный
/5
функций
)
OKB752CFX (
многофункциональный
/5
функций
)
OKB752CFN (
многофункциональный
/5
функций
)
OKB752CFW (
многофункциональный
/5
функций
)
OKB592CFX (
многофункциональный
/9
функций
)
OKB792CFX (
многофункциональный
/9
функций
)
"Loading the manual" means you need to wait until the file loads and becomes available for online reading. Some manuals are very large, and the time they take to appear depends on your internet speed.
Summary
ТИПЫ ПАНЕЛИ УПРАВЛЕНИЯ 4 2 3 1 5 Рис . 3.1 4 2 3 1 5 Рис . 3.2 4 2 3 1 5 Рис . 3.3 4 2 3 1 5 Рис . 3.4 1. Регулятор температуры . 2. Выбор функции приготовления . 3. Электронный таймер . 4. Зеленая лампочка питания . 5. Желтая лампочка термостата . 8
ЗАМЕНА ЛАМПЫ Круглая лампа , имеющаяся в рабочей камере духовки , имеет следующие характеристики : - Частота и напряжение тока : 220-240 V (50/60 Hz) - Мощность : 25 W - Тип цоколя : E-14 - Максимальная температура работы : 300°C В приборе используется специальная лампа , предназначенная для использ...
УТИЛИЗАЦИЯ Упаковка . Элементы упаковки ( картон , полистирол , полиэтиленовый пакет ) должны быть утилизированы в соответствии с местными правилами по охране окружающей среды . Обратитесь в специальный центр по сбору данного типа отходов . Духовка . Отключите духовку от сети электропитания , либо е...