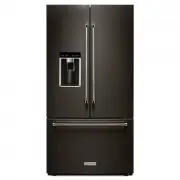
KitchenAid KRFC704FBS - User Manual
KitchenAid KRFC704FBS Refrigerator – User Manual, read for free online in PDF format. We hope this helps you resolve any issues you may have. If you have further questions, please contact us through the contact form.


Table of Contents:
- Page 2 – TABLE OF CONTENTS/TABLE DES MATIÈRES/ÍNDICE
- Page 3 – Your safety and the safety of others are very important.; DANGER; REFRIGERATOR SAFETY; IMPORTANT SAFETY INSTRUCTIONS
- Page 4 – PARTS AND FEATURES; Proper Disposal of; WARNING
- Page 5 – What’s New Behind the Doors?
- Page 6 – GETTING STARTED; INSTALLATION CHECKLIST; WATER FILTER INSTALLATION; Fingerprint-Resistant Steel and Black Stainless Steel
- Page 7 – DOOR ALIGNMENT
- Page 8 – INSTALLATION INSTRUCTIONS; Unpack the Refrigerator; Location Requirements
- Page 9 – Remove and Replace Refrigerator Doors
- Page 10 – Reset the Door Hinge
- Page 12 – Remove and Replace
- Page 13 – Electrical Requirements; Water Supply Requirements; Connect the Water Supply
- Page 14 – Handle Installation and Removal
- Page 17 – FILTERS AND ACCESSORIES; Water Filtration System
- Page 18 – Install Air Filter; Install Produce Preserver
- Page 19 – Accessories; REFRIGERATOR USE; Opening and Closing Doors
- Page 20 – Using the Controls
- Page 21 – External Dispenser Controls
- Page 22 – Water and Ice Dispensers; Lighting the Refrigerator
- Page 25 – Ice Maker and Storage Bin
- Page 28 – Freezer Drawers; Audio Reference; Tone Assignment
- Page 29 – REFRIGERATOR CARE; Cleaning
- Page 30 – Lights
- Page 31 – TROUBLESHOOTING
- Page 37 – PERFORMANCE DATA SHEET
- Page 38 – TEN YEAR LIMITED WARRANTY
French Door Refrigerator
Réfrigérateur à porte à double battant
Refrigerador de dos puertas
THANK YOU for purchasing this high-quality product. Register your new refrigerator at
www.kitchenaid.com
.
In Canada, register your refrigerator at
www.kitchenaid.ca
.
For future reference, please make a note of your product model and serial numbers.
These can be located on the inside wall of the refrigerator compartment.
Nous vous REMERCIONS d’avoir acheté ce produit de haute qualité. Enregistrer votre nouveau réfrigérateur
sur le site internet
www.kitchenaid.ca
.
Pour référence ultérieure, consigner par écrit les numéros de modèle et de série de votre produit.
Ceux-ci sont situés sur la paroi interne du compartiment de réfrigération.
LE AGRADECEMOS la compra de este producto de alta calidad. Registre su refrigerador en
www.kitchenaid.com.
En Canadá, registre su refrigerador en
www.kitchenaid.ca
.
Para referencia futura, tome nota del número de modelo y de serie del producto, ubicados en la pared interior
del compartimiento del refrigerador.
Model Number/Numéro de modèle/Número de modelo __________________________________________
Serial Number/Numéro de série/Número de serie
_______________________________________________
W10815171B
User Guide
Guide de l’utilisateur
Manual del usuario
"Loading the manual" means you need to wait until the file loads and becomes available for online reading. Some manuals are very large, and the time they take to appear depends on your internet speed.
Was this manual helpful?
About this manual
- Brand
- KitchenAid
- Model
- KRFC704FBS
- Document type
- User Manual
- Category
- Refrigerator
- Language(s)
- English
- Pages
- 38
- File size
- 1.2 MB
- Format
Other Manuals for KitchenAid KRFC704FBS
Summary
2 TABLE OF CONTENTS/TABLE DES MATIÈRES/ÍNDICE REFRIGERATOR SAFETY .........................3PARTS AND FEATURES ...........................4 What’s New Behind the Doors? ..............5 GETTING STARTED ..................................6INSTALLATION INSTRUCTIONS ..............8 Unpack the Refrigerato...
3 You can be killed or seriously injured if you don't immediately You can be killed or seriously injured if you don't follow All safety messages will tell you what the potential hazard is, tell you how to reduce the chance of injury, and tell you what canhappen if the instructions are not followed. ...
4 PARTS AND FEATURES Air filter Water filter FreshSeal ™ crispers Temperature- controlled pantry drawer Pull-out tray In-Door-Ice ® ice storage Slide-away split shelf Removable bin Under-shelf storage (on some models) Herb bin storage Proper Disposal of Your Old Refrigerator WARNING Suffocation Haza...
Ask a question
Related manuals
Popular KitchenAid Refrigerators
More KitchenAid Refrigerators models
 KitchenAid KRBR109ESS User Manual
 KitchenAid KRFC300EBS User Manual
 KitchenAid KRFC300ESS User Manual
 KitchenAid KRFC300EWH User Manual
 KitchenAid KRFC302EBS User Manual
 KitchenAid KRFC302ESS User Manual
 KitchenAid KRFF300EBS User Manual
 KitchenAid KRFF300ESS User Manual
 KitchenAid KRFF300EWH User Manual
 KitchenAid KRFF302EBS User Manual
 KitchenAid KRFF302ESS User Manual
 KitchenAid KRFF305EBS User Manual