Jet 707212 - User Manual
Jet 707212 Miter Saw – User Manual, read for free online in PDF format. We hope this helps you resolve any issues you may have. If you have further questions, please contact us through the contact form.


Table of Contents:
- Page 2 – General machine safety warnings
- Page 3 – Miter saw safety warnings
- Page 4 – Table of contents; Section
- Page 6 – About this manual
- Page 7 – Features and terminology
- Page 8 – Specifications
- Page 9 – Cutting capacities
- Page 10 – Setup and assembly; Dust bag
- Page 11 – Adaptor; Power cord storage clips
- Page 12 – Electrical connections; Extension cords
- Page 13 – Adjustments; Support foot; Miter positive stop selection; Table extensions and work stop
- Page 14 – Fence adjustment; Checking fence squareness; Bevel adjustments
- Page 15 – 5° bevel stop adjustment; Depth adjustment; Operation; LED light
- Page 16 – General saw operation; Starting the cut; Finishing the cut; Jammed material; Cutting options; Chop cuts; Miter cutting
- Page 17 – Cutting bowed material; General cleaning
- Page 18 – Lower Blade Guard; Lubrication; Additional servicing
- Page 19 – Crown molding charts; Crown molding: 90° wall angles
- Page 20 – Crown molding: various wall angles
- Page 21 – Troubleshooting JMS-10X,12X Miter Saws
- Page 22 – Replacement Parts
- Page 36 – Warranty and service
1
Operating Instructions and Parts Manual
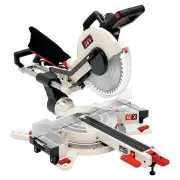
Sliding Dual-Bevel Compound Miter Saw
Model JMS-10X and JMS-12X
JET
427 New Sanford Road
LaVergne, Tennessee 37086
Part No. M-707210
Ph.: 800-274-6848
Edition 1 06/2019
www.jettools.com
Copyright © 2019 JET
This .pdf document is bookmarked
"Loading the manual" means you need to wait until the file loads and becomes available for online reading. Some manuals are very large, and the time they take to appear depends on your internet speed.
Summary
2 1.0 IMPORTANT SAFETY INSTRUCTIONS WARNING – To reduce risk of injury: 1.1 General machine safety warnings 1. Read and understand the entire owner's manual before attempting assembly or operation. 2. Read and understand the warnings posted on the machine and in this manual. Failure to comply with a...
3 29. Keep hands out of the line of saw blade. 30. Don’t use in dangerous environment. Don’t use power tools in damp or wet location, or expose them to rain. Keep work area well lighted. 1.2 Miter saw safety warnings Specific safety instructions for this compound miter saw: 31. Do not operate the mi...
4 Familiarize yourself with the following safety notices used in this manual: This means that if precautions are not heeded, it may result in minor injury and/or possible machine damage. This means that if precautions are not heeded, it may result in serious, or possibly even fatal, injury. 2.0 Tabl...