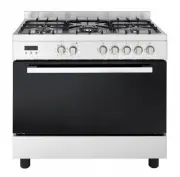
Page 2 - Getting to know your new cooker; DO NOT USE OR STORE FLAMMABLE MATERIALS IN
2 ENVIRONMENTAL WARNING Waste packaging Do not throw the packaging of your appliance into the dustbin, but pick out the different materials (for instance foil, paperboard, polystyrene) according to the local rules for rubbish elimination. This appliance must only be used for the purpose of domestic ...
Page 3 - Clearances to non- combustible materials
3 min.100 mm "0" mm "0" mm min "60" mm min "60" mm "0" mm "0" mm Fig. A Clearances to combustible materials "Any adjoining wall surface (side or rear) situated within 200mm of any hob burner must be a suitable non-combustible material from the edge...
Page 4 - The hose assembly; test point fitting must be installed betweeen; After the replacement of the injectors , replace also the
4 GAS CONNECTION Gas installation must be made in accordance with AS5601; Also refer to rangehood manufacturers recommendation. Check gas presure, note the correct setting from the data plate sealed inside the front appliance drawer *. Installing the gas cooker : (Flexible connection are NOT permitt...
Page 5 - WARNING; ELECTRICAL CONNECTION; IMPORTANT
5 - change the injector (see Fig. D) and replace it with another one suitable for the new type of gas (see Tab. 1) WARNING: 2nd SECTION FOR THE USER Fig. D MINIMUM FLOW ADJUSTMENT FOR HOB-TOP TAPS In order to adjust the minimum flame setting proceed as follows: switch the burner on, and set the knob...
Page 7 - Oven commutator knob; âté; n assisted g
7 Fan Oven G E N E R A L I N S T R U C T I O N HOW TO USE YOUR ELECTRIC OVEN - Before cooking in the first time we reccommend that the oven should be operated at 200° C for 30 minutes to remove any manufacturing greases and odours. - Do not place items or pan directly on to the oven botton. - Foil s...
Page 8 - PLATE WARMING
conventional oven, using one tray only. Cooking results are a matter of personal preference and may easily be adjusted to suit individual requirements by slight adjustment of the temperature and or cooking time. Preheating of the oven is recommended for 10-15 minutes or until the oven thermostat ind...
Page 9 - INSTRUCTIONS FOR USE OF CONTROL DEVICES; USlNG THE GRILL; Using the prograammer of cc ooking; Operation Panel and Instructions (for some models); List of functions; Control Function and Intructions
9 INSTRUCTIONS FOR USE OF CONTROL DEVICES (Depending on model) USlNG THE GRILL The grill is situated in the top of the oven compartment. The grill pan should be located on the top oven shelf position. Always grill with the door closed. Warning: Do not place fatty foods too close to the grill and nev...
Page 10 - cancel
USE OF THE ELECTRIC GRILL USlNG THE GRILL Turn the oven knob to the right and place it on the grill position . The grill pan should be located on the top oven shelf position. Always preheat the grill on full for 3-5 minutes before inserting the food. The user can change the shelves, depending on his...
Page 11 - Using the rotary spit; The rotary spit function only when the switch is in position gril; Preparing joints; of the; Removing the rotary spit
11 Using the rotary spit The rotary spit can be used to cook joints such as rolled joints and poultry with excellent results. The meat is roasted thoroughly and evenly. The rotary spit function only when the switch is in position gril l. Preparing joints Place the joint as centrally as possible on t...
Page 12 - B A; Removing the hook
12 Before cleaning the appliance, close the gas stopcock and unplug appliance or disconnect power at the main circuit breaker of the electrical system. Do not clean the appliance surfaces when still hot. Always clean off spillage as quickly as possible to prevent burning on which will make removal m...
Page 13 - Note
13 Removal of oven door In-depth cleaning of the oven becomes more convenient if the d oor i s r em ov e d f ol l o w i n g t he i n st r u ct i o n s b e l ow : 1 open the oven door completely. 2 flip the hinge hooks "A" outwards (see Fig. 5B). 3 shut the oven door slowly until it reaches h...
Page 14 - according to the models
14 Fig. 6 V Fig. 7 D V 7 Disassembly of the worktop must only be done by a qualified service technician DISASSEMBLE OF WORK-TOP ln case it is necessary to repair or replace the inside components, act as follows: Remove the grids, remove burners and flame-spreaders (see Fig. 6), unscrew the visible s...
Page 15 - S OME SA F ET Y P OI N T
15 Do not use the appliance as a space heater. If you smell gas Open a window. Do not use any electrical switches. Immediately extinguish naked flames. Isolate appliance from gas mains supplies via the isolation stopcock. Contact local gas authority or emergency services as appropriate. In the event...
Page 17 - Residentia; Warranty terms and conditions; Warranty
Residentia \ 12 Warranty terms and conditions Cooking appliances (rangehoods) This document sets out the terms and conditions of the product warranties for Residentia Group Appliances. It is an important document. Please keep it with your proof of purchase documents in a safe place for future refere...
Page 18 - User Manual
User Manual \ 13 5. You will bear the cost of transportation, travel and delivery of the Appliance to and from Residentia Group or its ASR. If you reside outside of the service area, you will bear the cost of: (a) travel of an authorised representative; (b) transportation and delivery of the Applian...