Husqvarna AUTOMOWER 308 - Quick Guide
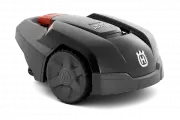
This installation and operational manual covers the Husqvarna Automower robotic lawn mower, focusing on setup, boundary wire configuration, charging station installation, and basic controls. The document highlights key functional areas like perimeter cable placement for mowing boundaries, power connections, and adjusting cutting schedules–all essential for proper deployment. It also emphasizes maintenance tasks such as battery care and avoiding obstructions to ensure reliable performance.
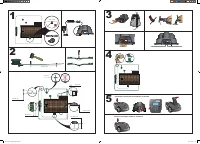
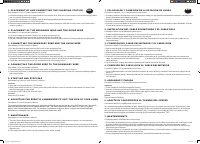
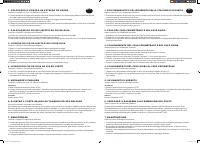
Table of Contents:
- Page 1 – Main Component Identification and Diagram
- Page 2 – Robotic Lawn Mower Installation and Operation Setup
- Page 3 – Mower Setup, Operation, and Maintenance Procedures
- Page 4 – Charging Station and Perimeter Cable Installation
H U S QVA R N A AU T O M O W E R
®
3 0 5 / 3 0 8
www.automower.com
1
2
3
4
5
6
7
20 cm
5 cm
30 cm
8
9
10
11
12
13
14
15
16
G U Í A R Á PI DA
G U I A R Á PI D O
G U I DA R A PI DA
Q U I C K G U I D E
115 59 36-30
AUTOMOWER
®
es una marca registrada de Husqvarna AB. Copyright © 2013 HUSQVARNA. Todos los derechos reservados.
AUTOMOWER
®
é uma marca registada da Husqvarna AB. Copyright © 2013 HUSQVARNA. Todos os direitos reservados.
AUTOMOWER
®
è un marchio di proprietà di Husqvarna AB. Copyright © 2013 HUSQVARNA. Tutti i diritti riservati.
AUTOMOWER
®
is a trademark owned by Husqvarna AB. Copyright © 2013 HUSQVARNA. All rights reserved.
What is what?
1. Main switch
2. STOP button
3. Charging strip
4. LED for function check
of the boundary and
guide wires
5. Cutting height indication
6. Display
7. Keypad
8. Charging station
9. Transformer
10. Low voltage cable
11. Wire for boundary and
guide
12. Couplers
13. Staples
14. Connectors
15. Measurement gauge
16. Screws for securing the
charging station
O que é o quê?
1. Interruptor principal
2. Botão STOP
3. Faixa de carga
4. LED para verifi cação do
funcionamento dos fi os
do limite e de guia
5. Indicação da altura de
corte
6. Ecrã
7. Teclado
8. Estação de carga
9. Transformador
10. Cabo de baixa tensão
11. Fio de limite e de guia
12. Acopladores
13. Grampos
14. Conectores
15. Instrumento de medição
16. Pregos para fixar a
estação de carga
Componentes de
Automower
®
?
1. Interruptor principal
2. Botón de PARADA
3. Tira de carga
4. LED para comprobar el
funcionamiento de los
cables delimitador y de
guía
5. Indicación de la altura de
corte
6. Pantalla
7. Teclado
8. Estación de carga
9. Transformador
10. Cable de tensión baja
11. Cable delimitador y cable
guía
12. Acopladores
13. Grapas
14. Conectores
15. Galga
16. Clavos para afianzar la
estación de carga
Descrizione delle parti
1. Interruttore principale
2. Pulsante STOP
3. Striscia di ricarica
4. LED per il controllo del
funzionamento dei cavi
perimetrale e guida
5. Indicazione dell’altezza
di taglio
6. Display
7. Tastiera
8. Stazione di ricarica
9. Trasformatore
10. Cavo a bassa tensione
11. Matassa per cavo
perimetrale e guida
12. Giunti
13. Picchetti
14. Connettori
15. Astina di misurazione
16. Chiodi per fissare la
stazione di ricarica
QG,1155936-,305-308,2014.indd 1
2013-11-08 17.41
"Loading the manual" means you need to wait until the file loads and becomes available for online reading. Some manuals are very large, and the time they take to appear depends on your internet speed.
Was this manual helpful?
About this manual
- Brand
- Husqvarna
- Model
- AUTOMOWER 308
- Document type
- Quick Guide
- Language(s)
- English, Spanish, Italian
- Pages
- 4
- File size
- 1.9 MB
- Format
Summary
Labeled diagrams showing the main components of the robotic lawn mower, including the main switch, charging station, and cutting height indicator.
Step-by-step instructions for installing and operating the robotic lawn mower, including setting up the boundary wire, connecting power sources, and remote control operation.
Instructions for setting up and operating the mower, positioning the charging station and boundary wire, connecting wires, starting/stopping the mower, adjusting mowing time, and maintenance tasks like battery charging and water avoidance.
Ask a question
Related manuals
Popular Husqvarna Other


More Husqvarna Other models
 Husqvarna Automower Manual
 Husqvarna Automower 105 Quick Guide
 Husqvarna AUTOMOWER 115H Quick Guide
 Husqvarna AUTOMOWER 220 AC Quick Guide
 Husqvarna AUTOMOWER 265 ACX Quick Guide
 Husqvarna Automower 305E NERA Quick Guide
 Husqvarna AUTOMOWER 310 Quick Guide
 Husqvarna Automower 310 Mark II Quick Guide
 Husqvarna Automower 310E NERA Quick Guide
 Husqvarna AUTOMOWER 315 Quick Guide
 Husqvarna Automower 315 Mark II Quick Guide
 Husqvarna AUTOMOWER 315X Quick Guide