Hisense HR6FDFF701SW - User Manual
Hisense HR6FDFF701SW Refrigerator – User Manual, read for free online in PDF format. We hope this helps you resolve any issues you may have. If you have further questions, please contact us through the contact form.


Table of Contents:
- Page 2 – WARNING
- Page 3 – Important safety instructions; General safety and daily use; etc; Safety about electricity
- Page 5 – Installing your new appliance; Ventilation of appliance; Leveling of appliance
- Page 6 – Doors removal; With the fridge doors opened; Disconnect power and shut off
- Page 8 – Installing the water lines
- Page 9 – Parts for water line installation
- Page 12 – Display Controls; Using the control panel on the fridge door
- Page 16 – Using your appliance; Fixing the handle; Getting cold water
- Page 17 – To avoid cold air leaking out from cabinet,
- Page 18 – Changing the water filter
- Page 19 – Using your fridge compartment; Door baskets
- Page 22 – Cleaning and care; Exterior cleaning; Door seals cleaning
- Page 23 – Replacing the LED light
- Page 24 – Helpful hints and tips
- Page 26 – Troubleshooting; Problem
- Page 28 – Disposal of the appliance; Packaging materials
MODEL:HR6FDFF701SW
"Loading the manual" means you need to wait until the file loads and becomes available for online reading. Some manuals are very large, and the time they take to appear depends on your internet speed.
Was this manual helpful?
About this manual
- Brand
- Hisense
- Model
- HR6FDFF701SW
- Document type
- User Manual
- Category
- Refrigerator
- Language(s)
- English
- Pages
- 29
- File size
- 15.1 MB
- Format
Summary
2 Contents Brief introduction 2 Important safety instructions 3 Installing your new appliance 5 Description of the appliance 11 Display controls 12 Using your appliance 16 Cleaning and care 22 Helpful hints and tips 24 Troubleshooting 26 Disposal of the appliance 28 Brief introduction Thank you for ...
3 Important safety instructions General safety and daily use It is important to use your appliance safely. We recommend that you follow the guidelines below. Store any food in accordance with the storage instructions from the manufacturer. Don't try to repair the appliance yourself. It is dangerous ...
5 Installing your new appliance Before using the appliance for the first time, you should be informed of the following tips. Warning! For proper installation, this refrigerator must be placed on a level surface of hard material that is the same height as the rest of the flooring. This surface should...
Ask a question
Related manuals
Popular Hisense Refrigerators
More Hisense Refrigerators models
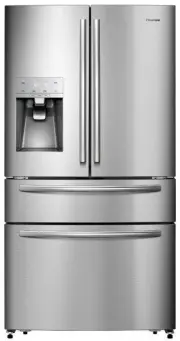
 Hisense HR6BMFF520SD User Manual
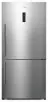
 Hisense HR6CDFF512GB User Manual
 Hisense HR6CDFF512S User Manual
 Hisense HR6CDFF695S User Manual
 Hisense HR6FDFF630S User Manual
 Hisense HR6SBSFF624SW User Manual
 Hisense HR6TFF223S User Manual
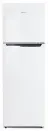 Hisense HR6TFF230 User Manual
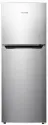 Hisense HR6TFF230S User Manual
 Hisense HR6TFF350 User Manual
 Hisense HR6TFF350S User Manual
 Hisense HR6TFF437SD User Manual
 Hisense HR6TFF527SD User Manual