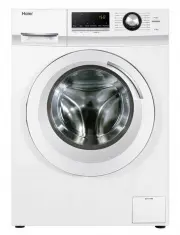
Page 2 - Thanks for purchasing a Haier Product; Accessories; Elements
1 Thanks for purchasing a Haier Product Please read these in ons carefully before using this appliance. The ins ons contain important informa on which will help you get the best out of the appliance and ensure safe and proper installa on, use and maintenance. Keep this manual in a convenient place s...
Page 3 - Legend; Ye; Index; Disposal
2 ................................................................................................................................................. 3 re e ......................... .................................................................. .......................................................
Page 5 - Do not...; Saving Tips; Do...
4 Let the power cord be replaced by the manufacturer, his service agent or other accordingly , in case it is damaged. Do not… . t o h s t e g t i , s s e c o r p g n i h s a w e h t g n i r u d r o o d r e h s a w e h t h c u o T Place heavy objects or sources of heat or damp on top of the appliance...
Page 6 - Descrip on; Before Use
5 Bef ore Use Descrip on This diagram may be slightly nt from the layout of the washing machine you have just purchased. Preparing the machine Remove all the packing materials to prevent unsteadiness, including the polystyrene base. Upon opening the package, water drops may be seen on the pla bag an...
Page 7 - Dismantle the transport; Adjus ng the feet and locking nut
6 In on Dismantle the transport on bolts The transpo on bolts are designed for clamping an - vib on components inside of the washing machine during the transpo on process. Remove the back cover. Remove the four bolts on the rear side and take out Replace the back cover. Fill the holes le by the bolt...
Page 9 - Oper; No; ons; Control Panel
8 1. 2. 3. Progra !" #$$%&'(! )$*+ al $ 4. Was ,$ Temp $ $ 5. -.+!$-.//0$ $ 6. 7. 12345$6+!7 e $ 8. 9. 10. 81*$*+7. lay $ */95: Oper onal Func ons Nº Func on Explica on 1 Detergent drawer 2 Program Dial !" #$%&'(! Wash Temp Spin Speed 3 4 5 6 ons ./!$3,/$0 rawer ;$3, r //$ compartmen...
Page 11 - Program Modes; Max
10 Program Modes ons Yes No n 90° C 30°C h c 60°C 30°C Chemica l !"#$%&!"'() 3 Mix 60°C 30°C 4 W oo l 40°C --- W oolen %&!"'() *$$+,-#" wea " 60°C 40°C +,-#" .#&" /$$012"3 40°C 20°C 012"3) 4#&" 7 Jeans 60°C 30°C 8 Hygienic 90°C n 11 Daily Wash ...
Page 13 - Washing Methods; Power Supply
12 Washing Methods the machine is use for commercial purpose the guarantee will not be valid anymore. Do not use it for purposes other than that for which on the label of each garment and wash only machine-washable garments. Power Supply Connect the washing machine to the power supply (220V to 240V~...
Page 14 - Loading the appliance
13 Sele ng Detergent The wa cy and the performance is determined by the quality of detergent used. Special non-foaming detergent produces good washing results. Use spe etergents for synthe and woollen goods. Do not use dry cleaning agents such as trichloroethylene and similar products. Do not add mo...
Page 17 - Cleaning and Care; Maintenance; A er washing
16 Cleaning and Care Maintenance A er washing Turn o the water supply and remove the electrical plug each wash. Open the washer door to prevent form on of moisture and odors. If the washing machine is idle for a long period, drain the water in the machine and replace the drain hose. Cleaning the det...
Page 18 - Display Codes
17 Water inlet valve and inlet valve r To prevent blockage to the water supply by ingress of foreign substances, clean the water inlet valve and inlet valve regularly. Moving the machine Remove the back cover. Remove the blanking plugs. Tighten the bolts with a spanner. Replace the back cover. Long ...
Page 21 - Technical data
20 Technical data Basic technical informa on regarding the appliance. Power source 220 - 240V~/50Hz 0 1 ) A ( t n e r r u c g n i k r o w . x a MWater pressure (MPa) ! "#$%# 1 8.0/8.5 ) g k ( d a o l l a n i m o NSpinning speed (r/min) 1400 6 1 s m a r g o r p g n i h s a WMax power (W) 1900 5 9...