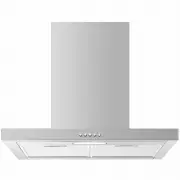
Page 3 - CONTENTS; Safety and warnings; SAVE THESE INSTRUCTIONS; Registration
1 CONTENTS Safety and warnings 3 Installation instructions 5 Operating instructions 4 Cleaning and maintenance Parts and accessories 17 Manufacturer’s Warranty 18 Customer Care 20 IMPORTANT! SAVE THESE INSTRUCTIONS The models shown in this user guide may not be available in all markets and are subje...
Page 5 - SAFETY AND WARNINGS; is 12 kg and weight of; IMPORTANT SAFETY INSTRUCTIONS
3 SAFETY AND WARNINGS ! WARNING! g k 2 1 (HC60) 15 kg (HC90) Weight HazardThe rangehood is heavy. Please ensure adequate care is taken when installing the rangehood to prevent personal injury. The rangehood must be installed onto a solid wall, stud, beam or truss. Weight of the is 12 kg and weight o...
Page 6 - Do not flambé under the rangehood.
4 SAFETY AND WARNINGS ● The minimum distance between the supporting surface for cooking vessels on the cooktop and the lowest part of the rangehood shall be 600 mm or 650 mm if installed over a gas cooktop. ● Stainless steel is very easily damaged during installation if abraded or knocked by tools. ...
Page 7 - Contents of packaging; Outside chimney
5 Contents of packaging Cooker Hood (1) Outside chimney (1) Inside chimney (1) Outside chimney bracket (1) Inside chimney bracket (1) Wall plug (9) Countersunk Screw (ST4*40mm) (7) Pan head Screw (ST4*30mm) (2) Hook (1) Hood mounting bracket (1) Screw (ST4 × 8mm) (4) V-flap (150) (1 pair) Cable tie ...
Page 8 - Recirculation Carbon filters; Not Included – available separately
I nstallation bracket S crew ST4*8mm 6 6 Carbon filter T-shaped plastic outlet S crew ST3*12mm (1) (1) (6) (2) (2) Optional Recirculation Accessories (when ducting externally not possible) Recirculation Carbon filters Not Included – available separately See arts and Accessories section for ordering ...
Page 10 - maximum dimensions indicated in the table above.
Height of rangehood INSTALLATION DIMENSIONS mm L Installation height Recirculation min.540 - max.1020 min.640 - max.1020 min.600 - max.750 min.650 - max.750 Height top of cooktop to base of product L Rangehood installation height above the cooktop is the user’s preference. Lower installation heights...
Page 11 - Venting options; Ducted
Venting options Attention should be given to ensure that any applicable regulations concerning the discharge of exhaust air are fulfilled. The rangehood can be installed to operate with the exhaust air ducted externally from the kitchen, or installed to operate with the exhaust air recirculating wit...
Page 12 - pic
WARNING! ● This product is heavy and requires two persons for installation. ● Installation work and electrical wiring must be done by qualified person(s) ● Failure to install the screws or fixing device in accordance with these instructions IMPORTANT! Wear gloves to protect against sharp edges. Inst...
Page 13 - Upper chimney bracket attachment point height; Bracket installation
PRODUCT DIMENSIONS mm mm N Lower rangehood attachment point width o Lower rangehood attachment point height p Upper rangehood attachment point width q Upper rangehood attachment point height r Upper chimney bracket attachment point width HC60BLX1 HC90BL1X1 11 Upper chimney bracket attachment point U...
Page 14 - Screw Installation; hole for inside; PRODUCT DIMENSIONS
12 Screw Installation hole for inside chimney bracket (2*wall plugs + 2*ST4*40mm screws) hole for hook (2*wall plugs + 2*ST4*30mm screws) safety hole (2*wall plugs + 2*ST4*30mm screws) PRODUCT DIMENSIONS mm mm Lower rangehood attachment point width Lower rangehood attachment point height Upper range...
Page 16 - INSTALLATION; Fix the ducting with a cable tie on the hood outlet. See
14 ducting v -flap INSTALLATION (VENT OUTSIDE)MOUNTING OF THE V-FLAP If the cooker hood does not have an assembled V-flap 1, you should mount the half-parts to its body.The images only show an example of how to mount the V-flap, because the outlet may vary according to different models and ...
Page 17 - Secure the ducting to the inlet of the T-shaped pl as tic
15 3. Put the cooker hood on the hood bracket or on the two screws. Tighten the two screws if needed. See 9. 4. Adjust the position and fix the cooker hood body with the safety screws (2pcs ST4*30mm). See 10.Note: The 6mm holes for these two screws are positioned on the back of the cooker hood. They...
Page 18 - adjusted pipe
Page 19 - Pu sh the “0 ” butt o n, and the m oto r w ill stop.; OPERATING INSTRUCTIONS
17 Start Using Your Cooker Hood Push button 1) Pu sh the “0 ” butt o n, and the m oto r w ill stop. 2) Push the “1” butt on, and the motor will run at low speed. 3) Push the “2” button, and the motor will run at mid speed. 4) Push the “3” button, and the motor will run at high speed. 5) Push the lig...
Page 20 - CLEANING AND MAINTENANCE; Never use abrasive or oil based cleaners.; INSTALLING GREASE MESH FILTERS; To install filters for the following four steps:; GREASE MESH FILTERS
CLEANING AND MAINTENANCE WARNING! Unplug or disconnect the appliance from the power supply before servicing or cleaning. IMPORTANT! ● Never use abrasive or oil based cleaners. ● Wear gloves to protect against sharp edges. Maintenance The rangehood should be cleaned regularly using a mild, liquid det...
Page 21 - Carbon filters – for use in recirculation mode; Open; CARBON FILTER -not supplied; Press the filter lock and remove the mesh filter.; Replacing the LED light; fisher
CLEANING AND MAINTENANCE Carbon filters – for use in recirculation mode Active carbon filters are disposable items designed to remove grease and odours from cooking vapours before the air is channelled back into the kitchen. The active carbon filters must be replaced periodically to work properly, a...
Page 22 - PARTS AND ACCESSORIES; ITEM; LED lights
PARTS AND ACCESSORIES ITEM REFERENCE NUMBER LED lights Aluminium filter Recirculation carbon filter( × 2) T-shape Recirculation Outlet kit 20 H0530061789 H0530061790 H0530060509H0530062211 + Chimney Extension 900mm
Page 23 - MANUFACTURER’S WARRANTY; This Manufacturer’s Warranty DOES NOT cover
MANUFACTURER’S WARRANTY You automatically receive a 2 year Manufacturer’s Warranty with the purchase of this rangehood covering parts and labour for servicing within the country of purchase. Fisher & Paykel undertakes to: Repair or, at its option, replace without cost to the owner either for mat...
Page 24 - For Australian Customers; Please keep this user guide in a safe place.
MANUFACTURER’S WARRANTY For Australian Customers This Manufacturer’s Warranty is an extra benefit and does not affect your legal rights. Our goods come with guarantees that cannot be excluded under the Australian Consumer Law. You are entitled to a replacement or refund for a major failure and for c...
Page 25 - CUSTOMER CARE; Your product is correctly installed.; In New Zealand if you need assistance...*; If you need service...*; In Australia if you need assistance...*; Fisher & Paykel Appliances Ltd, PO Box 798, Cleveland QLD 4163
CUSTOMER CARE Before you call for service or assistance... Check the things you can do yourself. Refer to the installation instructions and your user guide and check that: 1 Your product is correctly installed. 2 You are familiar with its normal operation. If after checking these points you still ne...
Page 26 - Complete and keep for safe reference:
CUSTOMER CARE Complete and keep for safe reference: Model Serial No. Purchase Date Purchaser Dealer Suburb Town Country 4 2