Geek Chef HIBC1702-01 - User Manual
Geek Chef HIBC1702-01 Grill – User Manual, read for free online in PDF format. We hope this helps you resolve any issues you may have. If you have further questions, please contact us through the contact form.

MODEL NO.: HIBC1702-01
ITEM NO.: GPG1702
Instruction Manual
T
able o
f Cont
ent
s
4
3
3
3
4
5
6
6
6
7
7
7
7
7
7
7
7
7
8
8
8
8
8
8
9
Saf
e
ty Ins
truc
tions
Saf
e
ty Ins
truc
tions
A
ssembly Ins
truc
tions
A
ssembly Ins
truc
tions
Oper
a
tion Ins
truc
tions
Oper
a
tion Ins
truc
tions
PORTABLE GAS GRILL
Toll Free:1-844-801-8880
IMPORTANT:Read the instructions carefully before
operating the appliance and keep them for future
reference.
Kool Solutions For Life
Limit
ed W
arr
anty
LIMITED WARRANTY
HOME EASY LTD warrants to the original consumer or purchaser this Geek Chef
is free from defects in material or workmanship for a period of One (1) year from the date of purchase.
defect is discovered within the warranty period, HOME EASY LTD, at its discretion, will repair or
replace the Product at no cost. This limited warranty is good only to the original purchaser of the product
effective only when used in United States.
For warranty or repair service: Call 844-801-8880 and choose the appropriate prompt, or email info@
homeeasy.net. Please have your Product’and phone number ready.
NO OTHER WARRANTY IS APPLICABLE TO THIS PRODUCT. THIS WARRANTY IS IN LIEU OF ANY OTHER
WARRANTY, EXPERSS OR IMPLIED. INCLUDING WITHOUT LIMITATION, ANY WARRANTY OF
MERCHANTABILITY OR FITNESS FOR A PARTICULAR PURPOSE. TO THE EXTENT ANY IMPLIED
WARRANTY IS REQUIRED BY LAW. IT IS LIMITED IN DURATION TO THE EXPRESS WARRANTY PERIOD
ABOVE. NEITHER THE MANUFACTURER NOR ITS U.S.DISTRIBUTOR SHALL BE LIABLE FOR ANY
INCIDENTAL, CONSEQUENTIAL, INDIRECT
DAMAGES OF ANY NATURE.
INCLUDING WITHOUT LIMITATION. LOST REVENUES OR PROFITS, OR ANY OTHER DAMAGE WHETHER
BASED IN CONTRACT, TORT, OR OTHERWISE, SOME STATES AND/OR TERRITORIES DO NOT ALLOW
THE EXCLUSION OR LIMITATION OF INCIDENTAL OR CONSEQUENTIAL DAMAGES OR LIMITATIONS ON
HOW LONG AN IMPLIED WARRANTY LASTS. SO THE ABOVE EXCLUSION OR LIMITATION MAY NOT APPLY
TO YOU. THIS WARRANTY GIVES YOU, THE ORIGINAN PURCHASER, SPECIFIC LEGAL RIGHTS AND YOU
MAY ALSO HAVE OTHER RIGHTS THAT VARY FROM STATE
, SPECIAL, OR PUNITIVE
TO STATE OR TERRITORY TO TERRITORY.
THIS LIMITED WARRANTY DOES NOT APPLY TO
1.Failure of product to perform during power failures and interruptions or inadequate electrical service
2.Damage caused by transportation or handling.
3.Damage caused to the product by accident, vermin, lightnin winds, fire, floods, or acts of God.
4.Damage resulting from accident, alteration, misuse, abuse, or improper installation, repair, or
maintenance. Improper use includes using an external device that alters or converts the voltage or
frequency of electricity
5.Any unauthorized product modification, repair by unauthorized repair center, or use of non-approved
replacement parts.
6.Abnormal cleaning and maintenance as described in the user's manual.
7.Use of accessories or components that are not compatible with this product.
The cost of repair or replacement under these excluded
circumstances shall be borne by the consumer.
PORTABLE GAS GRILL
If any such
and
DANGER
Technical Characteristics
General Safety Information
General Installation
Technical Characteristics
General Safety Information
General Installation
Portable L.P. Gas Cylinder
Grill Features
Assemble Grill
Rotisserie Grill Basket Use Instructions
Connecting/Disconnecting the Gas Cartridge to the Appliance
Installing 1 Ib. Propane Cylinder
Leak testing-Disposable L.P. Gas Cylinders
How to Check for Leaks
Fixing A Fuel Leak
Regulator and Hose
Start-Up Check List
Lighting Instructions
Lighting The Burner
Shutting Off the Grill
General Use and Correct Burner Flames
The Burner Flame Check
Grilling Tips and Hints
In Case of Grease Fire
Care, Maintenance and Cleaning
Moving and Storage
Troubleshooting
Limited Warranty
Input Rating: 1 burner, 12,000 BTU/H
Category: Pressure regulated propane
Fuel: 16.4 oz disposable propane cylinder
DANGER indicates an imminently hazardous situation which, if not avoided,
will result in death or serious injury.
This manual contains important information about the assembly, operation and
maintenance of this outdoor propane appliance. General safety information is
presented on this page and is also located throughout these instructions.
Particular attention should be paid to information accompanied by the safety
alert symbol:
“
DANGER”,“
WARNING”,“
CAUTION”
Keep this manual for future reference and to educate new users of this
product. This manual should be read in conjunction with the labeling on the
product.
Safety precautions are essential when any mechanical or propane fueled
equipment is involved. These precautions are necessary when using, storing,
and servicing. Using this equipment with the respect and caution demanded
will reduce the possibilities of personal injury or property damage.
The following symbols shown below are used extensively throughout these
instructions
.
Always heed these precautions as they are essential when using
any mechanical or propane fueled equipment.
WARNING
WARNING indicates a potentially hazardous situation which, if not avoided,
could result in death or serious injury.
WARNING
1.Do not store or use gasoline or other flammable liquids or
vapors in the vicinity of this or any other appliance.
2.An L.P. cylinder not connected for use shall not be stored
in the vicinity of this or any other appliance.
CALIFORNIA PROPOSITION 65:
WARNING: This fuel, and by products of combustion of this fuel contain
chemicals known to the state of California to cause cancer, birth defects, or
other reproductive harm.
CAUTION
CAUTION indicates a potentially hazardous situation which, if not avoided
could result in minor or moderate personal injury, or property damage.
DANGER
If you smell gas :
1.Shut off gas to the appliance.
2.Extinguish any open flame.
3.If odor continues, keep away from the appliance and
immediately call your gas supplier or your fire department.
DANGER
·
FOR OUTDOOR USE ONLY. NEVER operate grill in enclosed areas, as
this could lead to gas accumulating from a leak, causing an explosion or a
carbon monoxide build-up, which could result in injury or death. DO NOT
use in garages, breezeways, sheds or any enclosed area.
·
NOT FOR USE BY CHILDREN.
·
If these instructions are ignored, a hazardous fire or explosion could result
in physical injury, death or property damage!
WARNING
·
DO NOT move grill while it is lit.
·
Keep outdoor cooking gas appliance area clear and free from combustible
materials, gasoline, and other flammable vapors and liquids.
WARNING
·
DO NOT lean on the grill.
·
NEVER use charcoal briquettes or lighter fluid in a gas grill.
·
Grill is hot when in use; to avoid burns, DO NOT touch any hot grill
surface. Keep children and pets away from hot grill.
·
NEVER leave the grill unattended while it is in used.
·
It is your responsibility to assemble, install, operate and care for your gas
grill properly.
·
DO NOT use gas grill indoors.
·
Under some circumstances, propane may lose the distinctive odor that
was added. Other strong odors may hide or mask the odor of propane.
··
·
Colds, allergies, sinus congestion, and the use of tobacco, alcohol or
drugs may impair your ability to detect the odor of propane.
·
Installation must conform with local codes or in the absence of local
codes, with either the
National Fuel Gas Code
, ANSI Z223. 1/NFPA 54,
Natural Gas and Propane Installation Code
, CSA B149.1, or
Propane Storage and Handling Code
, CSA B149. 2, as applicable.
·
To check local codes, see your local L.P. gas dealer or natural gas
company listed in the Yellow Pages for recommended installation
procedures and regulations.
Leak Testing- Disposable L.P. Gas Cylinders
DANGER
Lighting The Burner
Shutting Off the Grill
General Use and Correct Burner Flames
How to Check for Leaks
Fixing A Fuel Leak
Start-Up Check List
Lighting Instructions
TO PREVENT FIRE OR EXPLOSION HAZARD:
·
NO SMOKING. DO NOT use or permit sources of ignition in the area while
doing a leak test.
·
Perform leak tests outdoors only.
·
NEVER perform a leak test with fire or flame.
WARNING
·
Do NOT add charcoal or lighting fluid!
·
Do NOT attempt to refill any 16.4 oz. disposable fuel cylinders.
·
Use only the gas specified.
·
Operate the grill on horizontal solid surface only.
WARNING
THE FOLLOWING RULES MUST ALWAYS BE FOLLOWED IN THIS
ORDER:
1. Check that the burner control knob is turned to "OFF”.
2. DO NOT stand with your head or arms over the cooking area.
CAUTION
1.DO NOT touch hot grill parts with your bare hands!
2.You MUST use protective gloves.
3.Be certain the disposable cylinder is disconnected when the grill is placed
in storage.
WARNING
·
Keep the grill area clean and free from combustible materials, gasoline
and other flammable vapors, liquids, and spare L.P. cylinders.
·
DO NOT obstruct the flow of combustion and ventilation air.
·
Keep the ventilation opening(s) of the L.P. cylinder enclosure free and
clear of debris.
·
A grill becomes hot during use. DO NOT touch cooking surfaces or heat
shield.
WARNING
·
If ignition does not occur after two attempts, turn the control knob off
(clockwise), and turn the regulator switch off. Wait 5 minutes, and repeat the
lighting.
·
Once the burner have extinguished turn the control knob to the “OFF”
position. Disconnecting the gas cartridge to the appliance.
·
If the burner has not lit after several attempts, consult your gas dealer, or
the store where you purchased the grill, or a qualified service provider for
assistance or repair.
·
Never try to rectify the problem by yourself.
1. Make a soapy solution of equal parts mild liquid dishwashing detergent and
water.
2. Turn off the burner control knob.
3. Apply a soap solution to the connection. If bubbles appear at these areas, a
leak is indicated.
No Smoking
No Flame
Infrared Ray Piezoelectric Ignition:
1.Turn control knob to the “OFF” position.
2.Connect the gas cartridge to the grill as the instructions.
3.To light the burner, push down and turn the burner control knob to 9 o'clock
position, wait maximum 5 seconds and press the red piezoelectric igniter
button once. Keep the control knob pushed for further 5-20 seconds until the
burner starts to glow.
·
Turn the burner control knob to off.
If you detect a leak:
1. Stop a leak by tightening the loose joint. DO NOT attempt to repair the
cylinder if it should become damaged; the cylinder MUST be replaced.
2. If you are unable to stop a leak, remove the cylinder from the grill. DO NOT
use the grill until the leak is corrected.
When to test for leaks
1. Perform a leak test each time the gas supply cylinder is connected to the
regulator. Leak test anytime a part of the gas system is replaced.
5.When the burner has lit, the burner rate can be adjusted by turning the
butner control knob anti-clockwise to any position between MAX( ) and MIN
( ) positions.
6.Turn the control knob to the “OFF” position.
Piezoelectric igniter
Control knob
Regulator and Hose
·
Use only regulators and hose approved for LPG at the above pressures 30
mbar. The life expectancy of the regulator is estimated as 10 years. It is
recommended that the regulator is changed within 10 years of the date of
manufacture. Please check production date on your instructions.
·
The use of the wrong regulator or hose is unsafe; always check that you
have the correct items before operating.
·
The hose and regulator uesd must conform to the relevant standard for the
country of use. The length of the horse must be 0.3m(maximum). Worn or
damaged hose must be replaced. Ensure that the hose is not obstructed,
kinked, or in contact witn any part of the rotisserie grill other than at its
connection.
The Burner Flame Check
·
Observe whether there is a flame out of the burner, no flame spout, the
burner turns red, prove the burner normal operation. Otherwise it is not
normal.
·
Keep your arms and face away from being directly above the cooking area.
Look through the cooking grates and observe the burner's flame inside.
·
Some yellow tips on flames up to 1 inch in length are acceptable as long as
no carbon or soot deposits appear.
·
Regular use of your grill will actually help keep it operating more smoothly.
·
Each grill may heat differently. Some units will heat somewhat more to the
center and back of the grill. The flavor of grilled food will improve the more you
use the grill and as you become familiar with it.
Grilling Tips and Hints
Burner Control Setting Tips:
·
The high flame setting is good for quick searing of meat, then finish cooking
on medium or low flame settings.
·
Use a medium flame setting for cooking of steaks, pork chops, chicken and
hamburgers.
·
Use a low flame setting for roasts.
·
Thick steaks will finish with a better texture and more juice if first seared on
high flame setting and then cooked on a low flame setting.
Safe Grill Operation
Food Preparation Hints
Your grill can cook a variety of foods. For best results, follow these
instructions:
·
Trim excess fat from meat and poultry. Slash any remaining
fat to stop curling, but take care not to cut the meat.
·
Frozen meat and poultry should be thawed prior to cooking.
·
Frozen fish and vegetables will cook without thawing.
·
Salt food after cooking to help prevent drying out the food.
·
Brush naturally lean meats with cooking oil or margarine
·
Cook small pieces of tender foods in foil or on special
delicate-food cooking grates(see the section titled
“ Cooking Methods”)
·
Apply barbecue, tomato or sugar-based sauces no sooner than the last 10
minutes of cooking.
·
Turn food with tongs or a spatula; piercing food(especially meat), tends to
dry it out.
Follow These Steps:
1. Shut off the gas at the burner valve and stay away!
2. Allow the fire to burn itself out.
3. Once the fire is out and the appliance has cooled, remove the disposable
cylinder.
4. Clean all parts and inspect for damage. Parts to check for damage are the
L.P. cylinder, regulator, burner valve, and the burner.
5. If any of the above mentioned components are damaged, seek repair from
Goldchef before operating grill again. Do not replace any component by
yourself.
Note:
·
Some flare-up adds a smoky flavor and sears food. Excessive grease fires
can cause a potentially hazardous situation and damage the grill.
·
Trimming excess fat from meat will reduce grease fires and flare-ups. Cook
fatty meat in smaller amounts over indirect heat on a low setting.
·
Be sure to follow the instructions in the section titled "Care,
Maintenance, and Cleaning”.
Suggested Cleaning Materials
·
Mild dish washing liquid detergent
·
Wire brush (Nylon cleaning pad)
·
Hot water
·
Paper clip
·
Soft brass bristled brush
Plastic Surfaces
·
Wash with a soft cloth and hot soapy water solution. Rinse with water. Do
not use abrasive cleaners, degreasers or a concentrated barbecue cleaner on
plastic parts.
Grill Basket
·
Use a mild soapy water solution. Non-abrasive scouring powder can be
used on stubborn stains then rinse with water.
Drip Tray
·
Use a mild soapy water solution. Non-abrasive scouring powder could be
used on stubborn stains then rinse with water.
In Case of Grease Fire
Care, Maintenance and Cleaning
Moving and Storage
Troubleshooting
CAUTION
All cleaning and maintenance should be done only when the grill is cool &
with the fuel supply turned off at the cylinder. Disposable propane cylinder
should be detached from the grill during cleaning.
CAUTION
A collision with the grill, as with any metal object, could cause injury. Use care
when moving a portable gas grill.
Moving the grill:
·
DO NOT move the grill while it is lit or hot, or with objects on the cooking
surface.
·
Remove the drip tray before moving the grill to prevent spills.
·
Collapse the grill before moving.
·
Move the grill slowly.
After moving the grill:
·
Check all gas connections for leaks that could occur from the movement.
Steps to follow before storing grill:
·
Clean the grill, including the drip tray.
·
For outdoor use only. If the grill is stored indoors, detach the cylinder
outdoors. If left outdoors, remove the cylinder and cover the grill for protection
from the weather.
·
Grill covers may be purchased from a grill dealer or manufacturer.
Problem:
Grill will not light when the igniter button is pushed or flame blows
out.
Possible Causes and Solutions:
1. Lack of fuel. Check to see that the cylinder has fuel.
2. Make sure the burner is turned on. Allow up to four seconds for gas flow to
ignite.
3. Regulator failure; regulator needs to be replaced by an authorized service
dealer.
4. Make sure the regulator and cylinder are properly assembled. See the
section titled "Installing 1 Ib. Propane Cylinders.”
Problem:
Flame blows out on low setting or has uneven heat distribution
Possible Causes and Solutions:
1. Cold grill needs to be preheated for 2 minutes on high setting.
2.Cold and windy weather will require you to move the grill away from the
wind.
3. Lack of fuel. Check to see that the cylinder has fuel.
Problem:
Grill too hot.
Possible Causes and solutions:
1. Excessive flareups which require the maintenance described in the section
titled "IN CASE OF GREASE FIRE.”
2. A damaged regulator which requires replacement with factory authorized
parts.
3. Choose a lower cooking temperature if using excessively high settings.
CAUTION
·
NEVER leave cooking food unattended. Continually observing the food will
help in maintaining an even temperature, conserve fuel, improve the foods
flavor and lessen flare-ups.
·
To move the grill basket, slowly lift the handle to avoid burning in case of a
grease fire flare-ups.
·
DO NOT expose any part of your body directly above the cooking area.
7
A4
ASSEMBLER/INSTALLER
Leave these instructions with the consumer.
CONSUMER/USER:
Read all instructions and keep in a safe place for future reference.
For Outdoor Use Only
Note: Propane cylinder is not included.
3
2
4
5
6
7
8
9
Portable L.P. Gas Cylinder
Cylinder Specifications
Grill Features
·
Liquefied Petroleum gas (abbreviated L.P. gas propane), is highly
flammable. It becomes liquid when stored under high pressure inside a
cylinder and vaporizes when released. L.P. gas is heavier than air and tends to
collect in low areas. It is important that there are no leaking connections on
your gas grill that could cause a fire or explosion (see the section titled "LEAK
TESTING ")
·
Portable L.P. gas grills require a fuel delivery system which is comprised of a
valve, a regulator with vent hole an L.P. gas supply cylinder.
·
All L.P. gas cylinders used with this appliance shall be constructed and
marked in accordance with the
Specifications for L P. Gas Cylinders
of
the U.S Department of Transportation (DOT) or the National Standard of
Canada,
CAN/CSA-B339
,
Cylinders, Spheres and Tubes for
Transportation of Dangerous Goods; and Commission
, as
applicable; and a cylinder connection device compatible with the connection
for outdoor cooking appliances.
·
Read labels on the L.P. Gas Supply Cylinder.
DANGER
·
NEVER store a spare L.P. gas supply cylinder under the grill body or
inside the grill enclosure or in the vicinity of any heat producing appliance.
·
Failure to follow this information exactly could result in an explosion and/or
fire causing death or serious injury
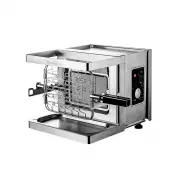
1. Grilling/Cooking Surface
2. Piezoelectric Igniter
3. Control Knob
4. Grill Basket
5. Foot
6. Regulator
7. Disposable Cylinder (Not Included)
8. Drip Tray
WARNING
This appliance is not to be installed in or on a recreational vehicle and/or
boat.
Follow these safety rules before each use:
1. A minimum clearance of 24 inches from the left, right, back sides of the
grill must be maintained between the grill and any combustible construction
such as wood siding of a building.
2. Never locate the grill under an unprotected combustible material or
overhang.
3. Do not obstruct the flow of combustion and ventilation air. Maintain a
minimum clearance of 3 inches from the back of the grill and non-combusti-
ble construction such as a concrete or brick wall.
4. The grill should be level and not facing directly into the wind.
WARNING
·
A liquid propane tank, not connected for use with this gas grill, shall not be
stored in the vicinity of this or any other appliance.
·
Connections must comply with local requirements and are the sole
responsibility of the person performing the work.
WARNING
·
DO NOT attempt to adjust the regulator as this could create a situation
causing personal injury or property damage.
1
2
4
3
6
8
5
7
Assemble Grill
IMPORTANT:
Remove all packing material prior to assembly/use.
·
Remove the grill main part, heat shield, grill basket, drip tray and feet from
packaging.
·
Inspect all packing and remove all parts.
·
See carton for parts included with your unit.
heat shield
main part
rotisserie grill
basket
foot
drip tray
Install feet at
the bottom
Pull out telescope
grill frame
Insert drip tray
Install heat shield
Insert rotisserie grill
basket
Operate on horizontal
solid surface only
6
it can be installed
by one person
·
Notice the “ top “ sign on the handle of the locking-sider clamp.
WARNING
·
Only cylinders marked "Propane" must be used.
·
Only use a 1 Ib. disposable propane cylinder.
Tighten by hand only. DO NOT use tools.
Turn the control knob to the “OFF”
position, open the back door in
the direction of the arrow
Turn gas cartridge clockwise to
connect the gas regulator.
Place the gas cartridge to the appliance and lock it with straps.
Unlock the straps, turn gas cartridge anticlockwise to disconnect it
from the gas regulator.
WARNING
·
This procedure MUST be performed OUTDOORS only! Read and follow
the directions on the cylinder.
·
Before attaching propane cylinder make sure burner valve are in the OFF
position.
·
Remove plastic cap from top of propane cylinder and screw cylinder into
regulator hand tight.
·
Never operate grill with propane cylinder in an inverted position.
WARNING
The heat shield of handle must be placed on the outside of the front frame
support. Damage will occur and void the warranty.
CAUTION
·
You must USE protective gloves when operating the hot locking-sider
clamp of the grill to prevent hot.
Rotisserie Grill Basket Use Instructions
Locking – side clamp
Installing 1 lb. Propane Cylinder
Connecting/Disconnecting the Gas Cartridge to the Appliance
DANGER
·
NEVER store a spare L.P. gas supply cylinder under the grill body or in the
vicinity of any heat producing appliance.
·
Failure to follow this information exactly could result in an explosion and/or
fire causing death or serious injury.
CAUTION
"Loading the manual" means you need to wait until the file loads and becomes available for online reading. Some manuals are very large, and the time they take to appear depends on your internet speed.