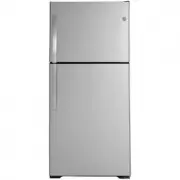
Page 2 - THANK YOU FOR MAKING GE APPLIANCES A PART OF YOUR HOME.; card included in the packing material.
2 49-1000478 Rev. 2 THANK YOU FOR MAKING GE APPLIANCES A PART OF YOUR HOME. Whether you grew up with GE Appliances, or this is your first, we’re happy to have you in the family. We take pride in the craftsmanship, innovation and design that goes into every GE Appliances product, and we think you wil...
Page 3 - CAUTION; SAFETY; IMPORTANT SAFETY INFORMATION; READ ALL INSTRUCTIONS BEFORE USING THE APPLIANCE; WARNING; FIRE OR EXPLOSION HAZARD Flammable Refrigerant
49-1000478 Rev. 2 3 CAUTION To reduce the risk of injury when using your refrigerator, follow these basic safety precautions. Ŷ 'RQRWFOHDQJODVVVKHOYHVRUFRYHUVZLWKZDUP water when they are cold. Glass shelves and covers may break if exposed to sudden temperature changes or impact, such as bumping or d...
Page 4 - PROPER DISPOSAL OF YOUR OLD REFRIGERATOR; CONNECTING ELECTRICITY; ELECTRICAL SHOCK HAZARD; READ AND SAVE THESE INSTRUCTIONS; SUFFOCATION AND ENTRAPMENT HAZARD; INSTALLATION; FIRE OR EXPLOSION HAZARD; Refrigerant and Foam Disposal
4 49-1000478 Rev. 2 PROPER DISPOSAL OF YOUR OLD REFRIGERATOR Do not, under any circumstances, cut or remove the third (ground) prong from the power cord. For personal safety, this appliance must be properly grounded. The power cord of this appliance is equipped with a 3-prong (grounding) plug which ...
Page 5 - emperature Control / Garage Operaion / Sabbath Mode
49-1000478 Rev. 2 5 The temperature control adjusts the refrigerator from its warmest to coldest settings. Your refrigerator will come with the recommended IDFWRU\VHWWLQJRQ³´)RUFROGHUWHPSHUDWXUHWXUQWKHNQREFORFNZLVHWRHLWKHUVHWWLQJ³´RU³´)RU warmer temperature, turn the dial counter-clockwise WRHLWKHUV...
Page 6 - USING THE REFRIGERA; Shelves; Fresh Food Compartment Shelves
6 49-1000478 Rev. 2 USING THE REFRIGERA T OR: Shelves Fresh Food Compartment Shelves Freezer Compartment Shelves When placed correctly on the shelf supports, the steel wire stationary shelves will stop before coming FRPSOHWHO\RXWRIWKHIUHH]HUDQGZLOOQRWWLOWZKHQ\RX place food on it or remove food from ...
Page 7 - Drawer and Cover; Drawer Removal; Storage Drawers; Not all features are on all models.; Snack Drawer
49-1000478 Rev. 2 7 Drawer and Cover Drawer Removal 'UDZHUVFDQEHUHPRYHGHDVLO\E\JUDVSLQJWKHVLGHV and lifting up slightly while pulling drawers past the stop location. Cover Removal 1. Remove the drawers. 2. Reach in, push the back of glass cover up, and at the same time, pull it backward as far as it...
Page 8 - Automatic Icemaker
8 49-1000478 Rev. 2 Automatic Icemaker (on some models) WARNING Connect to potable water supply only. A cold water supply is required for automatic icemaker operation. The water pressure must be between 40 and 120 psi (275-827 kilopascals). CAUTION Avoid contact with the moving parts of the ejector ...
Page 9 - Cleaning the Inside; Moving the Refrigerator; Preparing to Move; Care And Cleaning; Cleaning the Outside; CARE AND; DO NOT use Stainless Steel cleaners on the door surfaces.
49-1000478 Rev. 2 9 Cleaning the Inside To help prevent odors, leave an open box of baking soda in the IUHVKIRRGDQGIUHH]HUFRPSDUWPHQWV8QSOXJWKHUHIULJHUDWRUEHIRUHFOHDQLQJ,IWKLVLVQRWSUDFWLFDO wring excess moisture out of sponge or cloth when cleaning around switches, lights or controls. 8VHZDUPZDWHUDQ...
Page 10 - Installation Instructions; Note to Installer –; INST
10 49-1000478 Rev. 2 ROLLERS AND LEVELING LEGS Leveling legs near each front corner of the refrigerator are adjustable. They firmly position the refrigerator and prevent it from moving when the doors are opened. Leveling legs should be set so the front of the refrigerator is raised just enough that ...
Page 11 - INSTALLING THE WATER LINE (on some models); BEFORE YOU BEGIN; WHAT YOU WILL NEED
49-1000478 Rev. 2 11 INST ALLA TION INSTRUCTIONS Installation Instructions INSTALLING THE WATER LINE (on some models) BEFORE YOU BEGIN 5HFRPPHQGHGFRSSHUZDWHUVXSSO\NLWVDUH:;;:;;RU:;;GHSHQGLQJRQWKHDPRXQWRI tubing you need. Approved plastic water supply lines are SmartConnect Refrigerator Tubing :;;:...
Page 12 - INSTALLATION INSTRUCTIONS
12 49-1000478 Rev. 2 Installation Instructions INSTALLING THE WATER LINE (Cont.) 1 SHUT OFF THE MAIN WATER SUPPLY AND UNPLUG REFRIGERATOR Turn on the nearest faucet (counterclockwise) long enough to clear the line of water. 2 CHOOSE THE VALVE LOCATION Choose a location for the valve that LVHDVLO\DFF...
Page 14 - INSTALLING THE DOOR HANDLE; PLASTIC HANDLE; HANDLE INSTALLATION; BADGE AND PLUG BUTTON
14 49-1000478 Rev. 2 Installation Instructions INSTALLING THE DOOR HANDLE 1A PLASTIC HANDLE ,QVWDOOWKHKDQGOHIDVWHQHULQWRWKHKROHRQWKHIUHH]HUDQGIUHVKIRRGGRRUV7KHIDVWHQHUV correspond with the handle side (the side opposite the hinge). 1B STAINLESS STEEL HANDLE Attach plastic bushing to the door with th...
Page 15 - REVERSING THE DOOR SWING; BEFORE YOU START; REMOVE THE FREEZER DOOR; Lifting Hazard
49-1000478 Rev. 2 15 INST ALLA TION INSTRUCTIONS REVERSING THE DOOR SWING Installation Instructions 1 BEFORE YOU START 8QSOXJWKHUHIULJHUDWRUIURPLWVHOHFWULFDO outlet. 1.2 Empty all door shelves, including the dairy compartment. CAUTION 'RQRWOHWHLWKHUGRRUGURSWRWKH floor. To do so could damage the door...
Page 16 - REMOVE THE FRESH FOOD; REVERSING THE HARDWARE
16 49-1000478 Rev. 2 Installation Instructions REVERSING THE DOOR SWING (Cont.) 3 REMOVE THE FRESH FOOD DOOR 3.1 Tape the door shut with masking tape. 8QVFUHZWKHFHQWHU hinge pin and remove it from its socket. Be careful not to lose the center hinge and washer. 3.3 Remove the tape and tilt the door a...
Page 17 - REVERSING THE DOOR HANDLES
49-1000478 Rev. 2 17 INST ALLA TION INSTRUCTIONS Installation Instructions REVERSING THE DOOR SWING (Cont.) 5 REVERSING THE DOOR HANDLES 5.1. Remove handle screws from the top of fresh food door. Remove handle screws from the ERWWRPRIIUHH]HUGRRU 5.2. Remove door handle on fresh food door by sliding ...
Page 18 - RE-HANGING THE DOORS
18 49-1000478 Rev. 2 Installation Instructions REVERSING THE DOOR SWING (Cont.) 6 RE-HANGING THE DOORS 6.1 Re-hang the fresh food door 6.1.1 Lower the fresh food door onto the bottom hinge pin. Be sure the washer is in place on the pin. 6.1.2 Tilt the door towards the cabinet. As the door is brought...
Page 19 - TROUBLESHOOTING TIPS:; Normal Operating Sounds; Do you hear what I hear? These sounds are normal.
49-1000478 Rev. 2 19 TROUBLESHOOTING TIPS: Normal Operating Sounds Normal Operating Sounds Ŷ The new high efficiency compressor may run faster and longer than your old refrigerator and you may hear a high-pitched hum or pulsating sound while it is operating. Ŷ You may hear a whooshing sound when the...
Page 20 - Before you call for service; Truth or Myth; TROUBLESHOOTING TIPS
20 49-1000478 Rev. 2 Troubleshooting Tips... Before you call for service 6DYHWLPHDQGPRQH\5HYLHZWKHFKDUWVRQWKHIROORZLQJSDJHVILUVWDQG\RXPD\QRWQHHGWRFDOOIRUVHUYLFH,I needed, service can be scheduled by visiting us online GEAppliances.com or calling 800.GECARES 800.432.2737. ,Q&DQDGDYLVLW GEApplianc...
Page 21 - Refrigerator Limited Warranty; Haier; company; GE Appliances Will Replace
49-1000478 Rev. 2 21 LIMITED W ARRANTY Staple your receipt here. Proof of the original purchase date is needed to obtain service under the warranty . Refrigerator Limited Warranty For US Customers, DOOZDUUDQW\VHUYLFHSURYLGHGE\RXU)DFWRU\6HUYLFH&HQWHUVRUDQDXWKRUL]HG&XVWRPHU&DUH ® technicia...
Page 22 - CONSUMER SUPPORT; Consumer Support
3ULQWHGLQ8QLWHG6WDWHV GE Appliances Website Have a question or need assistance with your appliance? Try the GE Appliances Website 24 hours a day, any day of the year! You can also shop for more great GE Appliances products and take advantage of all our on-line support VHUYLFHVGHVLJQHGIRU\RXUFRQYHQLH...
Page 23 - RÉFRIGÉRATEUR; Congélateur au sommet
MESURES DE SÉCURITÉ . . . . . . . . . 3 Instructions de fonctionnement Bouton de commande de la température . 5 Fonctionnement dans un garage . . . . . . . . . 5 Mode Sabbat . . . . . . . . . . . . . . . . . . . . . . . . . . 5 Clayettes du compartiment réfrigérateur . .6 Clayettes du compartiment c...
Page 24 - NOUS VOUS REMERCIONS D’ACCUEILLIR GE APPLIANCES CHEZ VOUS; sommes heureux de vous accueillir dans notre famille.
2 49-1000478 Rev. 2 NOUS VOUS REMERCIONS D’ACCUEILLIR GE APPLIANCES CHEZ VOUS Que vous ayez grandi avec GE Appliances ou qu’il s’agisse de votre première acquisition, nous sommes heureux de vous accueillir dans notre famille. Nous sommes fiers du savoir-faire, de l’innovation et de l’esthétique qui ...
Page 25 - LISEZ TOUTES LES DIRECTIVES AVANT D'UTILISER L'APPAREIL; LIRE ET CONSERVER CES INSTRUCTIONS; RISQUE D’INCENDIE OU D’EXPLOSION Réfrigérant inflammable
49-1000478 Rev. 2 3 INFORMA TION DE SÉCURITÉ INFORMATION DE SÉCURITÉ IMPORTANTES LISEZ TOUTES LES DIRECTIVES AVANT D'UTILISER L'APPAREIL ATTENTION Pour réduire le risque de blessures lorsque vous utilisez votre réfrigérateurde , veuillez suivre ces consignes de sécurité. Ŷ 1HQHWWR\H]SDVOHVFOD\HWWHVR...
Page 26 - BRANCHEMENTS ÉLECTRIQUES; RISQUE DE CHOC ÉLECTRIQUE; INFORMA; MISE AU REBUT APPROPRIÉE DE VOTRE ANCIEN RÉFRIGÉRATEUR; RISQUE DE SUFFOQUER OU D’Y ÊTRE EMPRISONNÉ; Mise au rebut des produits réfrigérants et en mousse; RISQUE D’INCENDIE OU D’EXPLOSION
4 49-1000478 Rev. 2 Ne coupez pas ou n’enlevez pas, sous aucun prétexte, la troisième broche de mise à la terre du cordon d’alimentation. Pour des raisons de sécurité, cet appareil doit être correctement mis à la terre. Le cordon d’alimentation de cet appareil est équipé d’une fiche à trois broches ...
Page 27 - &RPPDQGHGHODWHPSpUDWXUH; Fonctionnement dans un garage
49-1000478 Rev. 2 5 a commande de température règle le réfrigérateur depuis le plus chaud jusqu’au plus froid. À la livraison, votre réfrigérateur est réglé à la valeur d’usine « 3 ». Pour une température plus froide, tournez le bouton dans le sens des aiguilles jusqu’à la valeur « 4 » ou « 5 ». Pou...
Page 28 - Clayettes pleine largeur
49-1000478 Rev. 2 Clayettes du compartiment réfrigérateur UTILISA TION DU RÉFRIGÉRA TEUR: &OD\HWWHV Clayettes du compartiment congélateur Lorsqu’elles sont placées correctement sur leurs supports, les clayettes fixes se bloqueront avant de sortir complètement du congélateur et elles ne pencheron...
Page 29 - Tiroir et du couvercle; Enlèvement du bac de rangement; Pour remettre les bacs:; Bacs de rangement
49-1000478 Rev. 2 7 UTILISA TION DU RÉFRIGÉRA TEUR: Bacs de rangement Tiroir et du couvercle Enlèvement du bac de rangement Vous pouvez enlever facilement les bacs en relevant légèrement les côtés lorsque le bac dépasse la position de butée. Retrait du couvercle 1. Enlevez les deux bacs. 2. Placez v...
Page 30 - UTILISA; Machine à glaçons automatique
8 49-1000478 Rev. 2 AVERTISSEMENT 5DFFRUGH]O¶DSSDUHLOjXQH alimentation d’eau potable seulement. Une alimentation d’eau froide est requise pour faire fonctionner la machine à glaçons et le pichet à remplissage automatique. La pression d’eau doit se situer entre 40 et 120 psi. (275 à 827 kPa). ATTENTI...
Page 31 - ENTRETIEN ET NETT; Nettoyage de l’intérieur; Écartement du réfrigérateur; Préparation de départ en vacances; Entretien et nettoyage; Nettoyage de l’extérieur
49-1000478 Rev. 2 9 ENTRETIEN ET NETT OYAGE Nettoyage de l’intérieur Pour aider à empêcher les odeurs, laissez une boîte ouverte de bicarbonate de soude dans les compartiments réfrigération et congélation. Débranchez votre réfrigérateur avant de le nettoyer. Si ce n’est pas pratique, enlevez toute h...
Page 32 - Instructions d’installation; DÉGAGEMENTS; AVANT DE COMMENCER; IMPORTANT –; Note à l’installateur –; EMPLACEMENT DU RÉFRIGÉRATEUR; INSTRUCTIONS D’INST
10 49-1000478 Rev. 2 ROULETTES ET PIEDS DE NIVELLEMENT Les pieds de nivellement situés à proximité des coins avant GXUpIULJpUDWHXUVRQWUpJODEOHV,OVPDLQWLHQQHQWIHUPHPHQW le réfrigérateur en place et l’empêchent de bouger lors de l’ouverture des portes. Les pieds de nivellement doivent être réglés de s...
Page 33 - INSTALLATION DE LA CONDUITE D’EAU; CE DONT VOUS AUREZ BESOIN
49-1000478 Rev. 2 11 INSTRUCTIONS D’INST ALLA TION Instructions d’installation INSTALLATION DE LA CONDUITE D’EAU (sur certains modèles) AVANT DE COMMENCER Nous recommandons les trousses d’alimentation d’eau en cuivre WX8X2, WX8X3, WX8X4, selon le montant de conduite dont vous avez besoin. Nous appro...
Page 34 - INSTALLATION DE LA CONDUITE D’EAU (; SUITE
12 49-1000478 Rev. 2 Instructions d’installation INSTALLATION DE LA CONDUITE D’EAU ( SUITE ) 1 FERMEZ L’ALIMENTATION PRINCIPALE D’EAU ET DÉBRANCHEZ LE RÉFRIGÉRATEUR Ouvrez le robinet le plus proche en sens inverse des aiguilles d’une montre suffisamment longtemps pour purger le tuyau. 2 CHOIX DE L’E...
Page 35 - BRANCHEZ LE TUYAU À VOTRE; FERMEZ L’EAU AU; INSTALLEZ LE RÉFRIGÉRATEUR
49-1000478 Rev. 2 13 INSTRUCTIONS D’INST ALLA TION Instructions d’installation INSTALLATION DE LA CONDUITE D’EAU ( SUITE ) 8 BRANCHEZ LE TUYAU À VOTRE RÉFRIGÉRATEUR NOTES: • Avant de brancher le tuyau à votre réfrigérateur, assurez-vous que le cordon d’alimentation électrique du réfrigérateur ne soi...
Page 36 - INSTALLATION DE LA POIGNÉE; ÉCUSSON ET LE BOUCHON; POIGNÉE EN PLASTIQUE
14 49-1000478 Rev. 2 Instructions d’installation INSTALLATION DE LA POIGNÉE 2 INSTALLATION DE LA POIGNÉE 1. Fixez la poignée sur la porte congélateur en la glissant vers le haut sur le manchon en plastique ou à l'aide des vis dans le bas de la poignée. 2. Fixez la poignée sur la porte réfrigérateur ...
Page 37 - INVERSION DE L’OUVERTURE DES PORTES; ENLÈVEMENT DE LA PORTE DU; OUTILS REQUIS; Portes pesantes
49-1000478 Rev. 2 15 INSTRUCTIONS D’INST ALLA TION INVERSION DE L’OUVERTURE DES PORTES Instructions d’installation 1 AVANT DE COMMENCER 1.1 Débranchez le réfrigérateur. 1.2 Videz tous les balconnets y compris le compartiment laitier. ATTENTION Ne laissez pas tomber la porte sur le sol ce qui pourrai...
Page 38 - INVERSION DE LA QUINCAILLERIE
49-1000478 Rev. 2 Instructions d’installation INVERSION DE L’OUVERTURE DES PORTES (SUITE) 3 ENLÈVEMENT DE LA PORTE DU RÉFRIGÉRATEUR 3.1 Maintenez la porte fermée avec du ruban à masquer. 3.2 Dévissez l’axe de charnière central et retirez-le de son logement. Veillez à ne pas perdre la charnière centr...
Page 39 - INVERSION DES POIGNÉES DE PORTE
49-1000478 Rev. 2 17 INSTRUCTIONS D’INST ALLA TION Instructions d’installation INVERSION DE L’OUVERTURE DES PORTES (SUITE) 5 INVERSION DES POIGNÉES DE PORTE 5.1. Enlevez les vis de la poignée dans le haut de la porte réfrigérateur. Enlevez les vis de la poignée dans le bas de la porte congélateur. 5...
Page 40 - REMISE EN PLACE DES PORTES
18 49-1000478 Rev. 2 INVERSION DE L’OUVERTURE DES PORTES (SUITE) REMISE EN PLACE DES PORTES 5HPLVHHQSODFHGHODSRUWHGXUpIULJpUDWHXU$EDLVVH]ODSRUWHGXFRPSDUWLPHQW réfrigérateur sur l’axe de charnière inférieur. Assurez-vous que la rondelle est en place sur l’axe. ,QFOLQH]ODSRUWHYHUVODFDUURVVHULH/RUVTXH ...
Page 41 - CRAQUEMENTS et; CONSEILS DE DÉP; Bruits normaux de fonctionnement
49-1000478 Rev. 2 19 Bruits normaux de fonctionnement Ŷ /HQRXYHDXFRPSUHVVHXU à rendement élevé peut fonctionner plus longtemps et plus vite que votre ancien réfrigérateur et vous pouvez entendre un son modulé ou un ronflement aigu pendant son fonctionnement. Ŷ 9RXVSRXYH]HQWHQGUHXQVLIIOHPHQWORUVTXHOH...
Page 42 - Conseils de dépannage; Avant de faire un appel de service; Vérité ou mythe
20 49-1000478 Rev. 2 Conseils de dépannage ... Avant de faire un appel de service eFRQRPLVH]WHPSVHWDUJHQW&RQVXOWH]G¶DERUGOHVWDEOHDX[GHVSDJHVVXLYDQWHVHWYRXVSRXUULH]YRXVpYLWHUXQDSSHOGH service.Au besoin, vous pouvez programmer un appel de service en nous visitant sur GEAppliances.com ou en composa...
Page 43 - GARANTIE LIMITÉE; Garantie limitée du réfrigérateur; Ce qui n’est pas couvert :; Pendant la période de :; GE Appliances remplacera
49-1000478 Rev. 2 21 GARANTIE LIMITÉE $JUDIH]YRWUHIDFWXUHLFL3RXUEpQp¿FLHUGXVHUYLFHGHUpSDUDWL RQ sous garantie, une preuve de la date d’achat initial est nécessaire. Garantie limitée du réfrigérateur Pour les clients des États-Unis, WRXWHVOHVUpSDUDWLRQVHQYHUWXGHODJDUDQWLHVRQWIRXUQLVSDUQRV&HQWUHGH...
Page 44 - Soutien au consommateur; SOUTIEN AU
,PSULPpDX[eWDWV8QLV Soutien au consommateur Site Web de GE Appliances Vous avez une question ou vous avez besoin d’aide pour votre appareil électroménager? Visitez le site Web de GE $SSOLDQFHVKHXUHVSDUMRXUWRXVOHVMRXUVGHO¶DQQpH9RXVSRXYH]DXVVL\WURXYHUG¶DXWUHVIRUPLGDEOHVSURGXLWV*($SSOLDQFHVHWWLUHUDYDQW...
Page 45 - GARANTÍA LIMITADA; REFRIGERADORS; Congelador superior
INFORMACIÓN DE SEGURIDAD . . . . . . . . . . . . . . . . . . . 3 OPERACIÓN DEL REFRIGERADOR Control . . . . . . . . . . . . . . . . . . . . . . . . . . . . . . . 5 Modo Sabático . . . . . . . . . . . . . . . . . . . . . . . . 5 Funcionamiento en Garaje . . . . . . . . . . . . . . 5Estantes del compa...
Page 46 - GRACIAS POR HACER QUE GE APPLIANCES SEA PARTE DE SU HOGAR.; tenerlo en la familia.
2 49-1000478 Rev. 2 GRACIAS POR HACER QUE GE APPLIANCES SEA PARTE DE SU HOGAR. Ya sea que haya crecido usando GE Appliances, o que ésta es su primera vez, nos complace tenerlo en la familia. Sentimos orgullo por el nivel de arte, innovación y diseño de cada uno de los electrodomésticos de GE Applian...
Page 47 - PRECAUCIÓN; ADVERTENCIA; RIESGO DE INCENDIO O EXPLOSIÓN Refrigerantes Inflamables
49-1000478 Rev. 2 3 INFORMACIÓN DE SEGURIDAD LEA Y GUARDE ESTAS INSTRUCCIONES INFORMACIÓN IMPORTANTE DE SEGURIDADLEA TODAS LAS INSTRUCCIONES ANTES DE USAR PRECAUCIÓN A fin de reducir el riesgo de lesiones al usar el refrigerador, siga estas precauciones básicas. Ŷ 1ROLPSLHHVWDQWHVGHYLGULRQLWDSDVFRQD...
Page 48 - FORMA ADECUADA DE DESCARTAR SU ANTIGUO REFRIGERADOR; PELIGRO DE SUFFOCATION Y ENTRAPMENT; Cómo Eliminar Refrigerantes y Gomaespumas:; CONEXIÓN DE LA ELECTRICIDAD; INFORMACIÓN DE SEGURIDAD; LEA Y GUARDE ESTAS INSTRUCCIONES; INSTALACIÓN; RIESGO DE INCENDIO O EXPLOSIÓN
4 49-1000478 Rev. 2 FORMA ADECUADA DE DESCARTAR SU ANTIGUO REFRIGERADOR ADVERTENCIA PELIGRO DE SUFFOCATION Y ENTRAPMENT El incumplimiento de estas instrucciones de eliminación puede causar la muerte o lesiones graves. IMPORTANTE: Que un niño quede atrapado o que sufra una DVIL[LDQRVRQSUREOHPDVGHOSDV...
Page 49 - Control de la temperatura; OPERACIÓN DEL; &RQWUROGHODWHPSHUDWXUD*DUDJH2SHUDWLRQ0RGR6DEiWLFR
49-1000478 Rev. 2 5 l control de temperatura ajusta el refrigerador desde la configuración más caliente a la más fría. Su refrigerador contará con la configuración de fábrica UHFRPHQGDGDHQ³´3DUDDFFHGHUDXQDWHPSHUDWXUDPiVIUtDJLUHODSHULOODHQVHQWLGRKRUDULRD³´R´3DUD acceder a una temperatura más cálida, ...
Page 50 - Estantes; Estantes del compartimiento de alimentos frescos; Estantes con Ancho Completo
6 49-1000478 Rev. 2 OPERACIÓN DEL REFRIGERADOR: Estantes Estantes del compartimiento de alimentos frescos Estantes del compartimiento del congelador Cuando se coloquen de forma correcta en los soportes de los estantes, los dos estantes fijos con cables de acero se detendrán antes de salir completame...
Page 51 - Cajón y Tapa; Retiro del Cajón; Gavetas de almacenamiento
49-1000478 Rev. 2 7 Cajón y Tapa Retiro del Cajón Los cajones pueden ser retirados con facilidad tomando ambos lados y levantando levemente mientras se los empuja superando el punto de detención. Retiro de la Tapa 1. Retire las gavetas. 2. Alcance y empuje la parte trasera de la tapa de vidrio hacia...
Page 52 - Máquina de hielos automática
8 49-1000478 Rev. 2 Máquina de hielos automática (en algunos modelos) ADVERTENCIA Realice la conexión a un suministro de agua potable únicamente. Se requiere un suministro de agua fría para el funcionamiento de la máquina de hielos automática. La presión del agua deberá estar entre 40 y 120 psi (275...
Page 53 - Limpieza interior; Mover el refrigerador; Replacing the Lights; Cómo prepararse para las vacaciones; Cómo prepararse para trasladarse; Cuidado y limpiez; Limpieza exterior
49-1000478 Rev. 2 9 Limpieza interior Para ayudar a evitar olores, deje una caja abierta de bicarbonato en los compartimientos de alimentos frescos y en el congelador. 'HVFRQHFWHHOUHIULJHUDGRUDQWHVGHOLPSLDUOR6LHVWRQRHV práctico, escurra la humedad excesiva con una esponja o paño al limpiar alrededor...
Page 54 - Instrucciones para la instalación; IMPORTANTE; INSTRUCCIONES P
10 49-1000478 Rev. 2 RODILLOS Y PATAS NIVELADORAS Las patas niveladoras cerca de cada esquina delantera del refrigerador son ajustables. Éstas colocan firmemente el refrigerador y evitan que se mueva cuando las puertas se abran. Las patas niveladoras se deben colocar de manera que el frente del refr...
Page 55 - CÓMO INSTALAR LA TUBERÍA DEL AGUA; ANTES DE INICIAR; QUÉ NECESITA
49-1000478 Rev. 2 11 INSTRUCCIONES P ARA LA INST ALACIÓN Instrucciones para la instalación CÓMO INSTALAR LA TUBERÍA DEL AGUA (EN ALGUNOS MODELOS) ANTES DE INICIAR Los kits de cobre recomendados para el suministro de agua VRQ:;;:;;R:;;GHSHQGLHQGRGHODFDQWLGDG de tubería necesaria. Las tuberías plástic...
Page 56 - ANTES DE EMPEZAR
12 49-1000478 Rev. 2 Instrucciones para la instalación CÓMO INSTALAR LA TUBERÍA DEL AGUA (EN ALGUNOS MODELOS) 1 CIERRE EL SUMINISTRO PRINCIPAL DE AGUA Y DESENCHUFE EL REFRIGERADOR Abra el grifo más cercano en contra del sentido de las agujas del reloj por suficiente tiempo para limpiar la tubería de...
Page 57 - CONECTE LA TUBERÍA AL; ABRA LA LLAVE DEL; INICIE LA MÁQUINA DE HIELO
49-1000478 Rev. 2 13 CÓMO INSTALAR LA TUBERÍA DEL AGUA (Cont.) 8 CONECTE LA TUBERÍA AL REFRIGERADOR NOTAS: • Antes de hacer la conexión al refrigerador, asegúrese de que el cable de corriente del refrigerador no esté conectado en el tomacorriente de la pared. • Recomendamos instalar un filtro de agu...
Page 58 - INSTALACIÓN DE LA MANIJA DE LA PUERTA
14 49-1000478 Rev. 2 2 INSTALACIÓN DE LA MANIJA DE LA PUERTA 1. Adhiera la manija a la puerta del freezer deslizando la manija hacia arriba sobre el buje de plástico o el suspensor con los tornillos en la parte inferior de la manija. 2. Adhiera la manija a la puerta de comidas frescas deslizando la ...
Page 59 - CÓMO INVERTIR EL VAIVÉN DE LA PUERTA; RETIRE LA PUERTA DEL
49-1000478 Rev. 2 15 CÓMO INVERTIR EL VAIVÉN DE LA PUERTA 1 ANTES DE INICIAR 'HVFRQHFWHHOUHIULJHUDGRUGHOWRPDFRUULHQWH eléctrico. 'HVRFXSHWRGRVORVHVWDQWHVGHODSXHUWD incluyendo el compartimiento de lácteos. PRECAUCIÓN 1RSHUPLWDTXHQLQJXQD puerta se caiga al piso, ya que esto podría dañar el freno de la...
Page 60 - CÓMO INVERTIR LOS ELEMENTOS
16 49-1000478 Rev. 2 CÓMO INVERTIR EL VAIVÉN DE LA PUERTA (Cont.) 3 RETIRE LA PUERTA DE ALIMENTOS FRESCOS 3.1 Coloque cinta de mascarar en el cierre de la puerta.. 'HVHQURVTXHHOSHUQRGHODELVDJUDFHQWUDO\UHWLUH el mismo de su ficha. Tenga cuidado de no perder la bisagra central ni la arandela. 3.3 Reti...
Page 61 - CÓMO INVERTIR LAS MANIJAS DE LAS PERTAS
49-1000478 Rev. 2 17 CÓMO INVERTIR EL VAIVÉN DE LA PUERTA (Cont.) Instrucciones para la instalación 5 CÓMO INVERTIR LAS MANIJAS DE LAS PERTAS 5.1. Retire los tornillos de la manija desde la parte superior de la puerta de comidas frescas. Retire los tornillos de la manija desde la parte inferior de l...
Page 62 - CÓMO VOLVER A COLGAR LAS
18 49-1000478 Rev. 2 6 CÓMO VOLVER A COLGAR LAS PUERTAS 6.1 Vuelva a colgar la puerta de los alimentos frescos 6.1.1 Baje la puerta de alimentos frescos al perno de la bisagra inferior. Asegúrese de que la arandela esté correctamente colocada en el perno. 6.1.2 Incline la puerta hacia el gabinete. A...
Page 63 - Sonidos De Funcionamiento Normal; ¿Escuchas lo que yo escucho? Estos sonidos son normales.; SOLUCIÓN DE PROBLEMAS :
49-1000478 Rev. 2 19 Sonidos De Funcionamiento Normal (OVRQLGRGHORV5()5,*(5$'25VQXHYRVHVGLIHUHQWHDOGHDTXHOORVPiVDQWLJXRV/RV5()5,*(5$'25VPRGHUQRVFXHQWDQ con más funciones y utilizan una tecnología más nueva. Ŷ Es posible que el nuevo compresor de alta efectividad funcione más rápido y por más tiempo ...
Page 64 - Antes de Solicitar el Servicio Técnico; SOLUCIÓN DE PROBLEMAS
20 49-1000478 Rev. 2 Truth or Myth ¿Verdad o Mito? Respuesta Explicación La máquina de hielos au-tomática de mi refrigerador producirá hielo cuando el refrigerador se encuentre enchufado a un receptáculo de corriente. 0,72 El refrigerador debe estar conectado al agua, y la máquina de hacer hielo deb...
Page 65 - *DUDQWtDOLPLWDGDGHOUHIULJHUDGRU; Lo que no está cubierto; RUHOSHUtRGRGH
49-1000478 Rev. 2 21 GARANTÍA LIMIT ADA Grape aquí su recibo. Se requiere facilitar prueba de la fecha de compra original para obtener un servicio bajo la garantía. *DUDQWtDOLPLWDGDGHOUHIULJHUDGRU 7RGRHOVHUYLFLRGHJDUDQWtDHVSURYLVWRSRUQXHVWURV&HQWURVGH6HUYLFLRGH)DEULFDFLyQRXQWpFQLFRDXWRUL]DGRGH6H...
Page 66 - Notas
Page 68 - Soporte para el Consumidor
Impreso en los Estados Unidos Soporte para el Consumidor SOPORTE P ARA EL CONSUMIDOR Sitio Web de GE Appliances ¢'HVHDUHDOL]DUXQDFRQVXOWDRQHFHVLWDD\XGDFRQVXHOHFWURGRPpVWLFR"£,QWHQWHDWUDYpVGHO6LWLR:HEGH*($SSOLDQFHVODV 24 horas del día, cualquier día del año! Usted también puede comprar más electr...


 GE GTS19KMNRES User Manual
 GE GTS19KYNRFS User Manual
 GE GTS22KGNRBB User Manual
 GE GTS22KGNRWW User Manual
 GE GTS22KMNRDS User Manual
 GE GTS22KMNRES User Manual
 GE GVS04BQNSS User Manual
 GE GWE19JGLBB User Manual
 GE GWE19JGLWW User Manual
 GE GWE19JMLES User Manual
 GE GWE19JYLFS User Manual
 GE GWE23GMNES User Manual