Page 2 - affect the validity or enforceability of any other provision; LIMITED WARRANTY AND LIMITATION OF LIABILITY
Each Fluke product is warranted to be free from defects in material and workmanship under normal use and service. The warranty period is three years and begins on the date of shipment. Parts, product repairs, and services are warranted for 90 days. This warranty extends only to the original buyer or...
Page 3 - ii; Table of Contents; Title
ii Table of Contents Title Page Introduction ....................................................................................................................... 1 How to Contact Fluke ....................................................................................................... 1 Safety...
Page 5 - Introduction; model dependent; How to Contact Fluke; Warning
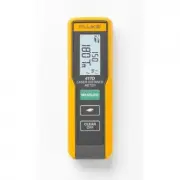
1 Introduction The Fluke 417D and 424D Laser Distance Meters (Meter or Product) are professional-grade laser distance meters. Use these Meters to quickly and accurately get the distance to a target, the area, and the volume measurements. This Meter is better than an ultrasonic device because it uses...
Page 6 - Users Manual; Product Familiarization; Features
417D/424D Users Manual 2 Product Familiarization The manual explains features for multiple models. Because models have different features, not all of the information in the manual may apply to your Product. Features Table 1 lists the features of the Product. Before You Start This section has basic i...
Page 7 - Multifunction Endpiece; ) until it locks into place. Push the endpiece lightly to the; Figure 1. Multifunction Endpiece
Laser Distance Meters Product Familiarization 3 Multifunction Endpiece Use the multifunctional endpiece to adapt to multiple measurement situations. A built-in sensor automatically senses the orientation of the endpiece and adjusts the zero point. See Figure 1 . • For measurements from an edge, fold...
Page 8 - Display; Item
417D/424D Users Manual 4 Display Table 2 shows the readout location on the display for each function of the 417D. Table 3 shows the readout location on the display for each function of the 424D. Table 2. Display 417D Item Description Area Battery Status Laser Indication D Measurement Reference...
Page 10 - Keypad
417D/424D Users Manual 6 Keypad Table 4 shows the buttons on the keypad on the 417D. Table 6 shows the keypad of the 424D. Table 4. Keypad 417D Item Description On/Measure Area/Units Clear/Off 1 2 3 Table 5. 417D Button Operation Button Pushes Function > 1x Turn on the Product and laser. (T...
Page 12 - Measurements with a Tripod; Note; Figure 4. Change Reference Point
417D/424D Users Manual 8 Measurements with a Tripod Measurements with the 424D that use a tripod must have the tripod reference set. When set, # shows on the display. Reference Point The display shows the reference point for a measurement. The default reference point is from the end of the Meter. If...
Page 13 - Functions; Units of Measurement
Laser Distance Meters Functions 9 Functions This section shows how to use non-measurement functions. Units of Measurement Push and hold = (417D) or (424D) for 2 seconds to step through the units for distance measurements. See Table 8 . Backlight Push at the same time for 2 seconds to turn on a...
Page 14 - Compass; Caution; Compass Calibration; Automatic Calibration; Magnetic Declination
417D/424D Users Manual 10 Compass The compass feature lets you know the view or direction as you make measurements. This is useful indoors to set the building plans in the correct direction. It is also useful to know the correct direction when you calculate the efficiency for a solar panel. See Tabl...
Page 16 - Timer; Beeper; Measurements; Single Distance Measurement; Continuous Measurement
417D/424D Users Manual 12 Timer Fluke recommends that you use a time-delay for the most accurate measurements at long distances. This prevents Meter movement when you push . To turn on the timer: 1. Push 1x to turn on the 5-second timer. This is the default time interval to release the laser for...
Page 17 - Minimum/Maximum Tracking; Area
Laser Distance Meters Measurements 13 Minimum/Maximum Tracking The tracking function measures the room diagonal (maximum value) and the horizontal distance (minimum value) from a stable measurement point. It also can find the distance between objects. See Figure 6 . Figure 6. Minimum/Maximum Trackin...
Page 18 - Volume; Smart Horizontal Mode
417D/424D Users Manual 14 Volume To measure volume: 1. Push 2x. The s symbol appears in the display. 2. Push to make the first measurement (for example, length). 3. Push again to make the second measurement (for example, height). 4. Push again to make the third length measurement (for exampl...
Page 19 - Figure 7. Smart Horizontal Mode; Height Tracking; Figure 8. Height Tracking; Leveling
Laser Distance Meters Measurements 15 Figure 7. Smart Horizontal Mode Height Tracking Height tracking shows continuously on the display as the Meter turns on a tripod. The tilt is continuously shown in the selected unit of measure as ° or %. To measure: 1. Push 2x. p shows in the display. 2. Point...
Page 20 - Tilt Sensor Calibration; Figure 9. Tilt Sensor Calibration; Figure 10. Stake Out Measurement
417D/424D Users Manual 16 Tilt Sensor Calibration To calibrate the tilt sensor: 1. Push at the same time for 2 seconds. The display shows message and the instructions for the first measurement. See Figure 9 . Figure 9. Tilt Sensor Calibration 2. Put the Meter on a flat horizontal surface. 3....
Page 21 - Corner Angle Measurement
Laser Distance Meters Measurements 17 To find stake out distances with 2 values: 1. Push 4x. r shows in the display. 2. Push and to increase or decrease the values that show on the display. The value (a), and the intermediate line that corresponds, blink on the display. 3. Push and to adju...
Page 22 - Indirect Measurement; Figure 12. Pythagoras 1
417D/424D Users Manual 18 The result shows in the summary line as the room triangle area. 6. Push for 2 seconds to get the second results as the angle between d1 and d2, the triangle circumference, and the area. Indirect Measurement The Meter can calculate distances with Pythagoras’ theorem. With ...
Page 23 - Figure 13. Pythagoras 2
Laser Distance Meters Measurements 19 Figure 13. Pythagoras 2 3. Push for the first distance (diagonal) measurement. 4. Point the laser at the second target (2). Make sure that the Meter is perpendicular to the wall. 5. Push for the second distance. 6. Point the laser at the third (3) target. 7....
Page 24 - Maintenance; Clean the Product; Figure 15. Battery Replacement
417D/424D Users Manual 20 Maintenance Maintenance and calibration are not necessary for the Meter. Clean the Product To keep the Meter in good condition: • Remove dirt with a moist, soft cloth. • Do not put in water. • Do not use aggressive detergents or solutions. Batteries Replace the batteries wh...
Page 25 - Information or Error codes; Table 10. Message Codes
Laser Distance Meters Information or Error codes 21 Information or Error codes Table 10 is a list of all message codes that show on the display. Table 10. Message Codes Codes Causes Resolution 156 Transverse tilt greater than 10 ° Hold the Meter without a transverse tilt. 162 Calibration mistake Mak...
Page 26 - Specifications
417D/424D Users Manual 22 Specifications 417D 424D Distance Measurement Accuracy at favorable conditions [1] ± 2.0 mm ( ± 0.08 in) [3] ± 1.0 mm ( ± 0.04 in) [3] Accuracy at unfavorable conditions [2] ± 3.0 mm ( ± 0.12 in) [3] ± 2.0 mm ( ± 0.08 in) [3] Range at favorable conditions [1] 0.2 m to 40 m ...