Page 3 - CONTENTS; Registration
3 CONTENTS Introduction 4Safety and warnings 5 Installation instructions 9 Moving or storing your appliance 22 ActiveSmart™ operating instructions 23 All about the external display (Ice & Water models only) 27 Using your water dispenser (Ice & Water models only) 28 Water filter (Ice & Wa...
Page 4 - INTRODUCTION
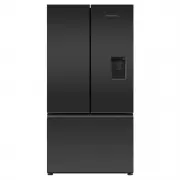
4 INTRODUCTION Thank you for buying a Fisher & Paykel ActiveSmart™ refrigerator.At Fisher & Paykel we are very proud of this refrigerator. This refrigerator combines size and storage space with the latest features and functions. Thousands of hours of food care research and refrigeration expe...
Page 5 - SAFETY AND WARNINGS; Electric Shock Hazard; Failure to follow this advise may result in; • Read and follow the safety and warnings; Risk of fire/flammable material; This refrigerator contains flammable refrigerant; including the following:; safe way and understand the hazards involved.
5 SAFETY AND WARNINGS WARNING! Electric Shock Hazard Failure to follow this advise may result in death, electric shock, fire or injury to persons. • Read and follow the safety and warnings outlined in this user guide before operating this appliance. WARNING! Risk of fire/flammable material This refr...
Page 6 - Electrical
6 SAFETY AND WARNINGS z This refrigerating appliance is optimally intended to be used at ambient temperatures ranging from 16 °C to 38 °C. z This refrigerating appliance is not intended to be used as a built-in appliance. z To avoid hazard due to instability of the appliance, it must be fixed in acc...
Page 7 - Disposal
7 SAFETY AND WARNINGS Disposal z Extreme care must be taken when disposing of your old appliance to avoid hazards: z The flammable refrigerant gas must be safely removed. z The thermal insulation foam in this appliance contains flammable insulation blowing gases, any exposed foam may be highly flamm...
Page 8 - Ice making
8 SAFETY AND WARNINGS z Installation and use MUST comply with all state and local plumbing codes. Check with your local public works department for plumbing codes. You must follow their guidelines as you install the water filtration system. z To avoid serious illness or death, only connect your wate...
Page 9 - INSTALLATION INSTRUCTIONS; The appliance must be installed so the plug is accessible.
9 INSTALLATION INSTRUCTIONS Please follow the installation steps below to ensure your appliance operates correctly. 1. Power z The appliance must be installed so the plug is accessible. z To ensure that the appliance is not accidentally switched off, connect your refrigerator to its own power point....
Page 10 - Product and cabinetry dimensions
10 INSTALLATION INSTRUCTIONS 4. Product and cabinetry dimensions If integrating your refrigerator, please follow installation instructions provided with the integration kits. Freezer door models (E372B, RF372B, E402B, RF402B, E442B, RF442B, E522B, RF522B) (Ice & Water, Automatic Ice and non-Ice ...
Page 11 - PRODUCT DIMENSIONS; Flush with refrigerator chassis – full door rotation; MINIMUM CLEARANCES
11 INSTALLATION INSTRUCTIONS E372B RF372B E402B RF402B E442B RF442B E522B RF522B PRODUCT DIMENSIONS MM A Overall height of product 1620 1720 1720 1720 B Overall width of product 1620 1720 1720 1720 C Overall depth of product (excl. handle, includes evaporator) n/a 695 695 695 CABINETRY DIMENSIONS (i...
Page 14 - INSTALLATION PRECAUTIONS
14 INSTALLATION INSTRUCTIONS 5. Connecting water (Ice & Water and Automatic Ice models) Contents of filter kit A 1 x tap connection B 1 x short tubing C 1 x locking key D 1 x pressure limiting valve (PLV) E 1 x water filter cartridge F 1 x wall mounting bracket, filter head and tubing G 2 x scre...
Page 15 - Installation instructions:; Connect the tap connection fitting (; Ensure the outlet tubing is correctly
15 INSTALLATION INSTRUCTIONS Installation instructions: 1 Ensure the refrigerator is NOT plugged into a power supply. 2 Locate a cold water supply/feed that is suitable for a water connection. 3 Connect the tap connection fitting ( A ) to the tap. Connect the short tubing ( B ) to the outlet of the ...
Page 16 - Read pages 17 – 18 carefully and then turn refrigerator on.
16 INSTALLATION INSTRUCTIONS 7 Attach the wall mounting bracket with the two screws provided, attach the bottom screw first then the top screw (refer to Diagram 5). 8 Insert the filter water into the filter head. Push the filter firmly into the filter head and turn in a clockwise direction until it ...
Page 18 - Before you start using the Ice & Water or Automatic Ice function; For Ice & Water and Automatic Ice models:; Ice storage bin and scoop
18 INSTALLATION INSTRUCTIONS Before you start using the Ice & Water or Automatic Ice function z Check your refrigerator is switched on. z Allow at least 2 hours for your refrigerator to cool before use. z Complete all the flushing steps detailed in this installation/user guide to ensure optimum ...
Page 19 - Aligning your refrigerator with cabinetry.; Levelling of refrigerator doors
19 INSTALLATION INSTRUCTIONS 6. Installation (all models) Your Fisher & Paykel ActiveSmart™ refrigerator is fitted with front and rear rollers, designed for moving the product in the forwards and backwards direction.Avoid moving the product in a sideways direction as this may damage the rollers ...
Page 20 - What to do if your product is unstable; Make small adjustments to front feet where necessary.
20 INSTALLATION INSTRUCTIONS 8. What to do if your product is unstable A Gently push the refrigerator back until the rear rollers contact the floor. z Measure the gap under the front foot, which has come off the floor. z Obtain some solid packing material (hardwood, plastic, etc.) which fits firmly ...
Page 21 - Before placing food in the fresh food or freezer compartments; For the most energy efficient use of your appliance:
21 INSTALLATION INSTRUCTIONS Before placing food in the fresh food or freezer compartments z Remove all internal packaging. Ensure that all transit clips are removed from the refrigerator. These are small rubber stoppers located at the back of the shelves. z Clean the inside of the appliance with a ...
Page 22 - MOVING OR STORING YOUR APPLIANCE; Moving your refrigerator; Turn the adjustable feet to the right as far as they will turn.; Storing your refrigerator
22 MOVING OR STORING YOUR APPLIANCE If your refrigerator is turned off for any reason, wait 10 minutes before turning it back on. This will allow the refrigeration system pressures to equalise before restarting. Moving your refrigerator z Turn off the appliance and unplug from the power point. Remov...
Page 23 - ACTIVESMARTTM OPERATING INSTRUCTIONS; Internal control panel to adjust temperatures
23 ACTIVESMART™ OPERATING INSTRUCTIONS Models: 635mm wide E372B, E402B, RF372B, RF402B 680mm wide E442B, RF442B 790mm wide E522B, RF522A, RF522W, RF522B 900mm wide RF610A/RF540A The control panel enables you to view and modify features and options on your refrigerator. Temperature control (all model...
Page 25 - When the product is in Sabbath Mode:
25 ACTIVESMART™ OPERATING INSTRUCTIONS Key Mute (all models) KEY MUTE allows you to silence all button presses. z To activate KEY MUTE and silence buttons, press and hold the button for 4 seconds. z The icon on the internal control panel will be illuminated. z The keys will be silenced when KEY MUTE...
Page 26 - Special Functions
26 ACTIVESMART™ OPERATING INSTRUCTIONS Special Functions These features will temporarily change the temperature of the compartment. The default setting will remain unchanged. Bottle Chill (selected models only) This function allows you to chill your beverages more rapidly in the freezer without the ...
Page 27 - ALL ABOUT THE EXTERNAL DISPLAY; is; Dispenser lock button; is
27 ALL ABOUT THE EXTERNAL DISPLAY (ICE & WATER MODELS ONLY) This screen enables you to lock the water dispenser, indicates to you when BOTTLE CHILL is activated and when your water filter requires changing. EXTERNAL DISPLAY FEATURES Dispenser lock button and LED light Locks/unlocks the water dis...
Page 28 - USING YOUR WATER DISPENSER; Dispensing; the dispenser opening.; Dispenser Lock; Water dispenser
28 USING YOUR WATER DISPENSER (ICE & WATER MODELS ONLY) Dispensing z Your water dispenser has been designed for one-handed operation. z To dispense water push the dispensing pad gently, using a glass or container. This pad requires only a gentle press to activate. z To stop the flow of water, si...
Page 29 - WATER FILTER; Water filter; There is a replacement indicator icon; Changing the water filter cartridge; can be found
29 WATER FILTER (ICE & WATER AND AUTOMATIC ICE MODELS ONLY) Water filter The water supplied to your refrigerator is filtered to remove impurities through a filter located internally at the top right corner of the refrigerator. Replace your filter cartridge every 6 months. z There is a replacemen...
Page 30 - USING YOUR ICE MAKER; Ensure all bins are in place when the ice making; First use; Turn your ice maker off if:; Information about your ice maker
30 USING YOUR ICE MAKER (ICE & WATER AND AUTOMATIC ICE MODELS ONLY) Ice On/Off Your ice maker is designed to automatically dispense ice until it senses that the bin is full. So the more ice you use, the more it makes.To turn your ice maker on, press the button. The light above the ICE ON/OFF i...
Page 31 - ACTIVESMARTTM SPECIAL FEATURES; Upper left freezer bin, ice storage bin, ice; Information about your manual ice system
31 ACTIVESMART™ SPECIAL FEATURES Manual ice system (selected models only) An ice storage bin which sits inside the upper top freezer bin provides storage for and gives you access to clean, clear ice cubes. Upper left freezer bin, ice storage bin, ice tray, lid and scoop in correct position Accessing...
Page 32 - Fruit and vegetable bins and humidity control lid; Salad
32 ACTIVESMART™ SPECIAL FEATURES Fruit and vegetable bins and humidity control lid The fruit and vegetable bins feature a unique lid which provides two functions: z The humidity lid seals the bins and provides a humid microclimate to extend storage times of fruit and vegetables. z The humidity lid p...
Page 33 - Glass shelves; Glass shelves can be repositioned in the cabinet as desired.; Slim storage drawer
33 ACTIVESMART™ SPECIAL FEATURES Slim storage drawer (where fitted) The slim bins at the bottom of the fresh food compartment provide storage space for items that you may want to keep separate from the rest of the refrigerator. These slim storage bins can be used for deli item storage, beverages or ...
Page 34 - CLEANING AND CARING FOR YOUR REFRIGERATOR; Exterior doors; the risk of an electric shock.; function in your refrigerator to make; Cleaning the rear compartment cover
34 CLEANING AND CARING FOR YOUR REFRIGERATOR Exterior doors z Clean the exterior door with liquid dishwashing detergent dissolved in warm water and a soft cloth. z Dry the door with a lint-free cloth. z Do not use any abrasive stainless steel cleaners, glass cleaners, solvents or scourer pads as the...
Page 35 - Interior; Clean with warm water and detergent.; Automatic ice dispenser (Ice & Water and Automatic Ice models only); Wash bin in lukewarm water. Dry thoroughly and replace.
35 CLEANING AND CARING FOR YOUR REFRIGERATOR Interior z It is important to keep the interior of the refrigerator and freezer clean to help prevent food from becoming contaminated during storage. z The amount and types of food stored determines how often cleaning should be carried out in the refriger...
Page 36 - Humidity Control System; disassemble the Humidity Control System; Humidity; Turn shelf upside down.
36 CLEANING AND CARING FOR YOUR REFRIGERATOR Humidity Control System When cleaning the shelf above the vegetable bins, we recommend that you do not disassemble the Humidity Control System from the shelf. In the event that the humidity control lid (plastic lid) and humidity slides become separated fr...
Page 37 - To remove trays or fixed bins; ability to function. Do not immerse runners in water.; Permanently fixed bins and trays (Freezer drawer models only); Tray removal
37 CLEANING AND CARING FOR YOUR REFRIGERATOR To remove trays or fixed bins z For ease of removal, empty food from tray/bin first. z Hold the centre front of the tray/bin handle. z Lift vertically to unclip from the runners and pull tray/bin towards you to remove. z Push both runners back into refrig...
Page 38 - For best food care; We recommend using; when you are adding food items to your appliance,; Items stored in your refrigerator; We recommended cooling carbonated beverages only when the; FOODCARE
38 For best food care z Store only high-quality, fresh food in your appliance. z Store perishable foods in the appliance immediately after purchase. Storing at room temperature increases the rate of deterioration and can allow harmful microbial growth. z Storing at temperatures other than settings r...
Page 40 - ACTIVESMARTTM USER WARNINGS AND SOUNDS; User warnings; Normal operational sounds include:
40 ACTIVESMART™ USER WARNINGS AND SOUNDS User warnings Faults In the unlikely event a fault occurs the icon will illuminate on the internal control panel and an alarm will sound when the fresh food compartment door is opened. z Please count the number of beeps made when the fresh food compartment do...
Page 41 - TROUBLESHOOTING; All models
41 TROUBLESHOOTING If there is a problem with your appliance, please check the following points before contacting your local Fisher & Paykel trained and supported service technician or the Customer Care Centre. Product parts and accessories can be purchased through Fisher & Paykel Customer C...
Page 43 - Ice & Water and Automatic Ice models only
43 TROUBLESHOOTING Ice & Water and Automatic Ice models only PROBLEM POSSIBLE CAUSES WHAT TO DO Automatic ice maker does not work. Ice maker has not been turned on. Switch on ice maker. Bin is in the wrong way or there is no bin in place. Place bin so scoop is on the right side. Ice bin sits dir...
Page 45 - Ice & Water models only
45 TROUBLESHOOTING Ice & Water models only PROBLEM POSSIBLE CAUSES WHAT TO DO Water has poor taste/odour. Refrigerator not used for an extended period. Dispense 4L of water so fresh water supply is replenished. Water dispenser does not work. Water supply turned off or not connected. Turn water o...
Page 46 - MANUFACTURER’S SERVICE & WARRANTY; Complete and keep for safe reference:
46 MANUFACTURER’S SERVICE & WARRANTY For details of your Manufacturer’s Warranty and contacts for servicing, please refer to your separate ‘Service & Warranty’ book provided with your refrigerator.This product has been designed for use in a normal domestic (residential environment). This pro...
Page 47 - WASTE ELECTRICAL AND ELECTRONIC EQUIPMENT (WEEE)
47 EUROPEAN DIRECTIVE 2012/19/EU ON WASTE ELECTRICAL AND ELECTRONIC EQUIPMENT (WEEE) GB This appliance is marked according to the European directive 2012/19/EU on Waste Electrical and Electronic Equipment (WEEE). By ensuring this product is disposed of correctly, you will help prevent potential nega...
Page 48 - F I S H E R PAY K E L .CO M
8 6 3 1 8 6 B 07. 2 0 F I S H E R PAY K E L .CO M © Fisher & Paykel Appliances 2020. All rights reserved. The models shown in this guide may not be available in all markets and are subject to change at any time. The product specifications in this guide apply to the specific products and models d...