Page 3 - Contents
i 1. Before You Start... 1 Personal Safety 1 Electrical Connection Safety 2 If You Smell Gas 2 Peculiar Smells 2 Cooling Fan 2 Ventilation 2Maintenance 3Cooker Care 5 Cleaning 5 2. Overview 6 Hotplate burners 6 Wok burner 7 Wok cradle 7 Griddle 8Multifunction oven 8 Energy saving panel 10 Operating ...
Page 4 - ii
Page 5 - Personal Safety
1 Your cooker should give you many years of trouble-free cooking if installed and operated correctly. It is important that you read this section before you start. Personal Safety This appliance is for cooking purposes only. It must not be used for other purposes, for example heating a room. Using it...
Page 7 - Maintenance
3 in which it is installed. Therefore, make sure that the kitchen is well ventilated: keep natural ventilation holes open or install a powered cookerhood that vents outside. If you have several hotplates/burners on, or use the cooker for a long time, open a window or turn on an extractor fan Mainten...
Page 8 - Oven Care
4 FRONT Rear stop Front bracket by means of external timer or separated remote-control system. • If flammable materials are stored in the drawer, oven(s) or grill(s) it may explode and result in fire or property damage. Oven Care • When the oven is not in use and before attempting to clean the cooke...
Page 10 - Hotplate burners
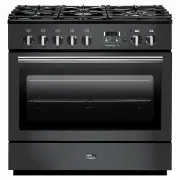
6 ArtNo.270-0001 Proplus control to high The dual fuel single cavity cooker ( Fig. 2.1 ) has the following features: A. 5 hotplate burners including a wok burner B. Control panel incorporating a timer C. Multifunction oven D. Storage drawer Hotplate burners The drawing by each of the central knobs i...
Page 11 - Wok burner; Wok cradle
7 ArtNo.311-0006 Correct wok sizes ArtNo.311-0002 Pan with rim If, when you let go of the control knob, the burner goes out, then the FSD has not been bypassed. Turn the control knob to the OFF position and wait for one minute before you try again, this time making sure to hold in the control knob f...
Page 13 - Multifunction oven modes
9 This is a fast intensive form of cooking; keep an eye on the food cooking until you are familiar with this function. Conventional oven (Top and Base Heat) This function combines the heat from the top and base elements. It is particularly suitable for roasting and baking pastry, cakes and biscuits....
Page 14 - Energy saving panel
10 ArtNo.062-0005 - Removing the divider (wrong) ArtNo.281-0150 - Oven Divider Energy saving panel The oven has a divider feature ( Fig. 2.14 ). With this in place only one half of the oven is heated and only the right-hand side elements are used. This saves energy and is ideal for cooking most food...
Page 15 - Operating the oven
11 ArtNo.270-0028 Proplus MF temp control indicator light 140 100 180 220 0 ArtNo.270-0026 Proplus MF oven controls (2) ArtNo.270-0027 Proplus MF oven selector control OFF Operating the oven The multifunction oven has two controls: a function selector and a temperature setting knob ( Fig. 2.17 ). Tu...
Page 16 - Accessories
12 Accessories Each oven is supplied with: • Two full capacity shelves ( Fig. 2.20 ) • Grill pan tray support ( Fig. 2.21 ) • Two grill pans with trivets ( Fig. 2.22 ) • Three energy saving shelves ( Fig. 2.23 ) • Four ladder shelf supports ( Fig. 2.24 ) • And one divider ( Fig. 2.25 ) Oven shelves ...
Page 17 - To stop the oven at a specific time of day; OR; REMEMBER
13 1 2 1 3 1 2 1 1 1 1 1 1 Step. 1 Step. 1 Step. 2 Step. 2 Step. 3 Step. 4 1 2 3 Check how much time you have left Cancel the timer alarm 3. Rotary clock To stop the oven at a specific time of day (main oven only) You have set the required temperature and function mode and you would like the oven to...
Page 18 - Beeper tone adjustment
14 1 1 2 1 1 Check how much time you have left Beeper tone adjustment 1 1 2 1 1 B 1 1 1 1 2 To start and stop the oven automatically (main oven only) The timer allows you to automatically start and stop by a combination of the length of the cooking time and the stop time. Giving you the flexibility ...
Page 19 - General oven tips
15 Cooking with a multifunction oven Remember: not all modes are suitable for all food types. The oven cooking times given are intended for a guide only. Tips on cooking with the timer If you want to cook more than one dish, choose dishes that require approximately the same cooking time. However, di...
Page 21 - Cleaning your cooker
17 A B C D A – inner burner cap, B – outer burner cap, C – burner head, D – wok burner base ArtNo.311-0032 Burner layout FSD A B C D E Isolate the electricity supply before carrying out any major cleaning. Allow the cooker to cool. n NEVER use paint solvents, washing soda, caustic cleaners, biologic...
Page 22 - Control panel and oven doors
18 Check the burner slots are not blocked. If a blockage occurs, remove stubborn particles using a toothbrush ( Fig. 6.4 ). Now fit the two burner caps, making sure that they are seated properly.Check the burner ports are not blocked. If a blockage occurs, remove stubborn particles using a piece of ...
Page 23 - Cleaning table
19 Cleaning table Cleaners listed ( Table 6.1 ) are available from supermarkets or electrical retailers as stated. For enamelled surfaces use a cleaner that is approved for use on vitreous enamel. Regular cleaning is recommended. For easier cleaning, wipe up any spillages immediately. HotplatePart F...
Page 26 - If You Have a Problem; Service and Spares
INSTALLATION Check the appliance is electrically safe when you have finished. 20 Firstly, please complete the appliance details below and keep them safe for future reference – this information will enable us to accurately identify the particular appliance and help us to help you. Filling this in now...
Page 29 - Positioning the cooker
INSTALLATION Check the appliance is electrically safe and gas sound when you have finished. 25 Positioning the cooker The diagram ( Fig. 9.1 ) shows the minimum recommended distance from the cooker to nearby surfaces as given in AS/NZS 5601.Where the appliance is installed next to cabinetry, the cab...
Page 30 - Moving the cooker; Removing the oven door; Levelling
INSTALLATION Check the appliance is electrically safe and gas sound when you have finished. 26 Moving the cooker n On no account try and move the cooker while it is plugged into the electricity supply. n The cooker is very heavy, so take great care. We recommend that two people manoeuvre the cooker....
Page 31 - Fitting a stability bracket
INSTALLATION Check the appliance is electrically safe and gas sound when you have finished. 27 ArtNo.011-0007 - Restraining chain (AUS) Restraining chain Fitting the stability bracket and chain n A stability bracket and chain MUST be fitted when the cooker is connected to a flexible gas supply. Unle...
Page 32 - Gas connection; Pressure testing
INSTALLATION Check the appliance is electrically safe and gas sound when you have finished. 28 ArtAUS.062-0002 - 90SC - Prof+ - Gas connection 40 80 ‘A’ 330 140 All dimensions in millimetres Gas connection Must be in accordance with the relevant standards.The gas supply needs to terminate with a thr...
Page 33 - Fixed wiring
INSTALLATION Check the appliance is electrically safe and gas sound when you have finished. 29 ArtNo.132-0001 - 1 phase 240Vac 50Hz 1-phase 230 V AC 50 Hz ArtNo.132-0003 - Single-phase connections (AUS) A N ArtNo.132-0002 - 3 phase 240/415Vac 50Hz 3-phase 400 V AC 50 Hz ArtNo.132-0004 - Fixed wiring...
Page 34 - Final checks; Final fitting; Customer care
INSTALLATION Check the appliance is electrically safe and gas sound when you have finished. 30 Final checks Hotplate check Check each burner in turn. There is a Flame Supervision Device (FSD) that stops the flow of gas to the burner if the flame goes out. For each burner, turn the control knob to th...
Page 35 - Removing the drawer
INSTALLATION Check the appliance is electrically safe and gas sound when you have finished. 27 Removing the drawer Fitting the drawer
Page 36 - Conversion to propane gas
WARNING – SERVICING TO BE CARRIED OUT ONLY BY AN AUTHORISED PERSON Disconnect from electricity and gas before servicing. Check appliance is safe when you have finished. 32 A B ArtNo.311-0010 Injectors A – Jet, B – Jet Conversion from Natural Gas (1.0 kPa) to LPG X Propane (2.54 kPa) n A suitably com...
Page 37 - Set the governor
WARNING – SERVICING TO BE CARRIED OUT ONLY BY AN AUTHORISED PERSON Disconnect from electricity and gas before servicing. Check appliance is safe when you have finished. 33 Set the governor Unscrew the governor’s brass top. In the base of the brass top is a plastic snap-in converter device ( Fig. 10....
Page 45 - Hotplate Efficiency
41 Hotplate Efficiency Brand Falcon Model Identification Professional+ FX Size 90 Single Cavity Type Dual Fuel Type of Hob GAS Number of gas burners 5 Auxiliary / Small Burner (EE gas burner) - Semi Rapide / Medium Burner (EE gas burner) 58% Semi Rapide / Medium Burner (EE gas burner) 58% Rapide / L...
Page 46 - Oven Data
42 Oven Data Brand Falcon Model identification Professional+ FX Type of oven Electric Mass kg 122 Number of cavities 1 Single Cavity Fuel type Electric Cavity type *Drop Down Door Multifunction* Power - conventional 2.75 Power - forced air convection 3.3 Volume Litres 114 Energy consumption (electri...