Page 2 - RASPBERRY SOUFFLÉ; METHOD
METHOD 1. For the soufflé, press the raspberries through a fine sieve to produce 180 g of purée. Put this into a heavy-bottomed pan, add the lemon juice and reduce down to a thick jam, stirring from time to time and being careful not to let it catch and burn. 2. Put 45 g of the sugar in a separate p...
Page 3 - iii; Contents
iii Elan 110 Dual Fuel Contents 1. Before You Start... 1 Installation and Maintenance 1 Peculiar Smells 1 If You Smell Gas 1 Ventilation 1 Personal Safety 1 Cleaning 2 2. Cooker Overview 3 Hotplate Burners 3 Wok Burners 4 The Wok Cradle 5 The Griddle 5 The Glide-out Grill 6 The Ovens 7 Operating the...
Page 4 - iv
Page 5 - Installation and Maintenance; TURN OFF; Peculiar Smells; Ventilation; If You Smell Gas; The use of a gas cooking appliance results; Personal Safety; DO NOT modify this appliance.
1 Your cooker should give you many years of trouble-free cooking if installed and operated correctly. It is important that you read this section before you start, particularly if you have not used a dual fuel cooker before. n This appliance is designed for domestic cooking only. Using it for any oth...
Page 6 - NEVER operate the cooker with wet hands.; Take care that no water seeps into the appliance.; This appliance is heavy so take care when moving it.; Cleaning; Clean only the parts listed in this guide.
2 n When the oven is on, DO NOT leave the oven door open for longer than necessary – otherwise, the control knobs may become very hot. Cooking high moisture content foods can create a ‘steam burst’ when an oven door is opened. When opening the oven stand well back and allow any steam to disperse. Ar...
Page 7 - Hotplate Burners; DO NOT
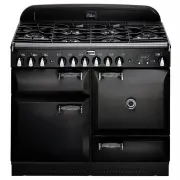
3 The 110 dual fuel cooker ( Fig. 2.1 ) has the following features: A. 6 hotplate burners including 2 wok burners B. Control panel C. Glide-out grill D. Multifunction oven E. Fan oven F. Storage drawer Hotplate Burners The drawing by each of the central knobs indicates which burner that knob control...
Page 8 - use cooking vessels on the hotplate that overlap the; Wok Burners
4 The igniter should spark and light the gas. Keep holding the knob pressed in to let the gas through to the burner for about ten seconds. If, when you let go of the control knob, the burner goes out, then the FSD has not been bypassed. Turn the control knob to the OFF position and wait for one minu...
Page 9 - Preheat the griddle for; a maximum of 5 minutes; before
5 The Wok Cradle The wok cradle is designed to fit a Professional 35 cm wok. If you use a different wok, make sure that it fits the cradle. Woks vary very widely in size and shape. It is important that the wok sits down on the pan support – however, if the wok is too small, the cradle will not suppo...
Page 11 - The Ovens; The Multi-function Oven; Multi-function Oven Functions; Defrost
7 Fan Oven This function operates the fan and the heating element around it. An even heat is produced throughout the oven, allowing you to cook large amounts quickly. Fan oven cooking is particularly suitable for baking on several shelves at one time and is a good ‘all-round’ function. It may be nec...
Page 12 - The Fan Oven; Operating the Ovens; Operating the Multifunction Oven
8 The exposed top element may cook some foods too quickly, so we recommend that the food be positioned in the lower half of the oven to cook. The oven temperature may also need to be lowered. Browning Element This function uses the element in the top of the oven only. It is a useful function for the...
Page 13 - Accessories; Oven Shelves; ‘Troubleshooting’; Storage
9 ArtNo.320-0017 Main oven light Fig. 2.29 Shelf guard Front ArtNo.320-0015 Fitting the Handyack 1 ArtNo.320-0016 Fitting the handyrack 2 ArtNo.320-0011 Removing the shelf 1 ArtNo.320-0012 emo n t e s el 2 Fig. 2.22 Fig. 2.23 Fig. 2.27 Fig. 2.24 Fig. 2.28 Fig. 2.25 Fig. 2.26 Accessories Oven Shelves...
Page 14 - Setting the Clock; Bell; Cancel the Timer Alarm; Minute
10 ArtNo.300-0005 2 m nute m n er sett n E A B ArtNo.300-0005 2 m nute m n er sett n A B C D The clock must be set to the time of day before the oven will work. Setting the Clock 1. Once the cooker is connected and switched on, the display will start to flash. 2. To set the time, turn the Timer (A) ...
Page 15 - TOP TIP
11 D A B A B ArtNo.311-0004 S a 2 sto n en 1 H A B To Stop the Oven at a Specific Time of Day You have set the required temperature and function mode and you would like the oven to automatically stop. TOP TIP Make a note of the current time so you do not forget. 1. Turn the Timer (A) knob to the Stop...
Page 16 - Reset to Manual Cooking
12 C A B C A B To Start and Stop the Oven Automatically The timer allows you to automatically start and stop by a combination of the length of the cooking time and the stop time. Giving you the flexibility to cook casseroles etc while you are out. You cannot set the actual start time. 1. Turn the Ti...
Page 17 - Tips on Cooking with the Timer; DO NOT place warm food in the oven to be timed.; Temperature conversion table; General Oven Tips; ‘Cleaning Your Cooker’
13 Tips on Cooking with the Timer If you want to cook more than one dish, choose dishes that require approximately the same cooking time. However, dishes can be ‘slowed down’ slightly by using small containers and covering them with aluminium foil, or ‘speeded up’ slightly by cooking smaller quantit...
Page 19 - Cleaning Your Cooker; Essential Information; but take care that no surplus water seeps into the; The burner heads and caps can be removed for cleaning.; DO NOT put the burner heads in a dishwasher.; Make sure they are absolutely dry before replacing them.; The Single Ring Burners; When reassembling the wok burner; The Wok Cradle; The Griddle; If the griddle is washed in a dishwasher then some
15 ArtNo.311-0032 Burner layout FSD A B C D E ArtNo.311-0033 Wok burner details FSD A B C D E A B Fig. 6.1 Fig. 6.2 Fig. 6.3 Fig. 6.4 A – Cap, B – Head, C – Notch, D – Base, E – Electrode A – Inner burner cap, B – Outer burner cap, C – Inner burner head, D – Outer burner head, E – Wok burner base A ...
Page 20 - DO NOT use any abrasive substances
16 ArtNo.331-0001Grill pan pulled forwards ArtNo.331-0003 Grill frame out, no pan ArtNo.331-0004 emo n t e r ll rame ArtNo.331-0005 Removing the grill rail ArtNo.331-0006 Grill pan plan Fig. 6.5 Fig. 6.6 Fig. 6.7 Fig. 6.8 Fig. 6.9 Glide-out Grill n Before you remove any of the grill parts for cleani...
Page 21 - ‘Cook & Clean’ Panels; Some of the lining panels can be removed for cleaning.
17 Control Panel and Doors Avoid using any abrasive cleaners including cream cleaners. For best results, use a liquid detergent. The control panel, knobs and doors should only be cleaned with a soft cloth wrung out in clean hot soapy water – but take care that no surplus water seeps into the applian...
Page 22 - Cleaning Table; Cleaners listed; Hotplate; Part; Outside of Cooker
18 Cleaning Table Cleaners listed (Table 5-1) are available from supermarkets or electrical retailers as stated. For enamelled surfaces use a cleaner that is approved for use on vitreous enamel. Regular cleaning is recommended. For easier cleaning, wipe up any spillages immediately. Hotplate Part Fi...
Page 24 - An oven light is not working; Turn off the power at the circuit breaker.; The oven door is misaligned; Retighten the hinge screws.
16 An oven light is not working The bulb has probably burnt out. You can buy a replacement bulb (which is not covered under the warranty) from a good electrical shop. Ask for a 15 W – 230 V lamp, FOR OVENS. It must be a special bulb, heat resistant to 300 °C (Fig. 7.1) . Turn off the power at the ci...
Page 25 - Service and Spares; * This information is on the appliance data badge.; If You Have a Problem; Dual Fuel
INSTALLATION Check the appliance is electrically safe and gas sound when you have finished. 21 Service and Spares Firstly, please complete the appliance details below and keep them safe for future reference – this information will enable us to accurately identify the particular appliance and help us...
Page 26 - INSTALLATION; Provision of Ventilation; An appliance for use on Propane must not be installed; Conversion; Please read the; The regulations and standards are as follows:; AS/NZS 5601 – ‘Gas Installations’
INSTALLATION Check the appliance is electrically safe and gas sound when you have finished. 22 Provision of Ventilation This appliance is not connected to a combustion products evacuation device. Particular attention shall be given to the relevant requirements regarding ventilation. The room contain...
Page 28 - Positioning the Cooker; Overhead – Measurement A
INSTALLATION Check the appliance is electrically safe and gas sound when you have finished. 24 130 mm min ArtNo.110-0023 - 110 - ooker learan es A S B C D E A * Positioning the Cooker The diagram (Fig. 8.1) shows the minimum recommended distance from the cooker to nearby surfaces as given in AS/NZS ...
Page 29 - Moving the Cooker; The cooker is very heavy, so take great care.; . Repeat from the back and remove; Lowering the Two Rear Rollers; Make sure you lower BOTH REAR ROLLERS.; Completing the Move; Levelling the Cooker; To set the front turn the feet bases to raise or lower.
INSTALLATION Check the appliance is electrically safe and gas sound when you have finished. 25 ArtNo.010-0004 Moving the cooker Moving the Cooker n On no account try and move the cooker while it is plugged into the electricity supply. n The cooker is very heavy, so take great care. We recommend that...
Page 30 - Fitting the Stability Bracket and Chain; The cooker must be set to the correct height; Fitting a Stability Bracket; When fitting a stability bracket (; Fitting the Restraining Chain; The restraining chain MUST be fitted.
INSTALLATION Check the appliance is electrically safe and gas sound when you have finished. 26 ArtNo.011-0007 - Restraining chain (AUS) 3FTUSBJOJOH DIBJO Fitting the Stability Bracket and Chain n A stability bracket and chain MUST be fitted when the cooker is connected to a flexible gas supply. Unle...
Page 31 - Gas Connection; Must be in accordance with the relevant standards.; Natural Gas; Conversion to Propane Gas; Pressure Testing; For Propane X cookers the pressure should be 2.54 kPa.
INSTALLATION Check the appliance is electrically safe and gas sound when you have finished. 27 All dimensions in millimetres Gas inlet 100 350 190 Gas Connection Must be in accordance with the relevant standards. The gas supply needs to terminate with a threaded fitting ½”. The inlet connector is lo...
Page 32 - Electrical Connection; Current Operated Earth Leakage Breakers; The combined use of your cooker and other domestic; IF IN DOUBT, PLEASE CONSULT A SUITABLY QUALIFIED; Fixed Wiring
INSTALLATION Check the appliance is electrically safe and gas sound when you have finished. 28 Electrical Connection This appliance must be installed by a qualified electrician to comply with with current AS/NZS 3000 Wiring Rules and regulations in force. Make sure that the mains characteristics (vo...
Page 33 - Final Checks; The clock must be set before the ovens will work. See; Hotplate Check; The oven light bulb is not included in the guarantee.; Final Fitting; Fitting the Plinth; Customer Care; Please complete your details in this guide, inform
INSTALLATION Check the appliance is electrically safe and gas sound when you have finished. 29 Replace the electric terminal cover box; make sure that the conduit is clear of the bottom flange. Final Checks Note: The clock must be set before the ovens will work. See ‘ The Clock ’ section for instruc...
Page 34 - WARNING – SERVICING TO BE CARRIED OUT ONLY BY AN AUTHORISED PERSON; Injectors; Remove the burner caps and heads. Remove the old jets; Tap Adjustment; Removing the Control Panel; Turn the bypass screw on each control clockwise to the stop; Conversion to LP Gas
WARNING – SERVICING TO BE CARRIED OUT ONLY BY AN AUTHORISED PERSON Disconnect from electricity and gas before servicing. Check appliance is safe when you have finished. 30 A B C ArtNo.311-0010 n e tors • A – Jet, B – Internal injector, C – External injector Art No 215-0028 - Handrail fascia fixings ...
Page 35 - Set the Governor; Check the appliance is gas sound.; Affix Label
WARNING – SERVICING TO BE CARRIED OUT ONLY BY AN AUTHORISED PERSON Disconnect from electricity and gas before servicing. Check appliance is safe when you have finished. 31 Set the Governor Unscrew the governor’s brass top. In the base of the brass top is a plastic snap-in converter device (Fig. 9.4)...
Page 36 - Panels & Handrails; To Remove the Handrail; Hotplate
WARNING – SERVICING TO BE CARRIED OUT ONLY BY AN AUTHORISED PERSON Disconnect from electricity before servicing. Check appliance is safe when you have finished. 32 Art No 215-0028 - Handrail fascia fixings " # 10. Servicing n BEFORE SERVICING ANY GAS CARRYING COMPONENTS TURN OFF THE GAS SUPPLY n...
Page 37 - Controls
WARNING – SERVICING TO BE CARRIED OUT ONLY BY AN AUTHORISED PERSON Disconnect from electricity before servicing. Check appliance is safe when you have finished. 33 Reassemble in reverse order, making sure that the leads are reconnected. Check for correct burner operation. 2.2 To Change a Hotplate Ta...
Page 38 - Grill
WARNING – SERVICING TO BE CARRIED OUT ONLY BY AN AUTHORISED PERSON Disconnect from electricity before servicing. Check appliance is safe when you have finished. 34 3.3 To Remove the Electronic TimerDISCONNECT FROM THE ELECTRICITY SUPPLY. Pull off the timer control button(s) and remove the control pa...
Page 40 - Doors
WARNING – SERVICING TO BE CARRIED OUT ONLY BY AN AUTHORISED PERSON Disconnect from electricity before servicing. Check appliance is safe when you have finished. 36 5.6 To Remove the Left-hand Oven Bottom and Top ElementsDISCONNECT FROM THE ELECTRICITY SUPPLY. Bottom Element Pull the cooker forward t...
Page 41 - Sensor
WARNING – SERVICING TO BE CARRIED OUT ONLY BY AN AUTHORISED PERSON Disconnect from electricity before servicing. Check appliance is safe when you have finished. 37 6.4 To Replace an Oven Door Outer Panel Move the cooker forward to gain access to the sides. Open the oven door slightly and remove the ...
Page 42 - br; Circuit Diagram; Code Description
38 1 1 1 1 1 1 1 1 1 a b e f c d 1 2 1 1 1 & X X X C C C C C C C C C C C C C C C C C PS PS PS PS HS CL X Z Z Z W W W W W W CL CL S S S S CS CS S C S HS X Z S CS CS CS CS CS CS CS X W W C X X X X C C C CS C C C X CS C C X CL CL C C CS CS C C C CS S S W W " " # # # ### # $ % % % % ' ' ( ( ...
Page 43 - Ratings
39 12. Technical Data This cooker is designed for use on Natural gas, although a conversion for LP (LPG X Propane (2.54 kPa)) gas is packed with the cooker. INSTALLER : Please leave these instructions with the User. DATA BADGE LOCATION : Cooker back, serial number repeater badge below oven door open...