Page 2 - RASPBERRY SOUFFLÉ; METHOD
METHOD 1. For the soufflé, press the raspberries through a fine sieve to produce 180 g of purée. Put this into a heavy-bottomed pan, add the lemon juice and reduce down to a thick jam, stirring from time to time and being careful not to let it catch and burn. 2. Put 45 g of the sugar in a separate p...
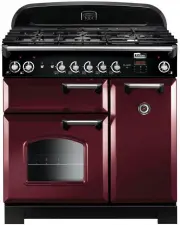
Page 3 - Contents; Cooker Overview
i Contents 1. Before You Start... 1 Personal Safety 1 Gas Connection Safety 1 If You Smell Gas 1 Peculiar Smells 2 Ventilation 2Maintenance 2Oven Care 3 Grill/Glide-out Grill™ Care 4 Cooling Fan 4 Cooker Care 4 Cleaning 4 2. Cooker Overview 5 Hotplate Burners 5 Wok Burner 6 The Wok Cradle (optional ...
Page 4 - ii
Page 7 - Oven Care
3 a flaming pan on a surface unit by covering the pan completely with a well fitting lid or baking tray. If available, use a multi-purpose dry chemical or foam- type fire extinguisher. • DO NOT modify this appliance. This appliance is not intended to be operated by means of external timer or separat...
Page 9 - Hotplate Burners
5 The 90 dual fuel cooker ( Fig. 2.1 ) has the following features: A. 5 hotplate burners including a wok burner B. A control panel incorporating a timer C. A glide-out grill D. Main fan oven E. Tall fan oven Hotplate Burners The drawing by each of the central knobs indicates which burner that knob c...
Page 10 - DO NOT; Wok Burner; Note
6 Art No. 311-0003 Simmer aids ArtNo.311-0004 Tipping wok ArtNo.311-0005 Wok burner & pan support ArtNo.311-0002 Pan with rim ArtNo.311-0001 Right pans gas Fig. 2.4 Fig. 2.5 Fig. 2.6 Fig. 2.7 Fig. 2.8 If, when you let go of the control knob, the burner goes out, then the FSD has not been bypasse...
Page 11 - Do not put it crossways – it will not fit properly and
7 ArtNo.311-0007 Wok stand close-up ArtNo.311-0006 Correct wok sizes The Wok Cradle (optional extra) The wok cradle is designed to fit a 35 cm wok. If you use a different wok, make sure that it fits the cradle. Woks vary very widely in size and shape. It is important that the wok sits down on the pa...
Page 12 - Operation
8 The Glide-out Grill n n CAUTION: Accessible parts may be hot when the grill is in use. Young children should be kept away. Open the door and pull the grill pan carriage forward using the handle ( Fig. 2.15 ). The burner does not glow red when in use; food cooks from the heat of the flame. The firs...
Page 13 - The Ovens; References to ‘left-hand’ and ‘right-hand’ ovens apply as viewed; The Gas Oven; Frozen foods must be thoroughly thawed out before
9 ArtNo.323-0003 Bray gas oven burner flame ArtNo.323-0004 Gas ovens shelves 1 ArtNo.323-0004 Gas ovens shelves 1 The Ovens The clock must be set to the time of day before the ovens will work. See the following section on ‘The Clock’ for instructions on setting the time of day. References to ‘left-h...
Page 14 - Operating the Ovens; Gas Oven; Meat
10 Should further browning be necessary, uncover the meat and increase the temperature to gas mark 4 for a short period.Cut root vegetables into small pieces unless cooking whole, e.g. jacket potatoes.Cover dishes tightly with a lid or foil to prevent evaporation and transfer of flavour.Once the ove...
Page 15 - ‘Troubleshooting’
11 ArtNo.324-0010 Plate warming shelf Accessories Oven Shelves – Left-hand (Main) Oven The cooker is supplied with 2 flat shelves ( Fig. 2.27 ). The oven shelves can be easily removed and refitted.Pull the shelf forward until the back of the shelf is stopped by the shelf stop bumps in the oven sides...
Page 16 - Using the clock; The clock must be set to the time of day before the
12 3. 3 Button clock Using the clock You can use the clock to turn the programmable oven on and off. The clock must be set to the time of day before the oven will work . NOTE : When using the timer functions, first set the clock as required before setting the oven temperature. The oven can be switch...
Page 18 - Tips on cooking with the timer; DO NOT place warm food in the oven to be timed.; General oven tips
14 Tips on cooking with the timer If you want to cook more than one dish, choose dishes that require approximately the same cooking time. However, dishes can be ‘slowed down’ slightly by using small containers and covering them with aluminium foil, or ‘speeded up’ slightly by cooking smaller quantit...
Page 20 - Cleaning Your Cooker; Essential Information; The Griddle
16 ArtNo.311-0032 Burner layout FSD A B C D E ArtNo.311-0033 Wok burner details FSD A B C D E A B A – Cap, B – Head, C – Notch, D – Base, E – Electrode A – Inner burner cap, B – Outer burner cap, C – Inner burner head, D – Outer burner head, E – Wok burner base A – Electrode notch, B – Ignition elec...
Page 21 - Control Panel and Doors
ArtNo.331-0006 Grill pan plan ArtNo.331-0005 Removing the grill rail ArtNo.331-0003 Grill frame out, no pan 17 Glide-out Grill n n Before you remove any of the grill parts for cleaning make sure that they are cool, or use oven gloves. n n DO NOT use any abrasive substances. The face of the grill bur...
Page 22 - Ovens; Do not
18 Carefully lift off the outer door panel. The inside face of the glass panels can now be cleaned – take care not to disturb or wet the door insulation. Note : If the door is triple glazed then the inner two panels are fixed together and should not be separated. After cleaning, carefully refit the ...
Page 23 - The Tall Oven; To clean the oven sides, slide out the shelves, unhook the; Cleaning Table; ) are available from supermarkets or
19 HotplatePart Finish Recommended Cleaning Method Hob top (including burner heads and caps) Enamel, stainless steel, aluminium Hot soapy water, soft cloth. Any stubborn stains remove gently with a nylon scourer. Griddle plate (some models only) Non-stick surface Allow to cool. Wash in hot soapy wat...
Page 26 - Service and Spares; Gas; If You Have a Problem; or contact Customer Care.; Out of Warranty
INSTALLATION Check the appliance is electrically safe and gas sound when you have finished. 22 Service and Spares Firstly, please complete the appliance details below and keep them safe for future reference – this information will enable us to accurately identify the particular appliance and help us...
Page 28 - INSTALLATION
INSTALLATION Check the appliance is electrically safe and gas sound when you have finished. 24 Checking the Parts: 3 pan supports Plinth Griddle plate Grill pan & trivet ArtNo.330-0001 - Grill pan Flat shelves Roasting tin ArtNo.324-0004 Roasting tin Handyrack Tall oven shelves & shelf suppo...
Page 29 - Positioning the Cooker; Overhead – Measurement A; *The fixing of 5mm thick ceramic tiles to the surface, or; DO NOT place the cooker on a base
INSTALLATION Check the appliance is electrically safe and gas sound when you have finished. 25 ArtNo.110-0023 - 110 - cooker clearances (AUS) Hob Trivet Horizontal combustible surface B C D E A * or ArtNo.090-0025 - 90 classic (gas) door clearances 130 mm Positioning the Cooker The diagram ( Fig. 8....
Page 31 - A stability bracket and chain MUST be fitted when; Levelling; With a stability chain fitted, release it as you ease the cooker out.
INSTALLATION Check the appliance is electrically safe and gas sound when you have finished. 27 ArtNo.070-0014 - Stability bracket - Wall fitting Cooker Stability bracket Floor Stability location bracket Wall ArtNo.070-0014 - Stability bracket - Wall fitting Cooker Stability bracket Floor Stability l...
Page 32 - Fitting the Oven Burner Trim
INSTALLATION Check the appliance is electrically safe and gas sound when you have finished. 28 470 350 675 A 315 All dimensions in millimetres Gas inlet Fig. 8.11 Fig. 8.12 Oven burner trim Oven burner bracket Fitting the Oven Burner Trim The oven burner has an enamel burner trim. To fit the trim, s...
Page 34 - Fixed Wiring; Disconnect from the mains supply.
INSTALLATION Check the appliance is electrically safe and gas sound when you have finished. 30 Fixed Wiring n n Disconnect from the mains supply. For connection to fixed wiring, i.e. flexible conduit, Remove the electrical terminal cover on the back panel ( Fig. 8.13 ). Remove the M4 screw securing ...
Page 35 - Final Checks; Final Fitting; The handles should be above the fixings.; Customer Care; Installer
INSTALLATION Check the appliance is electrically safe and gas sound when you have finished. 31 ArtNo.350-0011 - Fitting the plinth 2 (Kitchener) Outer plinth Outer plinth fixing screw Inner plinth ArtNo.350-0010 - Fitting the plinth 1 (Kitchener) ArtNo.215-0026 - Handle gaskets fixed Art No 215-0028...
Page 36 - Hotplate; Injectors; Control Panel Removal; Classic – Removing the Control Panel; Bypass Screw Adjustment; Conversion to LP Gas
WARNING – SERVICING TO BE CARRIED OUT ONLY BY AN AUTHORISED PERSON Disconnect from electricity and gas before servicing. Check appliance is safe when you have finished. 32 A B C ArtNo.311-0010 Injectors A – Jet, B – Internal injector, C – External injector ArtNo.0102-0011 - Screwing the control valv...
Page 37 - WARNING – SERVICING TO BE CARRIED OUT ONLY BY AN AUTHORISED PERSON; Grill; Injector; Oven Burner Injector; Pressure Testing; Check the appliance is gas sound.; Affix Label
WARNING – SERVICING TO BE CARRIED OUT ONLY BY AN AUTHORISED PERSON Disconnect from electricity and gas before servicing. Check appliance is safe when you have finished. 33 Grill Injector Lift up the spring retaining the grill holder and slide the jet holder out of the burner venturi ( Fig. 9.4 ). Re...
Page 38 - Panels
WARNING – SERVICING TO BE CARRIED OUT ONLY BY AN AUTHORISED PERSON Disconnect from electricity before servicing. Check appliance is safe when you have finished. 34 A B C A – Flue grill, B – Cooker backsheet, C – Earthing/fixing screws A B C A – Flue grill, B – Cooker backsheet, C – Earthing/fixing s...
Page 39 - Right-hand Wok Burner
WARNING – SERVICING TO BE CARRIED OUT ONLY BY AN AUTHORISED PERSON Disconnect from electricity before servicing. Check appliance is safe when you have finished. 35 Hotplate 2.1 To Remove the Hotplate Pull the cooker forward to gain access to the rear. Left-hand tray From the rear remove the screws s...
Page 40 - Controls; To Replace the Ignition or Light Switch; To Replace the Clock; To Change the Ignition Generator
WARNING – SERVICING TO BE CARRIED OUT ONLY BY AN AUTHORISED PERSON Disconnect from electricity before servicing. Check appliance is safe when you have finished. 36 Controls 3.1. To Replace the Ignition or Light Switch DISCONNECT FROM THE ELECTRICITY SUPPLY. Remove the control panel (see 1.1). Note: ...
Page 44 - Doors
WARNING – SERVICING TO BE CARRIED OUT ONLY BY AN AUTHORISED PERSON Disconnect from electricity before servicing. Check appliance is safe when you have finished. 40 Doors 6.1 To Remove the Grill Door Remove the left-hand side panel (see 1.2). Remove the plinth (4 screws) and the central vertical cove...
Page 46 - Circuit Diagram
42 11. Circuit Diagram ArtNo.080-0002 Classic 90 circuit diagram Key Code Colour b Blue br Brown bk Black or Orange r Red v Violet w White y Yellow g/y Green/yellow gr Grey Code Description A1 Right-hand oven thermostat A2 Right-hand oven control switch B Right-hand oven neon C Clock D Left-hand ove...
Page 47 - Connections; Dimensions
43 12. Technical Data This cooker is designed for use on Natural Gas, although a conversion for LP (LPG X Propane (2.54 kPa)) gas is packed with the cooker. INSTALLER : Please leave these instructions with the user. DATA BADGE LOCATION : Cooker back, serial number repeater badge below oven door open...