Esatto EDW7W - User Manual
Esatto EDW7W Dishwasher – User Manual, read for free online in PDF format. We hope this helps you resolve any issues you may have. If you have further questions, please contact us through the contact form.


Table of Contents:
- Page 2 – The Residentia Team
- Page 4 – KEEP THESE INSTRUCTIONS; GROUNDING INSTRUCTIONS; Quick Operation Guide
- Page 5 – Safety Instructions
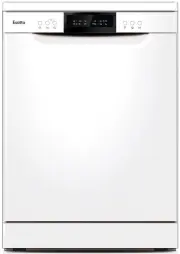
- Page 6 – Operation Instruction; Dishwasher Features; IMPORTANT; Control Panel
- Page 7 – Prior; to; using for the first time; Rinse Aid Dispenser
- Page 8 – Adjusting Rinse Aid Dispenser; Detergents; Concentrated Detergent
- Page 10 – Loading the Dishwasher Baskets; Folding Spikes of Lower Basket; Lower position Upper position; Folding back the cup shelives; Do not let any item extend through the bottom.
- Page 11 – Cutlery Basket
- Page 12 – Change the Program; At the End of the Wash Cycle
- Page 14 – Maintenance and Cleaning
- Page 16 – Installation instruction
- Page 17 – Cold Water Connection; NOTE
- Page 18 – Start of Dishwasher; Extension Hose; How to Drain Excess Water From Hoses
- Page 19 – Troubleshooting Tips; Problem; Before Calling for Service
- Page 20 – Height : 845mm; Technical Information
- Page 26 – Warranty
Model Code/s:
EDW7S
EDW7W
Product:
60cm
Freestanding
Dishwasher
Document:
User Manual
"Loading the manual" means you need to wait until the file loads and becomes available for online reading. Some manuals are very large, and the time they take to appear depends on your internet speed.
Summary
Dear Customer, Congratulations on purchasing your dishwasher. The Esatto brand is proudly distributed within Australia by Residentia Group Pty Ltd. Please refer to the warranty card at the rear of this manual for information regarding your product’s parts and labour warranty, or visit us online at w...
Page: 4 User Manual: Compartment A: For each wash cycle.Compartment B: For programs with pre-wash only.(Follow the user instructions) Mechanical indicator C. Electric indicator on control panel (if provided). Check the rinse aid level Load the baskets Select a programme Running the dishwasher Switch...
Page: 5 User Manual: KEEP THESE INSTRUCTIONS READ AND FOLLOW THIS SAFETY INFORMATION CAREFULLY 1.IMPORTANT SAFETY INFORMATION READ ALL OF THE INSTRUCTIONS BEFORE USING 1 GROUNDING INSTRUCTIONS This appliance must be grounded. In the event of a malfunction or breakdown, grounding will reduce the risk...