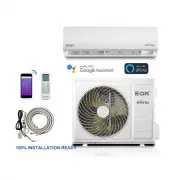
Page 2 - THANK YOU; Congratulations on your purchase and welcome to the Family.
Safety PrecautionsName Of Parts Remote ControlOperation InstructionsInstallation PrecautionsIndoor Unit InstallationOutdoor Unit InstallationTest Operation 1 4 6 1314152023 MaintenanceTroubleshooting 2526 THANK YOU Congratulations on your purchase and welcome to the Family. Your new Air Conditioner ...
Page 3 - SAFETY PRECAUTIONS; ead this guide before installing and using the appliance.; SAFETY RULES AND RECOMMENDATIONS FOR THE INSTALLER
1 SAFETY PRECAUTIONS 1. R ead this guide before installing and using the appliance. 2. D forbidden to children. Unforeseeable accidents could happen.3. M 4. C . 5. C 6. P 7. E 8. C et changed. 9. T 10. T sons. 11. D ances 12. er 13. T er for disposal. 14. 15. T 16. B . 17. T 18. T stand SAFETY RULES...
Page 4 - t not be used
2 SAFETY PRECAUTIONS . SAFETY RULES AND RECOMMENDATIONS FOR THE INSTALLER 19. D 20. C 21. E 22. D 23. T t not be used c. 24. 25. T . 26. T ap 27. N 28. . 29. T 30. H acturer 31. U 32. T 33. E 34.
Page 5 - SAFETY RULES AND PROHIBITIONS
3 SAFETY PRECAUTIONS . 1. D 2. D 3. D 4. D 5. 6. D sources of heat.7. T 8. D 9. D 10. D 11. 12. D 13. D 14. N . 15. C SAFETY RULES AND PROHIBITIONS
Page 6 - NAME OF PARTS; Indoor Unit
4 NAME OF PARTS Emergency button Front panel Indoor Unit Outdoor Unit Note: This figure shown may be different from the actual object. Please take the latter as the standard. Mounting plate Air inlet Drainage pipe Wiring cover Connection wiringValve protective cover With the protective cover removed...
Page 7 - Indoor Display; but their function is the sa e.
5 NAME OF PARTS Indoor Display The shape and position of s itches and indicators a be different according to the ode but their function is the sa e. 1 2 3 1 5 3 4 2 1 2 3 dicator for T er te perature and Error codes. Lights up during T er operation. LEEP ode 4 5
Page 8 - REMOTE CONTROL; Remote control DISPLAY; Cooling Mode; Meaning; EC Mode
6 REMOTE CONTROL Remote control DISPLAY Symbols Cooling Mode Fan speed: Mute function ture indicator Meaning EC Mode No. 1 2 3 4 5 6 7 8 9 10 11 12 13 14 15 16 17 18 19 20 21 22
Page 11 - HEAT; frost; DRY; Press; FAN; To set the F
9 REMOTE CONTROL COOLING MODE HEATING MODE HEAT MODE MODE COOL (For North American market) frost DRY MODE DRY Press MODE FAN MODE (Not F FAN . To set the F MODE AUTO MODE AUTO MODE ture. FAN Press FAN 1. Long press MODE and TIMER
Page 12 - TIMER; TURBO; te the highest fan
10 REMOTE CONTROL appliance. appliance. an set the 2. Press the TIMER . 3. Press TIMER TIMER Note: cancelled. TIMER TIMER Flaps . aps . the current angle. . the current angle. ether SWING SWING SWING SWING TURBO TURBO te the highest fan . 1. Press TIMER hours. 3. Press TIMER MODE FAN TIMER
Page 13 - MUTE; ou and ensure; DISPLAY; Press the; ECO; Press again to cancel it.; SLEEP
11 REMOTE CONTROL MUTE 1. Press MUTE . Press I FEEL ou and ensure er. I FEEL DISPLA (Indoor display) DISPLAY LED displa panel. Press DISPLAY the panel. Press ag tch on the LED displa ECO Press the ECO Press again to cancel it. Note: SLEEP Press SLEEP .
Page 14 - ou can; unit
12 REMOTE CONTROL appliance. . . ou can the process. cancelled. SWING SWING 8 o C 1. Long press ECO ( o o 8 C 46 F o C o (46 o o C (48 o C o (64 it unit o o Te F (30 o o o o 41 F (5 F (30 es.
Page 15 - OPERATION INSTRUCTIONS; resu e operation after 3 inutes.
13 OPERATION INSTRUCTIONS tte pt to use the air conditioner under the te perature be ond the specified range a cause the air conditioner protection de ice to start and the air conditioner a fail to operate. Therefore tr to use the air conditioner in the follo ing te perature conditions. t beeps brie...
Page 16 - INSTALLATION PRECAUTIONS; Torque Parameters; PIPE Size; Dedicated Distribution Device and Wire for Air Conditioner; and regulations.; Pipe Length and Additional Refrigerant; Lenght of pipe with standard charge
14 INSTALLATION PRECAUTIONS Torque Parameters PIPE Size 1 4 ( 6.35 3 8 ( 9.52 1 2 ( 12 5 8 ( 15.88 Newton meter [N x m] 18 2030 3545 5060 65 Pound-force foot (1bf-ft) Kilogram-force meter (kgf-m) 24.4 27.140.6 47.461.0 67.781.3 88.1 2.4 2.74.1 4.86.2 6.98.2 8.9 Maximum Operating Current of Air Condi...
Page 17 - INDOOR UNIT INSTALLATION; Minimum Indoor Clearances; Step1: Select Installation location; Floor
15 INDOOR UNIT INSTALLATION 1.1 Ensure the installation co plies ith the installation in u d ensions (defined belo and eets the in u and a u connecting piping length and a u change in ele ation as defined in the ste Re uire ents section. 1.2 ir inlet and outlet ill be clear of obstructions ensuring ...
Page 18 - Step3: Drill Wall Hole; mm; all slee; Step2: Install Mounting Plate
16 INDOOR UNIT INSTALLATION Step3: Drill Wall Hole 70 mm all slee all slee er tdoor oor all b ue angle Step2: Install Mounting Plate . ate drainage. Note: ( Ma e sure the ounting plate is fir enough and flat against the all after installation. ( This figure sho n a be different fro the actual ob ct ...
Page 19 - hen cutting off the plastic sheet at the outlet the cut should be tr; Piping outlet; Step4: Connecting Refrigerant Pipe; the connecting pipes ith the port facing up as sho n in the figure.; YE; Chec; rap the oint ith the insulation pipe.
17 INDOOR UNIT INSTALLATION 4.1 ccording to the all hole position select the appropriate piping ode. There are three optional piping odes for indoor units as sho n in the figure belo : Piping Mode 1 or Piping Mode 3 a notch should be ade b using scissors to cut the plastic sheet of piping outlet and...
Page 20 - Step5: Connect Drainage Hose; INSTALLATION PRECAUTIONS); Drainage ports
18 INDOOR UNIT INSTALLATION 5.1 d st the drainage hose(if applicable so e ode both sides of the indoor unit are pro ided ith drainage ports ou can choose one of the to attache the drainage hose. nd plug the unused drain port ith the rubber attached in one of the ports. Step5: Connect Drainage Hose 5...
Page 21 - Step7: Wrap Piping and Cable; together tight .; Step8: Mount Indoor Unit; the pips and wires on the wall, do as below:
19 INDOOR UNIT INSTALLATION Step7: Wrap Piping and Cable Connecting iring Refrigerant piping Drainage hose sulation tape fter the refrigerant pipes connecting ires and drainage hose are all installed in order to sa e space protect and insulate the it ust be bundle ith insulating tape before passing ...
Page 22 - OUTDOOR UNIT INSTALLATION; Step1: Select Installation Location; of the outdoor unit.
20 OUTDOOR UNIT INSTALLATION Step1: Select Installation Location elect a site that allo s for the follo ing: 1.1 Do not install the outdoor unit near sources of heat stea or fla able gas. 1.2 Do not install the unit in too ind or dust places. 1.3 Do not install the unit here people often pass. elect...
Page 23 - Step4: Install Wiring
21 OUTDOOR UNIT INSTALLATION Step4: Install Wiring Step5: Connecting Refrigerant Pipe connection pipes flare nuts Ta e do n the a e co er Ter inal bloc Cable cla p iring co er iring diagra 5.3 INSTALLATION PRECAUTIONS . . Note: .
Page 24 - Step6: Vacuum Pumping; Lo pressure
22 OUTDOOR UNIT INSTALLATION Step6: Vacuum Pumping co pound gauge Lo pressure e e protec caps Pressure hose Pressure gauge High pressure al Charge hose High pressure al Lo pressure e cu p p ice port Manifold gauge 6.5 or 1 the pressure hose. ector. the outdoor unit. . 6.6 T
Page 25 - TEST OPERATION; est Run
23 TEST OPERATION Electrical safet inspection Chec hether the po er supp oltage co plies ith specification. Chec hether there is an rong or issing connection bet een the po er lines signal line and earth ires.Chec hether the earth resistance and insulation resistance co p ith re uire ents. stallatio...
Page 26 - Test Run Instruction; ainage hose
24 TEST OPERATION Test Run Instruction . . T. ainage hose e storage of accessories. Note:
Page 27 - MAINTENANCE; Replace the filter
25 MAINTENANCE Clean the unit <40 hen cleaning ou ust shut do n the achine and cut off the po er suppl for ore than 5 inutes. Under no circu stances should the air conditioner be flushed ith ater. olatile li uid (e.g. thinner or gasoline ill da age the air conditioner so onl use soft dr cloth or ...
Page 28 - TROUBLESHOOTING; MALFUNCTION
26 TROUBLESHOOTING trange odor The appliance does not operate Noise of running ater fine ist co es fro the air outlet sufficient airflo eitherhot or cold The appliance does not respond to co ands The displa is off itch off the air conditioner i ediate and cut off the po er supp in the e ent of: stra...
Page 29 - ERROR CODE ON THE DISPLAY; door roo te perature sensor fault; Description of the trouble; utdoor PM odule fault; DO NOT
27 TROUBLESHOOTING ERROR CODE ON THE DISPLAY door roo te perature sensor fault Description of the trouble Display utdoor pipe te perature sensor fault door pipe te perature sensor fault Malfunction of indoor fan otor Refrigerant s ste lea age or fault utdoor a bient te perature sensor fault utdoor d...