Costway N4-AH-10N04-A0U1-SL - User Manual
Costway N4-AH-10N04-A0U1-SL Oven – User Manual, read for free online in PDF format. We hope this helps you resolve any issues you may have. If you have further questions, please contact us through the contact form.

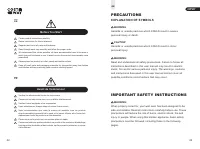


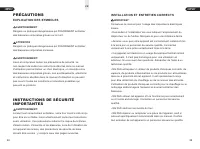
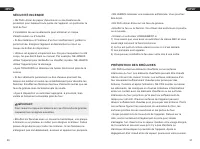
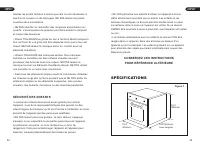
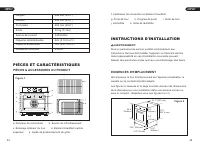
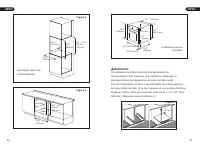
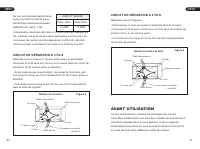

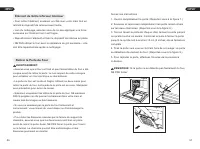
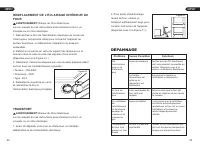
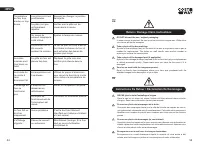
Table of Contents:
- Page 2 – Before You Start; Avant de Commencer; WARNING; PRECAUTIONS; IMPORTANT SAFETY INSTRUCTIONS; EXPLANATION OF SYMBOLS
- Page 5 – SPECIFICATIONS; PRODUCT PARTS & ACCESSORIES; Figure 1; INSTALLATION INSTRUCTIONS
- Page 6 – LOCATION REQUIREMENTS; Figure 2; Installation Under; Figure 3
- Page 7 – ELECTRICAL INSTALLATION; Electrical Shock Hazard; ELECTRICAL REQUIREMENTS
- Page 8 – The electrical supply should be 3-wire two-phase AC. Install a; Figure 5
- Page 9 – COOKING MODES; Turns the oven light on when selected
- Page 10 – Circulates air at room temperature to defrost food; Broil
- Page 11 – Defrost; ALWAYS follow label instructions on cleaning products.; CLEANING; Control Knobs; CARE AND MAINTENANCE
- Page 12 – Removing Oven Door
- Page 13 – If the door does not come; REPLACING OVEN INTERIOR LIGHT; TRANSPORTING
- Page 14 – TROUBLESHOOTING; Problem
- Page 15 – PRÉCAUTIONS; INSTRUCTIONS DE SÉCURITÉ; EXPLICATION DES SYMBOLES
- Page 17 – SPÉCIFICATIONS
- Page 18 – PIÈCES ET CARACTÉRISTIQUES; PIÈCES & ACCESSOIRES DU PRODUIT; EXIGENCES D'EMPLACEMENT; INSTRUCTIONS D'INSTALLATION
- Page 19 – Installation sous le
- Page 20 – Risque de Choc Électrique; EXIGENCES ÉLECTRIQUES
- Page 21 – AVANT UTILISATION; CIRCUIT REQUIS; CIRCUIT DE DÉRIVATION À 3 FILS; CIRCUIT DE DÉRIVATION À 4 FILS
- Page 22 – Fait circuler l'air à température ambiante; INSTRUCTIONS D'UTILISATION; MODES DE CUISSON; Allume la lumière du four lorsqu'elle est; Cuisson par Convection :; Utilise le puissant élément
- Page 23 – Cuisson par Convection (Convection Cooking)
- Page 24 – Suivez TOUJOURS les instructions figurant sur; NETTOYAGE; SOIN ET ENTRETIEN; Ventilation de Refroidissement
- Page 25 – Suivez TOUJOURS les instructions sur l'étiquette
- Page 26 – Si la porte ne se détache pas facilement du four,
- Page 27 – REMPLACEMENT DE L'ÉCLAIRAGE INTÉRIEUR DU; TRANSPORT; Problème Causes Possibles; DÉPANNAGE
- Page 28 – Instructions De Retour / Réclamation De Dommages; Return / Damage Claim Instructions
FP10040
If you're having difficulty, our friendly
customer team is always here to help.
THIS INSTRUCTION BOOKLET CONTAINS
IMPORTANT
SAFETY INFORMATION. PLEASE READ AND KEEP FOR FUTURE REFERENCE.
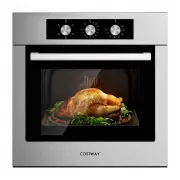
24-Inch Built-In Wall Oven
Four Encastrable
USA
office: Fontana
AUS
office: Truganina
GBR
office: Ipswich
FRA
office: Saint Vigor d'Ymonville
USA:[email protected]
AUS:[email protected]
GBR:[email protected]
FRA:c s. f r @costway.com
"Loading the manual" means you need to wait until the file loads and becomes available for online reading. Some manuals are very large, and the time they take to appear depends on your internet speed.
Was this manual helpful?
About this manual
- Brand
- Costway
- Model
- N4-AH-10N04-A0U1-SL
- Document type
- User Manual
- Category
- Oven
- Language(s)
- English, French
- Pages
- 28
- File size
- 3.3 MB
- Format
Summary
EN Before You Start Please read all instructions carefully.Retain instructions for future reference.Separate and count all parts and hardware.Read through each step carefully and follow the proper order.We recommend that, where possible, all items are assembled near to the area in which they will be...
a. Control Panel b. Cooling Vents c. Oven Interior Lightd. Top Central Heating Element e. Rack Position Guidef. Convection Fan and Heating Element g. Oven Doorh. Door Handle i. Oven Rack j. Broiler Pank. Broiler Pan Rack 23.4” (594mm) 23.8”(604mm) with handle 23.4” (594mm) Figure 1 SPECIFICATIONS Wi...
IMPORTANT: Installation must be in compliance with the consumption declaration. In order to ensure adequate ventilation, the back panel of the cabinet unit must be removed. When installing the oven, it is better to have it rest on two wooden strips. If the oven rests on a continuous, flat surface, t...
Ask a question
Related manuals
Other Costway appliances
 Costway BX319235 User Manual
 Costway BXD3-10N3 User Manual
 Costway BXD4-A2J-8NY User Manual
 Costway BXD1684-A User Manual
 Costway BXD1967 User Manual
 Costway EP22783 User Manual
 Costway EP23048 User Manual
 Costway EP23049 User Manual
 Costway EP23664 User Manual
 Costway EP23995 User Manual
 Costway EP24618US User Manual
 Costway EP24619US User Manual
 Costway EP25439US-BK User Manual
 Costway ES10111US-GR User Manual
 Costway ES10113US-WH User Manual
 Costway ES10114US-WH User Manual
 Costway ES10122US-WH User Manual
 Costway ES10146US-WH User Manual
 Costway ES10163US-WH User Manual
 Costway ES10196US-BL User Manual