CASAINC CA-HZB30 - User Manual
CASAINC CA-HZB30 Ice Maker – User Manual, read for free online in PDF format. We hope this helps you resolve any issues you may have. If you have further questions, please contact us through the contact form.


Table of Contents:
- Page 2 – CONTENTS
- Page 3 – IMPORTANT SAFETY INSTRUCTIONS
- Page 4 – instructions before using any appliance.; IMPORTANT SAFETY TIPS
- Page 6 – SPECIFICATIONS
- Page 9 – ) EXPLOSIVE DRAWINGS
- Page 12 – UNPACKING YOUR ICE MAKER; WARNING:Only use drinking water; INSTALLATION LOCATION REQUIREMENT; OPERATING PROCEDURES & MAINTENANCE
- Page 13 – Electrical Shock Hazard; ELECTRICAL REQUIREMENT & CONNECTIONS; Recommended grounding method
- Page 14 – OPERATION YOUR UNIT; connect to water mains and that old hose-sets should not be reused.; water hose; Unit Back View
- Page 15 – Connecting the water drainage pipe; If you select to use manual water supplying mode; Water filler cap
- Page 16 – Ice making program is explained in following chart:
- Page 17 – Automatic self-cleaning program; Timer setting operation
- Page 18 – Internal LED light operation; ERROR code of unit breakdown; Water Drainage
- Page 19 – Normal Sounds
- Page 20 – CLEANING & MAINTENANCE; What shouldn't be done; Exterior Cleaning; For Ice Storage Bin; If the ice maker has been left unused for a long time, before the
- Page 21 – Ice Making Parts Cleaning
- Page 22 – position, and return machine to work, discard first batch of ice.
- Page 24 – MCU; COMP; Main PCB; Electrical Diagram; Control panel PCB; Following the above program to clean the ice storage bin .; Cleaning Suggestion; WIRING DIAGRAM
- Page 25 – NORMAL; TROUBLE SHOOTING
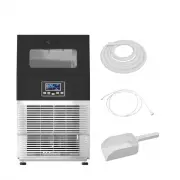
Automatic Ice Maker
-
Both Manual & Automatic water supplying
Instruction Manual
Model: WF-HZB30
To ensure proper use of this appliance and your safety, please read the following
instructions carefully before operating this appliance.
Customer Service
:
Phone
:
888-257-3857
"Loading the manual" means you need to wait until the file loads and becomes available for online reading. Some manuals are very large, and the time they take to appear depends on your internet speed.
Summary
1 CONTENTS IMPORTANT INSTRUCTIO------------------------------------------------------------------------------ 2 IMPORTANT SAFTY TIPS------------------------------------------------------------------------ 3 SPECIFICATION--------------------------------------------------------------------------------...
2 DANGERWARNING IMPORTANT SAFETY INSTRUCTIONS Your safety and the safety of others are very important. We have provided many important safety messages manual and your appliance.Always read and obey all safety messages. This is the safety alert symbol: ! All safety messages will follow the safety ale...
3 When using electrical appliances, basic safety precautions should be followed to reduce the risk of fire, electric shock, and injury to persons or property. Read all instructions before using any appliance. Use this appliance only for its intended purpose as described in this owner’s manual. This ...