Brother DCP-8025D- User Manual
Brother DCP-8025D– User Manual, read for free online in PDF format. We hope this helps you resolve any issues you may have. If you have further questions, please contact us through the contact form.


Table of Contents:
- Page 2 – Carton Components; Getting Started
- Page 3 – Control Panel
- Page 4 – Table of Contents; Setting Up the Machine; For Windows NT; For Administrators; Setting your IP Address, Subnet Mask and Gateway using BRAdmin
- Page 5 – Slide ADF support into the groove on ADF.
- Page 6 – Close the front cover of the machine.
- Page 8 – Press the; then press the Set key.; Install Power Cord; English
- Page 9 – Installing the Driver & Software
- Page 11 – must be logged on as the administrator.)
- Page 13 – Select Local Interface, and then click Next.
- Page 14 – For Windows
- Page 15 – Click Finish to restart your computer.; is started. The Control Center
- Page 17 – Brother Native driver Installation
- Page 19 – Select Yes and Next to print a test page.
- Page 26 – is
- Page 27 – Make sure that you followed the instructions in
- Page 28 – is started. The Control
- Page 34 – Insert the Supplied CD-ROM for Windows
- Page 39 – If the DCP is un-configured for your network:; If the DCP is configured for your network:; Go to
- Page 41 – Turn on your Macintosh; For USB Interface Cable Users; For Mac
- Page 42 – has been
- Page 43 – Select Applications from the Go menu.
- Page 44 – Open the Printer Center icon.; To install Presto! PageManager
- Page 45 – For Network Interface Cable Users
- Page 48 – xxxxxx are the last six digits of the; The setup is now complete.
- Page 50 – Insert the supplied CD-ROM for Windows
- Page 52 – Options; Lower Tray Unit; Replacement Consumables; Drum Unit
Q
u
ick
S
e
tu
p
G
u
ide
DCP
-8020
DCP
-8025D
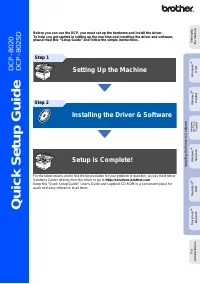
Before you can use the DCP, you must set up the hardware and install the driver.
To help you get started in setting up the machine and installing the driver and software,
please read this “Setup Guide” and follow the simple instructions.
For the latest drivers and to find the best solution for your problem or question, access the Brother
Solutions Center directly from the driver or go to http://solutions.brother.com
Keep this “Quick Setup Guide”, User’s Guide and supplied CD-ROM in a convenient place for
quick and easy reference at all times.
Step 1
Step 2
Installing the Driver & Software
Setup is Complete!
In
s
tall
ing t
he
Dr
iv
er
&
S
of
twar
e
S
e
tti
n
g
Up
th
e
M
a
c
h
in
e
W
in
dow
s
®
USB
W
indow
s
®
Pa
ra
lle
l
W
indo
w
s
NT
®
4.
0
Pa
ra
lle
l
M
a
ci
nt
osh
®
USB
M
a
c
int
osh
®
Ne
two
rk
W
in
dow
s
®
Ne
two
rk
Fo
r
A
d
mi
n
is
tra
to
rs
"Loading the manual" means you need to wait until the file loads and becomes available for online reading. Some manuals are very large, and the time they take to appear depends on your internet speed.
Other Manuals for Brother DCP-8025D
Summary
Carton components may differ from one country to another.Save all packing materials and the carton. Carton Components Quick Setup Guide CD-ROMs For Windows ® For Macintosh ® User’s Guide ADF Support Drum Unit Assembly (including Toner Cartridge) AC Power Cord Accessory Order Form (USA/Canada only) ■...
DCP-8020 and DCP-8025D have similar control panel keys. Warning Control Panel 1. Print keys 4. Navigation keys 7. Stop/Exit 2. Status LED (Light-Emitting Diode) 5. Copy keys (Temporary Settings) 8. Start 3. 5-Line Liquid Crystal Display (LCD) 6. Numeric keys 9. Scan key For the details of the contro...
1 Table of Contents Setting Up the Machine 1. Install the Automatic Document Feed (ADF) Support .................................... 2 2. Install the Drum Unit Assembly ........................................................................ 2 3. Load Paper in the Paper Tray ...........................