Page 2 - Contents
Page 3 - Terms of Use
1 - English Terms of Use • Please read this guide carefully and keep it for future reference. • Follow all instructions for safe use and handling of the product. • Use the camera within the given temperature, humidity and voltage level noted in the specifications. And only use accessories approved b...
Page 4 - What’s in the Box
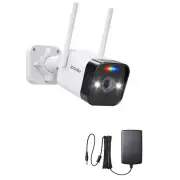
2 - English What’s in the Box Camera Power Adapter Mounting Screw Bag Quick Start Guide Quick Start Guide Mounting Template Waterproof Lid
Page 5 - Introduce the Camera
3 - English Introduce the Camera NOTE: Before installing the product, please test its functionality to ensure it is working properly. For battery-powered products, make sure they are fully charged before installation and use. Antenna LED Indicator Microphone Warm Light Lens Infrared LightReset Butto...
Page 6 - Access the System via Smartphone/PC
4 - English Access the System via Smartphone/PC • Smartphone Search “Zosi Smart” in App Store or scan the QR code to download and launch the App, follow the prompts to register and log in. Add Device 3 Ways to Add Device to Zosi Smart App . • Via QR Code• Via AP• Via Wired Connection • PC Download: ...
Page 7 - Install the Camera
5 - English Install the Camera 1. Installation Precautions • Do not face the camera to any light source.• Do not point the camera at glass windows or reflective objects. Otherwise, it may result in poor image performance due to reflections from infrared LEDs, ambient lights or status lights.• Do not...
Page 8 - Mount the Camera to the Wall
6 - English Mount the Camera to the Wall Drill holes according to the mounting template. NOTE: Use the anchors included in the package if needed. Attach the camera bracket with screws included in the package. NOTE: Run the cables through the cable notch on the mounting base. For WiFi cameras, it is ...
Page 9 - Installation Distance, Height and Angle
7 - English Installation Distance, Height and Angle Distance: Best accuracy for objects within 5-50 ft (1.5-15 m). Angle: Tilt the camera down about 30°-60° from the horizontal position. Height: Install the camera 8-16 ft (2.5-5m) above the ground. NOTE: The accuracy of human detection will be affec...
Page 10 - FAQ
8 - English FAQ 1. Camera cannot Turn On? If your camera is not powering on, please try the following solutions: • Try plugging the camera into a different power outlet and check again. • Power on the camera with another working 12V power adapter and see if it works. If the problem persists, please ...
Page 11 - Notification of Compliance; FCC Compliance Statement; Simplified EU Declaration of Conformity
9 - English Notification of Compliance 1. FCC Compliance Statement This device complies with Part 15 of FCC Rules. Operation is subject to the following two conditions: (1) This device may not cause harmful interference. (2) This device must accept any interference received, including inference that...
Page 12 - Precauciones de seguridad
10 - Español Precauciones de seguridad (especificaciones de uso) • Lea atentamente este manual y consérvela. • Siga todas las instrucciones para un uso y manipulación seguros del producto. • Utilice la cámara dentro de los límites de temperatura, humedad y voltaje especificados y utilice los accesor...
Page 13 - Lista de empaque
11 - Español Lista de empaque Cámara Fuente de alimentación Bolsa de tornillos Quick Start Guide Manual de instrucciones Plantilla de montaje Accesorios impermeables
Page 14 - Especificaciones de producto
12 - Español Especificaciones de producto Nota: Por favor pruebe el producto antes de instalarlo. Los productos con batería deben estar completamente cargados antes de su instalación y uso. Antena Luz indicadora Micrófono Luz Blanca Lente Luz IRBotón Reset Micrófono Ranura de Tarjeta Micro SD CDS
Page 16 - Instalación de la cámara
14 - Español Instalación de la cámara 1. Precauciones de la instalación • Evite orientar la cámara hacia la luz.• Evite orientar la cámara hacia las ventanas o los objetos reflectantes. De lo contrario, el rendimiento de la imagen puede verse afectado por los reflejos de la luz infrarroja, las luces...
Page 17 - Instala la cámara sobre la pared
15 - Español Instala la cámara sobre la pared Taladre los agujeros según la plantilla de montaje e inserte los tacos plásticos en los agujeros. Alinee el soporte de la cámara con los agujeros, y fije la cámara sobre la pared con tornillos. NOTA: Por favor pase el cable por la muesca del soporte. Par...
Page 18 - Ambiente de la instalación
16 - Español Ambiente de la instalación Distancia: la mejor precisión para objetos dentro de 5-50 pies (1,5-15 m). Ángulo: incline la cámara hacia abajo unos 30°-60° desde la posición horizontal. Altura: instale la cámara entre 2,5 y 5 m (8 y 16 pies) sobre el suelo. NOTA: La activación de la cámara...
Page 20 - Notificación de Cumplimiento; Declaración de Cumplimiento de la FCC; Declaración de Conformidad de UE Simplificada
18 - Español Notificación de Cumplimiento Declaración de Cumplimiento de la FCC Este dispositivo cumple con la Parte 15 de las Normas de la FCC. La operación está sujeta a las siguientes dos condiciones: (1) Este dispositivo no puede causar interferencias perjudiciales, (2) Este dispositivo debe ace...