ZOSI 1NC-6963Y-W-S-A2 - Manuals
User Manual ZOSI 1NC-6963Y-W-S-A2


Summary
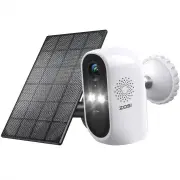
What’s in the box 01 Battery Camera USB Cable Mounting Screws NOTE: 1 English Quick Start Guide Mounting Bracket Reset Needle This guide will get you going with yo ur camera. For more details and information of the camera, please co ntact us or your dealer .
Press and hold the power switch on the back of the camera for 3 seconds, the network indicator lights blink red. NOTE: It is recommended to test that each camera can work normally before installation, if not, please contact us. (1) Do not charge the camera when the temperature is higher than 45 ℃ or...
NOTE: The camera system has been matched before shipment. After the camera is powered on, the system will automatically connect and display video. This function requires the connection with a specific NVR. If you need it, please contact us or your dealer. If you want to add or reset a camera, follo...
ZOSI Security Cameras Manuals
-
 ZOSI 16CK-211B16S-20-US
User Manual
ZOSI 16CK-211B16S-20-US
User Manual
-
 ZOSI 16CK-211B16S-40-US
User Manual
ZOSI 16CK-211B16S-40-US
User Manual
-
 ZOSI 16CK-261W12S-20
User Manual
ZOSI 16CK-261W12S-20
User Manual
-
 ZOSI 16CK-261W16-40
User Manual
ZOSI 16CK-261W16-40
User Manual
-
 ZOSI 16CK-261W16S-20A
User Manual
ZOSI 16CK-261W16S-20A
User Manual
-
 ZOSI 16CK-418B12S-20-US
User Manual
ZOSI 16CK-418B12S-20-US
User Manual
-
 ZOSI 16CK-418B12S-40-US
User Manual
ZOSI 16CK-418B12S-40-US
User Manual
-
 ZOSI 16CK-418W8S-20-US
User Manual
ZOSI 16CK-418W8S-20-US
User Manual
-
 ZOSI 16DK-1058W10-30-US-A2
User Manual
ZOSI 16DK-1058W10-30-US-A2
User Manual
-
 ZOSI 16DK-1828W10-40-US-A2
User Manual
ZOSI 16DK-1828W10-40-US-A2
User Manual
-
 ZOSI 16DK-1828W16-40-US
User Manual
ZOSI 16DK-1828W16-40-US
User Manual
-
 ZOSI 16DK-2255AW16-40-US-A2
User Manual
ZOSI 16DK-2255AW16-40-US-A2
User Manual
-
 ZOSI 16DK-2615W10-30-US-A2
User Manual
ZOSI 16DK-2615W10-30-US-A2
User Manual
-
 ZOSI 16DK-2615W8-30-US-A2
User Manual
ZOSI 16DK-2615W8-30-US-A2
User Manual
-
 ZOSI 16DK-2615W8-40-A2
User Manual
ZOSI 16DK-2615W8-40-A2
User Manual
-
 ZOSI 16DK-4285W10-30-US-A2
User Manual
ZOSI 16DK-4285W10-30-US-A2
User Manual
-
 ZOSI 16DK-4285W8-30-US-A2
User Manual
ZOSI 16DK-4285W8-30-US-A2
User Manual
-
 ZOSI 16DK-4295W16-40-US-A2
User Manual
ZOSI 16DK-4295W16-40-US-A2
User Manual
-
 ZOSI 16DK-4295W8-40-US-A2
User Manual
ZOSI 16DK-4295W8-40-US-A2
User Manual
-
 ZOSI 16FK-106W4X419W8S-20-US
User Manual
ZOSI 16FK-106W4X419W8S-20-US
User Manual