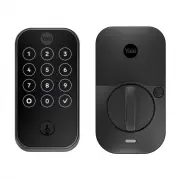
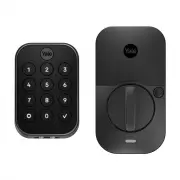
Page 2 - Trusted every day; In The Box; Hardware Components
Part of ASSA ABLOY P/N YRD400-KD-0022 Rev A Trusted every day 2 In The Box AA AA AA AA Yale Smart Module (with select models) Exterior Keypad Interior Lock Mounting Plate Batteries Screws and Plastic Clips (pre-installed) Battery Cover Guide Hardware Components x4 x2 Note: You must use the provided ...
Page 3 - Remove Existing Deadbolt
Part of ASSA ABLOY P/N YRD400-KD-0022 Rev A Trusted every day 3 1 Remove Existing Deadbolt Keep your old deadbolt until your new lock has been successfully installed. Door Frame
Page 4 - Check Door Measurements and Adjust If Needed
Part of ASSA ABLOY P/N YRD400-KD-0022 Rev A Trusted every day 4 Check Door: Tear off the Door Checker page of this guide and follow instructions to verify your door measurements and make any needed adjustments. Note: There are some cases where existing holes cannot be adjusted to be compatible. New ...
Page 5 - Verify Measurements with the Check Your Door Guide
Part of ASSA ABLOY P/N YRD400-KD-0022 Rev A Trusted every day 5 Verify Measurements with the Check Your Door Guide Equals I Less than I(Adjust diameterto 1") Greater than I(Your door is not a match for a Yale smart lock) X 1" (25mm) Dia. 1" (25mm) Dia. 1" (25mm) Deep Frame Equals I L...
Page 9 - Install Deadbolt Latch and Strike Plate; Deadbolt latch must be
Part of ASSA ABLOY P/N YRD400-KD-0022 Rev A Trusted every day 9 Install Deadbolt Latch and Strike Plate 3 *Correct deadbolt latch length is based on backset. Choose 2-3/8" or 2-3/4".Door Checker measurements E and F can help you verify your backset measurement. 2-3/8"Backset, Out of Box ...
Page 10 - Verifying Bore Face Measurement for Exterior Keypad
Part of ASSA ABLOY P/N YRD400-KD-0022 Rev A Trusted every day 10 Verifying Bore Face Measurement for Exterior Keypad 4 Install the lock with the door open.Do not close until all steps are completed. Measurement G on the Door Checker will help verify your bore face measurement. If hole is less than 2...
Page 11 - Install Mounting Plate and Exterior Keypad; There are 3 bolt sets with your
Part of ASSA ABLOY P/N YRD400-KD-0022 Rev A Trusted every day 11 Install Mounting Plate and Exterior Keypad 5 IMPORTANT: There are 3 bolt sets with your lock. Choose the bolt length for your door thickness. Measurement B, C, or D on the Door Checker will help you identify which bolts to use. 1-3/8&#...
Page 12 - Attach Wire to Inside of Interior Lock
Part of ASSA ABLOY P/N YRD400-KD-0022 Rev A Trusted every day 12 Make sure wire is attached securely. Ridges face outward Attach Wire to Inside of Interior Lock 6
Page 13 - Install Interior Lock
Part of ASSA ABLOY P/N YRD400-KD-0022 Rev A Trusted every day 13 Install Interior Lock 7 Screws are pre-installed. Tighten when lock is seated on plate. When fully tightened, lock should be flush to door. Tailpiece must be vertical. Insert tailpiece into the slot. Push the lock towards the door, adj...
Page 14 - Test Thumbturn and Key
Part of ASSA ABLOY P/N YRD400-KD-0022 Rev A Trusted every day 14 Test Thumbturn and Key Smooth deadbolt latch operation will enhance your battery life. If deadbolt latch does not lock or unlock when turning thumbturn: Ensure tailpiece is inserted into deadbolt latch slot. Step 4 Ensure tailpiece is ...
Page 15 - Install Yale Smart Module; Included with select models; Batteries must not be installed
Part of ASSA ABLOY P/N YRD400-KD-0022 Rev A Trusted every day 15 Install Yale Smart Module Included with select models S Select Models Batteries must not be installed when inserting or removing Yale Smart Module.
Page 16 - Install Batteries and Replace Cover; Deadbolt latch must
Part of ASSA ABLOY P/N YRD400-KD-0022 Rev A Trusted every day 16 Install Batteries and Replace Cover 8 Congratulations, you’ve installed the Yale Assure Lock® 2 Keyed Deadbolt! 1st 2nd Place ribbon behind batteries for easy battery removal. Deadbolt latch must be unlocked before installing batteries...
Page 17 - Surface Mount Installation; Installing DoorSense®; Installation options:; What you’ll need
Part of ASSA ABLOY P/N YRD400-KD-0022 Rev A Trusted every day 17 Surface Mount Installation 1.5" 2" Door Frame 9 Installing DoorSense® Installation options: 1. Surface Mount: Only requires only the use of a screwdriver. 2. Flush Mount: Provides a cleaner and less visible look with more robus...
Page 20 - Flush Mount Installation; PUSH
Part of ASSA ABLOY P/N YRD400-KD-0022 Rev A Trusted every day 20 9 Installing DoorSense® Flush Mount Installation What you’ll need • Flush Mount Cap (shown in illustration on page 16.) • 5/8" drill blade bit • Electric drill Step 1. Remove magnet from the housing Use a small blunt object to push...
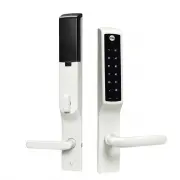
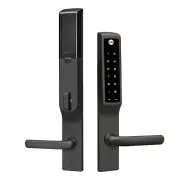
Page 22 - Using Your Lock; Interior Lock; Exterior Keypad
Part of ASSA ABLOY P/N YRD400-KD-0022 Rev A Trusted every day 22 Using Your Lock To Unlock the Door 1. Press the Yale logo on the exterior keypad. 2. Enter the entry code.3. Press the . Interior Lock Battery Cover Passage Button Indicator Light Thumbturn Exterior Keypad Warnings Lock door Wake or On...
Page 23 - Features
Part of ASSA ABLOY P/N YRD400-KD-0022 Rev A Trusted every day 23 Features Feature Description DoorSense Entry Codes Auto-Lock Auto-Unlock Passage Mode • DoorSense tells you if your door is closed or open. Note: You can only ask a Voice Assistant if the door is locked or unlocked. • Entry Codes are u...
Page 24 - Setting Definitions; Setting
Part of ASSA ABLOY P/N YRD400-KD-0022 Rev A Trusted every day 24 Setting Definitions Setting Default Definition Codes Programming Code Automatically created by the Yale Access App This code is used to access programming features: Handing, Smart Module integration, andDiagnostics. This code cannot be...
Page 26 - Troubleshooting
Part of ASSA ABLOY P/N YRD400-KD-0022 Rev A Trusted every day 26 Symptom Suggested Action Lock does not respond -door is open and accessible. • Keypad becomes active when the Yale logo is pressed.• Verify contact with the logo.• If keypad numbers are visible, check they respond when pressed.• Check ...
Page 28 - Hardware Troubleshooting
Part of ASSA ABLOY P/N YRD400-KD-0022 Rev A Trusted every day 28 Hardware Troubleshooting Symptom Solution Deadbolt grinds and will not extend tolock when using an ntry ode but e c thumbturn locks and unlocks smoothly. Attempt re-handing using the Settings Menu. You must use Code to access the Setti...
Page 29 - Resetting Lock to Factory Defaults; Remove 1 battery to
Part of ASSA ABLOY P/N YRD400-KD-0022 Rev A Trusted every day 29 Resetting Lock to Factory Defaults When lock is reset*, it will remove the lock from the Yale Access App and remove all pin codes and settings that were changed. To Reset Lock: 1. Remove battery cover and one battery.2. Press reset but...
Page 30 - Keypad Alerts
Part of ASSA ABLOY P/N YRD400-KD-0022 Rev A Trusted every day 30 Keypad Alerts Keypad Meaning Gear flashes Amber Low Battery Level 1 Gear flashes Red Low Battery Level 2 Gear flashes Red then stays reduntil batteries are replaced Low Battery Level 3 Checkmark flashes Pairing Success X then gear flas...
Page 31 - Interior Lock Light Alerts; Inside Lock Light
Part of ASSA ABLOY P/N YRD400-KD-0022 Rev A Trusted every day 31 Interior Lock Light Alerts Inside Lock Light Meaning Blue flashing Low Battery Level 1 Blue flashing Low Battery Level 2 Blue flashing Low Battery Level 3 Pink flashing Passage Mode enabled Red flash Locked state Green flash Unlocked s...