Page 2 - DISPOSAL INFORMATION; Please keep this user manual in a safe place for future reference.
DISPOSAL INFORMATION Thank you for choosing Whynter. Please follow the instructions provided in this user manual to obtain the very best performance from your steam oven. We trust that your Whynter steam oven will provide the performance and reliability that we stand for. Please keep this user manua...
Page 3 - Table of Contents; PAGE
Table of Contents PAGE SAFETY PRECAUTIONS 4 BEFORE FIRST USE 5 INTRODUCTION 6 PRODUCT DIAGRAM 7 CONTROL PANEL / DISPLAY 8 - 10 OPERATING INSTRUCTIONS 10 - 11 DIY FUNCTION MODES 12 - 13 MENU SELECTIONS 14 - 16 TIPS 16 CLEANING AND MAINTENANCE 17 SPECIFICATIONS 17 TROUBLESHOOTING 18 WARRANTY 19
Page 5 - UNPACKING INSTRUCTIONS; Lift the packing materials, oven and accessories out of the box.; FOR HOUSEHOLD USE ONLY.; BEFORE THE FIRST USE; Do not use on heat; KEEP OUT OF REACH OF CHILDREN.
UNPACKING INSTRUCTIONS 1. Place the box on a large, sturdy, flat surface. 2. Open the box and remove the instruction book and any other literature. 3. Lift the packing materials, oven and accessories out of the box. 4. Remove any other items and remove packing materials surrounding those parts. 5. R...
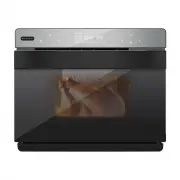
Page 6 - INTRODUCTION; What Is a Steam Oven?; Steam ovens are just what they sound like –; How Do Steam Ovens Work?; in boiler, heating it to 212 degrees Fahren-; PRODUCT STRUCTURAL DESIGN
INTRODUCTION What Is a Steam Oven? Steam ovens are just what they sound like – ovens that use hot steam rather than hot air to cook food. They introduce a whole new level of cooking to your kitchen, and can even reheat things more effectively than microwaves, making them an awesome double whammy for...
Page 7 - Residual Steam Outlet
INTERNAL DIAGRAM 1 2 3 4 5 6 7 9 10 8 1. Residual Steam Outlet 6. Bottom Heater 2. Oven Lamp 7. Internal Fan 3. Top Heater 8. Air Inlet 4. Steam Inlet 9. Temperature Sensor 5. Steam Inlet 10. Temperature Sensor 11. Water Tank 11
Page 8 - CONTROL PANEL; Icon; Press ENTER key to
CONTROL PANEL 1 2 3 4 5 6 7 Icon Function Description 1 Oven lamp/child lock key: • Press to toggle Oven Lamp ON or OFF • Oven lamp will remain ON for three minutes after function completion. • Oven lamp will remain ON for three minutes when the oven door is left opened. • To activate Child Lock, pr...
Page 10 - DISPLAY; Dehydrate; Powering on; OPERATING INSTRUCTIONS
DISPLAY Dehydrate Dry fruit and nuts menu contains 9 programs and recipes. Refer to page 15. Mode: Back heater convection or Top & bottom heater pipes Steam Steam menu contains 9 programs and recipes. Refer to page 14. Mode: Steam Roast Roast menu contains 9 programs and recipes. Refer to page 1...
Page 11 - ) Press the Enter button to begin the cooking cycle.; During Operation; Pause function; Cooking Complete Reminder
OPERATING INSTRUCTIONS 2) Select a cooking time by confirming the blinking numbers (hours & minutes). 3) Select a temperature by confirming the blinking number temperature. 4) Press the Enter button to begin the cooking cycle. The countdown timer will begin counting down until the cooking cycle ...
Page 12 - DIY FUNCTION MODES; DIY Steam mode
DIY FUNCTION MODES Steam Strengthening heating (Back heater convection + top heater pipe + bottom heater pipe) Top heater pipe Top/bottom heater pipe Hot air convection (Top heater pipe + rear fan) Back heater convection | Air Fryer (Back heating + rear fan) High - temperature steaming (steam + Back...
Page 13 - DIY Other Roast Modes; 9). Press the Enter button to confirm the selection.
DIY FUNCTION MODES DIY Other Roast Modes Press the selection key > and choose the desired cooking mode. The function icon will flash, press the Enter button to confirm the selection. Press the selection key > to select the operation hour time (default value is 0, ranging from 0 - 6) and minute...
Page 14 - MENU SELECTIONS; Steam Menu
MENU SELECTIONS Code E - 1 E - 2 E - 3 E - 4 E - 7 E - 8 E - 9 Food Style Steamed Vegetable Steamed Rice Steamed Fish Steamed Shrimp Steamed Crab Steamed Eggs Steamed Chicken Steamed Papaya Steamed Potatoes Heating time (minute) 16 50 20 15 30 16 30 35 30 Heating temp. (°F) 210 210 210 210 210 210 2...
Page 15 - Dry Fruit and Nuts Menu; Other Functions; Descaling Function; Remove all accessories from inside the oven.
MENU SELECTIONS Dry Fruit and Nuts Menu Code L - 1 L - 2 L - 3 L - 4 L - 5 L - 6 L - 7 L - 8 L - 9 Food Style Dried Banana Dried Apple Dried Raisins Dried Kiwi Dried Lemon Almonds Walnut Macadamia Nut Cashew Nut Heating time (minute) 360 360 420 360 10 12 Heating temp. (°F) 150 150 195 150 285 320 O...
Page 16 - Press the Light button to turn the oven interior light on or off.; TIPS; Always use distilled or filtered water.
MENU SELECTIONS Light Press the Light button to turn the oven interior light on or off. Child Lock Press and hold the Child Lock button for 3 seconds to activate the child lock. To deactivate the child lock, press and hold the Child Lock button for 3 seconds Water level detection If the water tank i...
Page 18 - TROUBLESHOOTING; Oven light does not
TROUBLESHOOTING Error Possible causes Solution Er1 Open circuit for top sensor Stop the work, open the oven door and allow the cavity to cool down for 10 minutes, and then restart it or contact Whynter Customer Support Er2 Short circuit for top sensor Stop the work, open the oven door and allow the ...
Page 19 - ONE YEAR LIMITED WARRANTY; THIS WARRANTY DOES NOT COVER:
ONE YEAR LIMITED WARRANTY This WHYNTER product is warranted to the original owner, purchased from an authorized Whynter dealer with- in the 48 U.S. continental states, for one year from the original purchase date against defects in material and workmanship under normal residential usage. Should your...