Page 2 - DISPOSAL INFORMATION; Thank you for choosing the Whynter 1
2 DISPOSAL INFORMATION This symbol on the product or its packaging indicates that the appliance cannot be treated as normal domestic trash, but must be handed in at a collection point for recycling electric and electronic appliances. Your contribution to the correct disposal of this product protects...
Page 3 - TABLE OF CONTENTS / TECHNICAL SPECIFICATIONS
3 TABLE OF CONTENTS / TECHNICAL SPECIFICATIONS DISPOSAL INFORMATION 2 TECHNICAL INFORMATION 3 SAFETY PRECAUTIONS 4 PARTS AND CONTROL PANEL 5 LCD DISPLAY OVERVIEW 6 INSTALLATION AND OPERATING INSTRUCTIONS 7 – 8 CARE AND MAINTENANCE 9 TROUBLESHOOTING 10 WARRANTY INFORMATION 11
Page 4 - TECHNICAL SPECIFICATIONS; Latch Secured Reversible Door
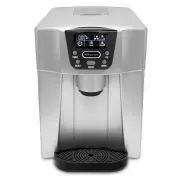
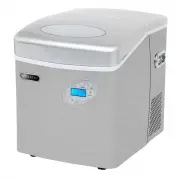
4 TABLE OF CONTENTS / TECHNICAL SPECIFICATIONS TECHNICAL SPECIFICATIONS MODEL : MIM-14231SS Power Supply: 115V/ 60Hz Ice Making Current: 1.8A Ice Making Harvest: 1.5A Max Storage Capacity: 12 lbs Ice Making Capability: 23 lbs/day Refrigerant: R-134a / 70g Unit Dimensions: 16.25" D x 14" W x ...
Page 5 - WARNING; This ice maker is designed for non-commercial use only.; SAFETY PRECAUTIONS; FOLLOWED
5 WARNING TO REDUCE THE RISK OF FIRE, ELECTRICAL SHOCK, OR INJURY WHEN USING YOUR ICE MAKER, FOLLOW THESE BASIC PRECAU- TIONS: Plug into a grounded 3-prong outlet; do not remove grounding prong, do not use an adapter, and do not usean extension cord. It is recommended that a separate circuit, se...
Page 6 - Do not use the apparatus other than for its intended purpose.; Electrical Connection
6 WARNING TO REDUCE THE RISK OF FIRE, ELECTRICAL SHOCK, OR INJURY WHEN USING YOUR ICE MAKER, FOLLOW THESE BASIC PRECAU- TIONS: Do not use the apparatus other than for its intended purpose. Cleaning and user maintenance shall not be made by children without supervision. In general, it is always...
Page 7 - PARTS AND CONTROL PANEL
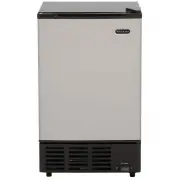
7 PARTS AND CONTROL PANEL 1 Door Hinge 2 Ice maker Tray 3 Door Hinge Hole 4 Ice Bucket 5 Door Handle 6 Door Latch 7 Power Button 8 Air Intake 9 Air Exhaust 10 Door 11 Rear Vent 12 Water Inlet Port 13 Power Supply Cord 14 Braided Stainless Steel Flexible Hose for water supply 15 Cabinet Flange (Optio...
Page 8 - INSTALLATION AND OPERATING INSTRUCTIONS; LEVELLING THE ICE MAKER; Place a carpenter’s level on top of the product to see if the ice; DOOR REVERSAL; Tools needed: Flathead screwdriver, Phillips screwdriver; To remove door from hinges:; Push the plug buttons into the original screw holes.
8 INSTALLATION AND OPERATING INSTRUCTIONS LEVELLING THE ICE MAKER It is important for the ice maker to be leveled in order to work properly. It can be raised or lowered by turning the four feet on the bottom of the machine. We recommend using a carpenter’s level to check the machine. 1. Place a carp...
Page 9 - INSTALLATION OF YOUR ICE MAKER
9 INSTALLATION AND OPERATING INSTRUCTIONS INSTALLATION OF YOUR ICE MAKER This ice maker should be installed by a licensed plumber only Locate the ice maker away from direct sunlight and sources of heat (stove, heater, radiator, etc.) as it mayincrease electrical consumption. Extreme cold ambient...
Page 10 - TRANSPORTATION AND LOCATION REQUIREMENTS; This icemaker should be installed by a licensed plumber only.; OPERATING INSTRUCTIONS; Check for leaks after connection.
10 INSTALLATION AND OPERATING INSTRUCTIONS To ensure proper service access and ventilation, allow at least 4” clearance at rear, and 1” at top and sides. The in-stallation should allow the ice maker to be pulled forward for servicing if necessary. TRANSPORTATION AND LOCATION REQUIREMENTS This icem...
Page 11 - Connecting the water line:
11 INSTALLATION AND OPERATING INSTRUCTIONS Connecting the water line: 1. Turn off main water supply. Turn on nearest faucet long enough to clear line of water. 2. Find a ½” to ¾” vertical cold water pipe near the installation location. The distance should be less than 9 feet. The water supply hose p...
Page 12 - FLANGE KIT INSTALLATION; and make the lower edge of flange not touch the ground.; INSTALLATION; Remove the flange and screws from the shipping carton.
12 FLANGE KIT INSTALLATION The flange kit allows seamless installation of the Whynter MIM-14231SS which gives a greater degree of person-alized application. This is an optional accessory, sold separately. The flange kit is used for a consistent smooth surface and additional secure fastening by screw...
Page 13 - CARE AND MAINTENANCE; CLEANING AND MAINTENANCE; Do not touch the power plug when your hands are wet.; Exterior cleaning; Shut off the water supply to the unit.; Recommissioning
13 CARE AND MAINTENANCE CAUTION : Failure to unplug the ice maker could result in electrical shock or personal injury CLEANING AND MAINTENANCE Periodic cleaning and proper maintenance will ensure efficiency, top performance, and long life. The maintenance intervals listed are based on normal conditi...
Page 14 - Condenser cleaning; Unplug the ice maker or disconnect power.
14 CARE AND MAINTENANCE Condenser cleaning WARNING: DO not touch the condenser surface. The surface is sharp and can be easily damaged. A dirty or clogged condenser prevents proper airflow, reduces ice making capacity, and causes higher than recommended operating temperatures that may lead to compon...
Page 15 - TROUBLESHOOTING
15 Problem Possible Causes Solutions The machine won't operate. The icemaker is unplugged. The icemaker power switch is OFF. The ice storage bin is full of ice. Plug the ice maker in. Turn the ice maker power switch to ICE (ON) Take away some ice cubes; make the ice full probe is free ...
Page 16 - ONE YEAR LIMITED WARRANTY; THIS WARRANTY DOES NOT COVER:; care and special handling provisions in the instructions.; Warranty begins from the original date of purchase.; To obtain service or information, contact
16 ONE YEAR LIMITED WARRANTY This Whynter Ice Maker is warranted, to the original owner within the 48 continental states, for one year from the date of purchase against defects in material and workmanship under normal use and service. Should your Whynter Ice Maker prove defective within one year fro...