Page 2 - Table of Contents; PAGE
2 Table of Contents PAGE Technical Data / Safety Precautions 3 - 5 Parts 5 Features and Parts 6 Installation and Operation 7 - 10 Recipes 11 - 12 Troubleshooting and Tips 13 Warranty Information 14
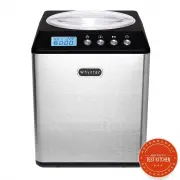
Page 3 - MODEL; Stainless steel housing
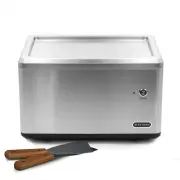
3 Table of Contents MODEL ICM-201SB Capacity 2.1 Quart / 2 Liter Power Supply 115 V / 60 Hz Maximum power consumption 180W Cooling Temperature - 0.4F to -31F Refrigerant R134a Noise Level < 58dB Net Weight 24.25 lbs Unit Dimensions 12.5” W x 10.75” D x 14.25” H Packaging Dimensions 14” W x 12.75”...
Page 4 - Safety Precautions; APPLIANCE SAFETY; Your safety and the safety of others are very important to us.; IMPORTANT SAFEGUIDES
4 Safety Precautions APPLIANCE SAFETY Your safety and the safety of others are very important to us. This is the Safety Alert Symbol. This symbol alerts you to potential hazards that may result in serious injury. All safety messages will follow the Safety Alert Symbol and either the words” DANGER” o...
Page 6 - Features and Parts; BEFORE USING YOUR APPLIANCE; PREPARE RECIPE INGREDIENTS
6 Features and Parts BEFORE USING YOUR APPLIANCE Remove the exterior and interior packing. Before connecting the appliance to the power source, let it stand upright for approximately 2 hours. This will reduce the possibility of a malfunction in the cooling system from handling during transportat...
Page 7 - Installation and Operation; IMPORTANT SAFETY INSTRUCTIONS; WARNING
7 Installation and Operation IMPORTANT SAFETY INSTRUCTIONS INSTALLATION OF YOUR APPLIANCE WARNING : Do n o t sto re o r i n stal l th e ap p l i an ce o u td oo rs. CAUTION : This appliance is designed for making ice cream desserts. Place your appliance on a hard and level surface that is stro...
Page 8 - INSTALLATION OF YOUR APPLIANCE; POWER Button; Ice Cream mode
8 Installation and Operation INSTALLATION OF YOUR APPLIANCE NOTE: Always place the Ice Cream Maker upright on a flat, level and solid surface. 1. Install the removable mixing bowl into the motor axis. Make sure the outside of the removable mixing bowl is completely dry before inserting it to the app...
Page 9 - START / PAUSE Button; TIMER Button; ICE CREAM MAKING; OPERATING INSTRUCTIONS; EXTENDED COOLING FUNCTION
9 Installation and Operation START / PAUSE Button After desired operating time is set, press the START/PAUSE button to initiate operation. The LCD will display the operation icon corresponding to the operation mode chosen . The unit can be paused by pressing the START/PAUSE again. At pause, press ...
Page 10 - PAUSE TIME AND MIXING
10 Installation and Operation NOTE: The mixing function is not activated during the Extended Cooling Function. If you would like to mix as well, press and hold the Menu button for 3 seconds to reset. You can also turn the unit off at any time during the Extended Cooling Function. PAUSE TIME AND MIXI...
Page 11 - Recipes
11 Recipes Ice cream mixtures can be as simple as pureed fruit, sugar and cream, Philadelphia -style, or based on more complicated cooked custards, French style. Both are delicious, though French versions are slightly richer. The recipes which follow are for both kinds. All use rich, heavy cream. If...
Page 13 - Troubleshooting and Tips; Problem; Some user tips for your ice cream maker:
13 Troubleshooting and Tips Problem Possible Causes Solutions Ice cream maker churning blade not working Mixture is too hard Power off the unit and wait for the mix-ture to be soften Ice cream maker does not freeze Room’s ambient temperature is too high Ice cream mixture temperature is too w...
Page 14 - ONE YEAR LIMITED WARRANTY; Warranty begins from the original date of purchase.; To obtain service or information, contact
14 ONE YEAR LIMITED WARRANTY This Whynter Ice Cream Maker is warranted, to the original owner within the 48 continental states, for one year from the date of purchase against defects in material and workmanship under normal use and service. When making a warranty claim, please have the original bill...