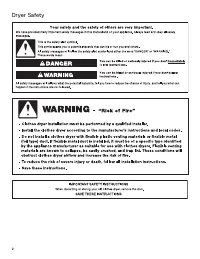
Page 2 - DRYER SAFETY; CAUTION –; RISK
2 DRYER SAFETY CAUTION – RISK OF FIRE / FLAMMABLE MATERIALS This is an additional safety alert symbol that alerts you to the risk of fire.
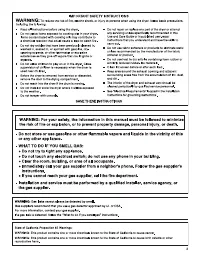
Page 3 - FOR YOUR SAFETY; IMPORTANT SAFETY INSTRUCTIONS
3 FOR YOUR SAFETY 1. DO NOT USE OR STORE PETROL OR OTHER FLAMMABLE MATERIALS IN THIS APPLIANCE OR NEAR THIS APPLIANCE. 2. DO NOT SPRAY AEROSOLS IN THE VICINITY OF THIS APPLIANCE WHILE IT IS IN OPERATION. 3. DO NOT MODIFY THIS APPLIANCE. n Remove all objects from pockets, such as lighters and matches...
Page 4 - SPECIFICATIONS
4 This appliance is marked according to the European directive 2012/19/EU on Waste Electrical and Electronic Equipment (WEEE). By ensuring this product is disposed of correctly, you will help avoid potential negative consequences for the environment and human health, which could otherwise be caused ...
Page 5 - Tools and Parts; INSTALLATION REQUIREMENTS
5 Tools and Parts Gather the required tools and parts before starting installation. Tools needed for all installations: Level Tape measure Pliers Parts package is located in dryer drum. Check that all parts are included. Parts needed: Check local codes. Check existing electrical supply and venting. ...
Page 6 - Location Requirements
6 Dryer Dimensions Location Requirements You will need: n A location allowing for proper exhaust installation. See “Venting Requirements.” n A separate 30-amp circuit for electric dryers. n A separate 15- or 20-amp circuit for gas dryers. n If you are using power supply cord, a earthed electrical ou...
Page 7 - Electrical Requirements
7 ELECTRIC DRYER POWER HOOKUP Electrical Requirements Installation spacing for recessed area or closet The dimensions shown are for the minimum spacing allowed. n Additional spacing should be considered for ease of installation and servicing. n Additional clearances might be required for wall, door,...
Page 8 - INSTALL LEVELING LEGS; Prepare dryer for leveling legs; GAS DRYER POWER HOOKUP; Gas Supply Requirements; Screw in leveling legs
8 INSTALL LEVELING LEGS 1. Prepare dryer for leveling legs To avoid damaging floor, use a large flat piece of cardboard from dryer carton; place under entire back edge of dryer. Firmly grasp dryer body (not console panel) and gently lay dryer down on cardboard. GAS DRYER POWER HOOKUP Gas Supply Requ...
Page 10 - ELECTRICAL REQUIREMENTS; EARTHING INSTRUCTIONS; Choose electrical connection type; Remove terminal block cover; ELECTRICAL CONNECTION
10 ELECTRICAL REQUIREMENTS EARTHING INSTRUCTIONS SAVE THESE INSTRUCTIONS Electrical Connection Options 1. Choose electrical connection type Direct wire connection: Go to steps 1–2 on page 11 for direct wire strain relief, then steps 3–7 in “Direct Wire Connection” section. Then go to “Venting Requir...
Page 11 - Install Strain Relief
11 Put power supply cord through the strain relief. Be sure that the wire insulation on the power supply cord is inside the strain relief. The strain relief should have a tight fit with the dryer cabinet and be in a horizontal position. Do not further tighten strain relief screws at this point. Go t...
Page 13 - VENTING; Venting Requirements; Connect ground wire
13 4" (102 mm) WARNING: To reduce the risk of fire, this dryer MUST BE EXHAUSTED OUTDOORS. IMPORTANT: Observe all governing codes and ordinances. Dryer exhaust must not be connected into any gas vent, chimney, wall, ceiling, attic, crawlspace, or a concealed space of a building. Only rigid or fl...
Page 14 - Plan Vent System
14 Exhaust hoods: n Must be at least 305 mm (12") from ground or any object that may obstruct exhaust (such as flowers, rocks, bushes, or snow). Elbows: n 45° elbows provide better airflow than 90° elbows. Clamps: n Use clamps to seal all joints. n Exhaust vent must not be connected or secured w...
Page 15 - Venting Kits; Vent System Chart
15 Alternate installations for close clearances Venting systems come in many varieties. Select the type best for your installation. Two close-clearance installations are shown. Refer to the manufacturer’s instructions. Over-The-Top installation (also available with one offset elbow) Periscope instal...
Page 16 - Install Vent System; Install exhaust hood; MAKE GAS CONNECTION
16 Install Vent System 12" min. (305 mm) 12" min. (305 mm) 1. Install exhaust hood Install exhaust hood and use caulking compound to seal exterior wall opening around exhaust hood. A B C D 2. Plan pipe fitting connection A combination of pipe fittings must be used to connect dryer to existin...
Page 17 - CONNECT VENT; Connect vent to exhaust outlet; LEVEL DRYER; Level dryer; Tighten and adjust leveling legs
17 CONNECT VENT 1. Connect vent to exhaust outlet 2. Move dryer to final location Using a 102 mm (4") clamp, connect vent to exhaust outlet in dryer. If connecting to existing vent, make sure vent is clean. Dryer vent must fit over dryer exhaust outlet and inside exhaust hood. Check that vent is...
Page 18 - Select plug; POWER CORD INSTALLATION; Assemble plug
18 COMPLETE INSTALLATION CHECKLIST q Check that all parts are now installed. If there is an extra part, go back through steps to see what was skipped. q Check that you have all of your tools. q Dispose of/recycle all packaging materials. q Check dryer’s final location. Be sure vent is not crushed or...
Page 19 - REVERSE DOOR SWING; Place towel on dryer
19 REVERSE DOOR SWING (OPTIONAL) NOTE: Magnetized screwdriver is helpful. Place towel on top of dryer to avoid damaging the surface. 1. Place towel on dryer 2. Remove bottom screws Open dryer door. Remove bottom screws from dryer cabinet side of hinges. Loosen (do not remove) top screws from dryer c...
Page 20 - Rotate outer door
20 Remove the door catch, bezel, and plug from the inside of the inner door by squeezing and pulling/pushing them. Place the door catch, bezel, and plug on the sides opposite from where they were. Plug Catch and bezel 6. Switch door catch, bezel, and plug 7. Rotate outer door Rotate outer door 180º ...
Page 21 - TROUBLESHOOTING
21 Close door and check that door strike aligns with door catch. If it is needed, slide door catch left or right within slot to adjust alignment. 13. Check door strike alignment 12. Insert screws in hinge holes on dryer cabinet NOTE: Two people may be needed to reinstall door. Insert screws into the...