Westinghouse WSU6603XR - Manuals
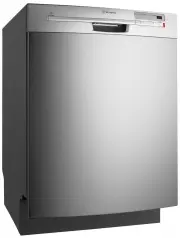
User Manual Westinghouse WSU6603XR


Summary
Electrolux. Thinking of you. Westinghouse. We are part of the Electrolux family. Share more of our thinking at www.electrolux.com CONTENTS Safety information 2 Product description 4 Control panel 5 Use of the appliance 6 Use of detergent and rinse aid 6 Loading cutlery and dishes 7 Setting and start...
• Keep all detergents in a safe area. Do not let children touch the detergents. • Keep children and pets away from the appliance when the door is open. Installation • Make sure that the appliance is not dam- aged because of transport. Do not con-nect a damaged appliance. If necessary,contact the sup...
PRODUCT DESCRIPTION 7 1 Upper basket 2 Air vent 3 Salt container (the container is onlyfunctional for dishwashers with a watersoftener) 4 Detergent dispenser 5 Rinse aid dispenser 6 Rating plate 7 Filters 8 Lower spray arm 9 Upper spray arm Internal light This appliance has an internal light thatcom...
Westinghouse Dishwashers Manuals
-
 Westinghouse WSF6602WA
User Manual
Westinghouse WSF6602WA
User Manual
-
 Westinghouse WSF6602XA
User Manual
Westinghouse WSF6602XA
User Manual
-
 Westinghouse WSF6604WA
User Manual
Westinghouse WSF6604WA
User Manual
-
 Westinghouse WSF6604XA
User Manual
Westinghouse WSF6604XA
User Manual
-
 Westinghouse WSF6606KXA
User Manual
Westinghouse WSF6606KXA
User Manual
-
 Westinghouse WSF6606W
User Manual
Westinghouse WSF6606W
User Manual
-
 Westinghouse WSF6606X
User Manual
Westinghouse WSF6606X
User Manual
-
 Westinghouse WSF6606XA
User Manual
Westinghouse WSF6606XA
User Manual
-
 Westinghouse WSF6608KXA
User Manual
Westinghouse WSF6608KXA
User Manual
-
 Westinghouse WSF6608W
User Manual
Westinghouse WSF6608W
User Manual
-
 Westinghouse WSF6608X
User Manual
Westinghouse WSF6608X
User Manual
-
 Westinghouse WSF6608XA
User Manual
Westinghouse WSF6608XA
User Manual
-
 Westinghouse WSF67381S
User Manual
Westinghouse WSF67381S
User Manual