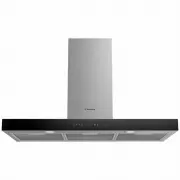
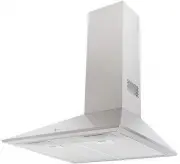
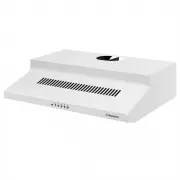
Westinghouse WRCG914BC - Manuals
User Manual Westinghouse WRCG914BC


Summary
2 CONTENTS CONTENTS Important safety instructions ........................................................3Product description ...........................................................................5Rangehood dimensions ................................................................. 6Installat...
3 SAFETY SAFETY This manual explains the proper use of your new Westinghouse canopy rangehood. Please read this manual carefully before using the product. This manual should be kept in a safe place for handy reference. This canopy rangehood is a domestic appliance which has been manufactured and tes...
4 SAFETY IMPORTANT SAFETY INSTRUCTIONS (CONTINUED) Electrical connection Check that the mains voltage matches with the voltage on the data plate inside the canopy rangehood. Check that the installation complies with standards of local building, gas and electrical authorities. Before connecting to th...
Westinghouse Range Hoods Manuals
-
 Westinghouse EFG540G-A
User Manual
Westinghouse EFG540G-A
User Manual
-
 Westinghouse EFG750X-A
User Manual
Westinghouse EFG750X-A
User Manual
-
 Westinghouse WRC613SB
User Manual
Westinghouse WRC613SB
User Manual
-
 Westinghouse WRC614SC
User Manual
Westinghouse WRC614SC
User Manual
-
 Westinghouse WRC904SC
User Manual
Westinghouse WRC904SC
User Manual
-
 Westinghouse WRC913SB
User Manual
Westinghouse WRC913SB
User Manual
-
 Westinghouse WRC914SC
User Manual
Westinghouse WRC914SC
User Manual
-
 Westinghouse WRC924SC
User Manual
Westinghouse WRC924SC
User Manual
-
 Westinghouse WRCG930SB
User Manual
Westinghouse WRCG930SB
User Manual
-
 Westinghouse WRCG933SB
User Manual
Westinghouse WRCG933SB
User Manual
-
 Westinghouse WRCG943SB
User Manual
Westinghouse WRCG943SB
User Manual
-
 Westinghouse WRF600CS
User Manual
Westinghouse WRF600CS
User Manual
-
 Westinghouse WRF610SA
User Manual
Westinghouse WRF610SA
User Manual
-
 Westinghouse WRF610WA
User Manual
Westinghouse WRF610WA
User Manual
-
 Westinghouse WRF613SA
User Manual
Westinghouse WRF613SA
User Manual
-
 Westinghouse WRF613WA
User Manual
Westinghouse WRF613WA
User Manual
-
 Westinghouse WRF910SA
User Manual
Westinghouse WRF910SA
User Manual
-
 Westinghouse WRF910WA
User Manual
Westinghouse WRF910WA
User Manual
-
 Westinghouse WRF913SA
User Manual
Westinghouse WRF913SA
User Manual
-
 Westinghouse WRF913WA
User Manual
Westinghouse WRF913WA
User Manual