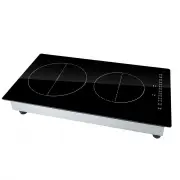
Page 2 - Specification of
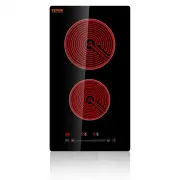
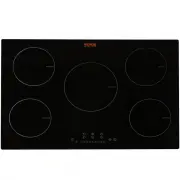
1 MODEL: LT4-77 Have product questions? Need technical support? Please feel free tocontact us: [email protected] NEED HELP? CONTACT US! This is the original instruction, please read all manual instructions carefully before operating. VEVOR reserves a clear interpretation of our user manual. The appe...
Page 3 - CONTENTS; MODEL AND PARAMETERS; Notice; WARNING; Model
2 CONTENTS · Model and parameters ……………………………….…..……..……........2 ·Important safety instructions……………………………….…..……..……3·Installation ….........................................................................................4·Connection to power supply………………………………..…….….…….6·Diagram of the radiant ho...
Page 4 - IMPORTANT SAFETY INSTRUCTIONS
3 with official regulations. IMPORTANT SAFETY INSTRUCTIONS Read all instructions carefully before using this cooktop.Using kitchen appliances, basic safety precautions must be followed,including the following:•This appliance must be properly installed and grounded by a qualifiedtechnician. Only conn...
Page 5 - SAVE THESE INSTRUCTIONS; INSTALLATION
4 ceramic, earthenware, or other glazed pots and pans are suitable forrange-top service due to the sudden change in temperature, which mayresult in breakage.•Do not soak removable heating elements. Heating elements should neverbe immersed in water.•Do not cook on a broken cooktop. Contact a qualifie...
Page 7 - Instructions for Use; Operating the device
6 Connection to power supply: If the cable is damaged or needs or needs replacing this should be done byan after sales technician using the proper tools so as to avoid anyaccidents.The installer must ensure that the correct electrical connection has beenmade and that it complies with safety regulati...
Page 8 - Power
7 Place suitable cookware onto the cooker plate,The operation of all zones isthe same. Caution! Make no hot pots or pans on the keypad! Stand-By-Modus Press the On / Off button. You will hear a beep and see flashing lines onthe display. If you have not selected a program within about 2 minutes, the ...
Page 9 - Timer cancellation
8 After you have selected the cooking zone, please press the timer key . Timer confirmation: The default ones place time LED is flashing. With sliding the to set time of the ones place. Press the again, the tens place time LED is flashing. With sliding the to set time of the tens place. ( Timer max....
Page 10 - SAFETY; Safety systems; USE OF CONTAINERS; ENAMEL; CERAMIC
9 Pause Touch this button, the hob will stop working, touch again, t will be back toprevious status SAFETY Safety systems In order to protect the electronics from overheating if the control unitdetects excessive heat it will switch off the hotplate closest to the sensorsand the letter H will appear ...
Page 11 - COPPER
10 COPPER Aluminum pans are notrecommended asthey may stain the surface,unless they have stainlesssteel encapsulated bottoms. Hotplates should not be switchedon without a pan on top. The baseof the pan should be flat and dry.Pans that have been used on gascookers are not normally completelyflat and ...
Page 12 - CLEANING
11 melt and fuse permanently with the radiant glasssurface. CLEANING IMPORTANT: If the radiant glass surface breaks or you notice cracks in it,disconnect the equipment. Call your Repair Service Technician. Clean the radiant glass surface frequently,when it is cool. Never use abrasiveproducts or pads...