VEVOR LXGSZZJWS800WAFTPV1 - Manuals

User Manual VEVOR LXGSZZJWS800WAFTPV1


Summary
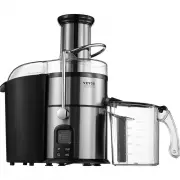
- 1 - MODEL:JE-70D Have product questions? Need technical support? Please feel free tocontact us: Technical Support and E-Warranty Certificate www.vevor.com/support NEED HELP? CONTACT US! This is the original instruction, please read all manual instructions carefully before operating. VEVOR reserves...
- 2 - IMPORTANT ASSURANCE WARNING: Before operating this device, please read this instruction manual completely and keep it handy for future reference. Always follow basic safety precautions when using these devices. These include: This appliance may not be used by children. Store the appliance and ...
- 4 - Before starting the juicer, ensure the accessories, e.g., filter and lid, are correctly installed.In operation, putting your hands or sharp objects into the feed port and any objects instead of the push rod is forbidden. In case of any accidents, please keep your eyes away from the feed port.T...
VEVOR Juicers Manuals
-
 VEVOR CZJBBXGCLS0000001V1
User Manual
VEVOR CZJBBXGCLS0000001V1
User Manual
-
 VEVOR CZJQBXGCLS0000001V1
User Manual
VEVOR CZJQBXGCLS0000001V1
User Manual
-
 VEVOR CZJQZDK0000000001V1
User Manual
VEVOR CZJQZDK0000000001V1
User Manual
-
 VEVOR DDNCJ100WWBX82BLJV1
User Manual
VEVOR DDNCJ100WWBX82BLJV1
User Manual
-
 VEVOR DDNCJ150WYABR3WS9V1
User Manual
VEVOR DDNCJ150WYABR3WS9V1
User Manual
-
 VEVOR GZZZJDD3GTM750W01V1
User Manual
VEVOR GZZZJDD3GTM750W01V1
User Manual
-
 VEVOR KKX200W800MLV2TOZV1
User Manual
VEVOR KKX200W800MLV2TOZV1
User Manual
-
 VEVOR LXGSZZJS1000W23DSV1
User Manual
VEVOR LXGSZZJS1000W23DSV1
User Manual
-
 VEVOR LXGSZZJSS350WIG5SV1
User Manual
VEVOR LXGSZZJSS350WIG5SV1
User Manual
-
 VEVOR MINIZKX100W4EGLO1V1
User Manual
VEVOR MINIZKX100W4EGLO1V1
User Manual
-
 VEVOR WF-A3000ZXBXGZZJ1V1
User Manual
VEVOR WF-A3000ZXBXGZZJ1V1
User Manual
-
 VEVOR WSYZJ150WDK6QCUVEV1
User Manual
VEVOR WSYZJ150WDK6QCUVEV1
User Manual
-
 VEVOR WSYZJ200WSK6L334XV1
User Manual
VEVOR WSYZJ200WSK6L334XV1
User Manual
-
 VEVOR YZJBXGSLTKMCA3ADMV1
User Manual
VEVOR YZJBXGSLTKMCA3ADMV1
User Manual
-
 VEVOR ZZJBD800W4IN1SD4DV1
User Manual
VEVOR ZZJBD800W4IN1SD4DV1
User Manual