Page 2 - – Describes how the appliance reacts to the steps taken.; Validity; Variations depending on the model are noted in the text.
2 Thank you for choosing to buy one of our products. Your appliance is made to high standards and is easy to use. Nevertheless, please take the time to read these operating instructions in order to familiarize yourself with the appliance and get the best use out of it. Please follow the safety preca...
Page 3 - Contents
3 Contents 1 Safety precautions 5 1.1 Transport . . . . . . . . . . . . . . . . . . . . . . . . . . . . . . . . . . . . . . . . . . . . . . . . . 5 1.2 Before using for the first time . . . . . . . . . . . . . . . . . . . . . . . . . . . . . . . . . . 6 1.3 Correct use . . . . . . . . . . . . . . . ...
Page 5 - Safety precautions; In accordance with the requirements of IEC 60335-1:; Transport; upside down; Front
5 1 Safety precautions In accordance with the requirements of IEC 60335-1: • This appliance is not intended for use by persons (including children) with reduced physical, sensory or mental capabilities, or lack of experience and knowledge, unless supervised or unless they have been given instruction...
Page 7 - Safety precautions; Do not use the appliance to dry the following; • Textiles that have been cleaned, treated or soaked with flammable
1 Safety precautions 7 Do not use the appliance to dry the following • Unwashed washing. • Textiles that have been cleaned, treated or soaked with flammable chemicals, detergents or solvents (benzine, alcohol, stain remover, oil, paint, wax, etc). Fire or explosion hazard! Wash materials containing ...
Page 9 - Children in the home; • Use the childproof locking facility.
1 Safety precautions 9 1.4 Children in the home • Packaging material (e.g. plastic, polystyrene) can be dangerous for children. Danger of suffocation! Keep packaging material away from children. • The appliance is designed for use by adults who are familiar with these operating instructions. Childre...
Page 10 - Note on use
1 Safety precautions 10 1.5 Note on use • Do not use the appliance if visibly damaged or if the inlet pipes are damaged. Contact Customer Services. • If the appliance is not operating properly, disconnect it from the electricity supply immediately. • If the mains cable of the appliance is damaged, i...
Page 11 - Maintenance; • The door filter must be cleaned each time after a drying programme.
1 Safety precautions 11 1.6 Maintenance • Disconnect the appliance from the mains before carrying out maintenance work. • The door filter must be cleaned each time after a drying programme. • Do not spray the outside or the inside of the appliance with water. Do not use a steam cleaner. • Do not sit...
Page 12 - Your appliance; Appliance description
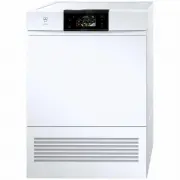
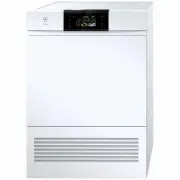
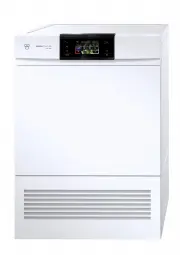
12 2 Your appliance 2.1 Appliance description The appliance operates with a closed air circuit. With the help of the heat pump, the moisture is extracted from the air which is then heated up again. Recovering heat in this way sharply reduces energy consumption. The appliance has no electric heating ...
Page 13 - Construction; Cassette in base
2 Your appliance 13 2.2 Construction 1 Operating and display elements (pivoting operating panel) 2 Appliance door 3 Door filter 4 Cover 5 Cassette in base 6 Air grille 7 Identification plate/ serial number (FN) 8 Cleaning instructions Cassette in base 9 Mesh filter in base 10 Filter mat The applianc...
Page 14 - Operating and display elements; Automatic programmes
2 Your appliance 14 2.3 Operating and display elements Automatic programmes Additional programme Additional functions Extra dry Normal dry Iron dry Damp Woollens Step button Fabric type Timed drying Easy care Delayed start End of programme MIN.
Page 16 - Using for the first time; Start function test
2 Your appliance 16 2.4 Using for the first time When the appliance is connected to the power supply for the first time, it is possible to select a function test. The purpose of the function test is to check the installation and it lasts about 3 minutes. For the function test the appliance must not ...
Page 17 - Programme overview; Programme sequence for automatic programmes; The drying programme has 3 phases:; Drying
17 3 Programme overview 3.1 Programme sequence for automatic programmes The drying programme has 3 phases: Drying The washing is tumble dried until it reaches the set level of dryness. The drying programme is monitored by a moisture sensor. As soon as the required level of dryness is reached, the «C...
Page 18 - Programme overview
3 Programme overview 18 3.2 Automatic programmes To select the right drying programme, follow the fabric care symbols on garment labels, e.g. . Programme Symbol Use Extra dry For thick, multi-layered fabrics and mixed loads.Not suitable for knitted or woven articles such as T-shirts and underwear as...
Page 20 - Fabric type
3 Programme overview 20 3.3 Fabric type Display Use P1 Airing For refreshing or airing little-worn garments. P2 Silk For drying silk fabrics. Follow the fabric care labels as silk tends to crease easily. Low temperature for gentle drying. P3 Shirts Fabrics are gently dried to «cupboard dry». P4 Leis...
Page 22 - Additional functions; Use
3 Programme overview 22 3.4 Additional functions Function/symbol Use Max. load Easy care Gentle drying for mixed fabrics (e. g. shirts, pullovers, T-shirts). The level of dryness is reduced. 2,5 kg Delayed start Take advantage of cheap-rate electricity (setting range: 1–24 hours).During shut-off per...
Page 23 - User settings; Changing user settings
23 4 User settings Providing no programme is running and no error message is displayed, the user settings can be changed with the appliance door open or closed. The procedure is generally the same for all settings. Changing user settings ➤ Hold the button depressed for 5 seconds. – The display shows...
Page 24 - User settings
4 User settings 24 The following diagram gives an overview of the possible user settings. no change restore * Factory setting Childproof lock Level of dryness Factory settings ➤ Hold button depressed for 5 seconds very strong drying strong drying low drying normal drying * very low drying OFF * ON
Page 25 - Level of dryness; Changing the level of dryness
4 User settings 25 4.1 Level of dryness The appliance is designed to provide the most energy-efficient drying. The moisture sensor continually monitors the level of dryness of the washing. If the washing is not being dried sufficiently – or being overdried – the level of dryness can be reset. Changi...
Page 26 - Childproof lock; Switching the childproof lock on/off; Restoring factory settings
4 User settings 26 4.2 Childproof lock The childproof lock is to prevent small children accidentally starting or stopping a programme. When the childproof lock is on, a programme can only be started by pressing two buttons simultaneously. Switching the childproof lock on/off ➤ Hold the button depres...
Page 27 - Preparing the appliance
27 5 Drying Preparing the appliance ➤ Plug the appliance in at the mains or turn the wall switch on. Loading the appliance ➤ Open the appliance door (press the middle of the lock side of the door at the edge). ➤ Loosely load wet washing items one by one. • See P ROGRAMME OVERVIEW for maximum drying ...
Page 28 - Programme selection; Duration remaining indicator
5 Drying 28 5.1 Programme selection An automatic programme is selected by pressing step button . All the necessary settings for the programme are made automatically.Additional functions can be selected or deselected by pressing the corre-sponding button.If no buttons are pressed within 20 seconds, t...
Page 29 - Selecting an automatic programme
5 Drying 29 Selecting an automatic programme ➤ Close the appliance door. – Indicator lights for buttons , and flash. ➤ Press button until the indicator light for the desired programme lights, or ➤ press button until the fabric type programme e.g. shows for approx. 3 seconds in the display. – The max...
Page 31 - Selecting delayed start
5 Drying 31 Selecting delayed start ➤ Hold button pressed immediately after the programme selection, or keep pressing it until the desired delayed start duration shows in the display (max. 24 hours). – The display goes dark. – After the desired delayed start period is up, the programme selected star...
Page 32 - Changing selection; During programme selection; Interrupting a programme
5 Drying 32 5.2 Changing selection During programme selection ➤ Press button . – The next programme is selected. – All selected settings are cancelled. 5.3 Interrupting a programme A running programme can be interrupted at any time to add/remove an item of washing before time. ➤ Open the appliance d...
Page 33 - Programme interruption through door opening
5 Drying 33 5.4 Aborting a programme ➤ Press the button. – The programme is aborted and all settings cancelled. 5.5 Programme selection with childproof lock activated How to turn the childproof lock on/off is described in U SER SETTINGS . ➤ Close the appliance door. – The display shows: . – Indicato...
Page 35 - End of programme; Unloading the washing
5 Drying 35 5.6 End of programme – The display shows: – The indicator light for the programme that has finished illuminates. – The indicator light for the button flashes. «Crease guard» starts if the appliance is not unloaded straightaway. When it has finished, the indicator lights and plain text di...
Page 36 - Care and maintenance; Cleaning intervals; To minimize the risk of fire hazard regularly clean the filters!; Cleaning intervals Cleaning
36 6 Care and maintenance 6.1 Cleaning intervals To minimize the risk of fire hazard regularly clean the filters! Pos. Part Cleaning intervals Cleaning 1 Door filter each time after a drying programme remove any fluff whenever there is a heavier build-up of deposits using an abrasive liquid cleaning...
Page 37 - Error message A9
6 Care and maintenance 37 6.2 Error message A9 Check and, if necessary, clean the following parts in the appliance: • Door filter • Base cassette • Mesh filter in base • Filter mat in base mesh filter 6.3 Build-up of fluff Fluff is made up of fine textile fibres that largely come from the manufactur...
Page 38 - Cleaning the door filter
6 Care and maintenance 38 ➤ Open the appliance door. ➤ Lift the door filter 1 out. ➤ Remove any fluff. ➤ Hold door mesh filter up to the light to detect deposits. Wash door mesh filter to clean off heavy deposits. ➤ Clean with an abrasive liquid cleaning agent (immerse if necessary) and a sponge; us...
Page 39 - Clean the base cassette; Cleaning the mesh filter in base
6 Care and maintenance 39 ➤ Open the appliance door. ➤ Open the cover 1 by pressing the release catch 2 . ➤ Remove the cassette in base 3 . ➤ Remove fluff from the base mesh filter in the base cassette. ➤ Replace the cassette in base and close the cover. ➤ Open the appliance door. ➤ Open the cover 1...
Page 40 - Cleaning the filter mat; Clean filter mat in base mesh filter; Never operate the appliance without the filter mat.
6 Care and maintenance 40 6.7 Cleaning the filter mat ➤ Open the appliance door. ➤ Open the cover 1 by pressing the release catch 2 . ➤ Remove the cassette in base 3 . ➤ Remove the mesh filter in base 4 from the cassette in base. ➤ Remove the filter mat 5 from the mesh filter in base. ➤ Rinse the fi...
Page 41 - Cleaning the moisture sensor; Cleaning the filter mat in front of the heat pump; Never remove the filter mat.
6 Care and maintenance 41 ➤ Open the appliance door and the cleaning cover. ➤ Remove the cassette in base. ➤ Clean the filter mat carefully using a vacuum cleaner with the crevice tool attachment. ➤ Replace the cassette in base and close the cleaning cover. 6.8 Cleaning the moisture sensor The moist...
Page 42 - What to do if ...; flashes; Possible cause
42 7 Trouble-shooting This section lists problems which you can resolve simply yourself by following the instructions given. If any other error messages appear or if you are unable to resolve the problem, call Customer Services. 7.1 What to do if … … flashes Before contacting Service please make a n...
Page 47 - ... the washing is not dry enough
7 Trouble-shooting 47 … the washing is not dry enough … the programme takes significantly longer than indicated in the display Possible cause Solution • The load contains different types of fabric. ➤ Select a longer programme. ➤ Select the programme. ➤ Change the level of dryness. • An interruption ...
Page 48 - ... the washing is charged with static electricity
7 Trouble-shooting 48 … the washing is charged with static electricity … the duration remaining indicator remains frozen for a longer period Possible cause Solution • Wash items that are made of man-made fibres. Static charge is a normal characteristic of man-made fibres and nothing to do with the a...
Page 49 - Drying tips; Fabric care symbols; General tips
49 8 Drying tips 8.1 Fabric care symbols To select the right drying programme, follow the fabric care symbols on garment labels. General tips • For the wash you are recommended not to use fabric conditioners or other fabric care solutions, otherwise comply with the manufacturer’s instruc-tions. Tumb...
Page 50 - Energy saving tips
8 Drying tips 50 • Woollen and silk fabrics often carry the «Do not tumble dry» label. ➤ For woollen and silk fabrics, follow the fabric care symbols on garment labels. ➤ Press the button and select the relevant programme. • For easy-care fabrics (e.g. shirts and cotton mixed fabrics), additionally ...
Page 51 - Spare parts; Door filter
51 9 Spare parts Please give model number and exact description when ordering parts. Door filter Mesh filter in base Filter mat in base mesh filter (2 items) Cassette in base for mesh filter in base and filter mat
Page 52 - Technical data; Dimensions; See identification plate
52 10 Technical data Dimensions Ambient conditions Electrical connection ➤ See identification plate Height: 85 cm Width: 60 cm Depth: 60 cm Weight: 65 kg Dry load capacity: 6 kg Permissible room temperatures when appliance in operation 5 °C to 35 °C
Page 53 - 0 Technical data; Notes for testing institutes; Set to standard programme according to AS/NZS 2442:
10 Technical data 53 10.1 Notes for testing institutes ➤ The correct determination of the declaration data is given with wash item after an intake phase of 5 complete drying programmes (Automatic programme: Normal dry ). ➤ Wash the base mesh filter in the base cassette after every drying programme. ...
Page 54 - Disposal; Packaging
54 11 Disposal Packaging • All packaging materials (cardboard, plastic film (PE) and polystyrene (EPS)) are marked and should, if possible, be collected for recycling and disposed of in an environmentally friendly way. Disconnection • Disconnect the appliance from the mains. With a fixed appliance, ...
Page 55 - Notes
Page 57 - Index
57 13 Index A Additional functions . . . . . . . . . 14, 22Additional programme . . . . . . . . . . 14Airing . . . . . . . . . . . . . . . . . . . . 17, 20Ambient conditions . . . . . . . . . . . . 52Appliance Construction . . . . . . . . . . . . . . . . 13Description . . . . . . . . . . . . . . . ....
Page 59 - Repair service
59 14 Repair service Whether you contact us about a malfunction or an order, please always state the serial number (FN) and the model type of your appliance. Enter these details below and also on the service sticker which comes with the appliance. Stick it in a conspicuous place or in your telephone...
Page 60 - Quick instructions
Quick instructions Please first read the safety precautions in the operating instructions! ➤ Open the appliance door ➤ Check the door filter ➤ Load the washing ➤ Close the appliance door ➤ Select programme ➤ Select any additional functions, if required ➤ The appliance starts automatically after 20 s...