Page 2 - Model
Thank you for choosing to buy one of our products. Your appliance is made tohigh standards and is easy to use. Nevertheless, please take the time to readthese operating instructions in order to familiarise yourself with the applianceand get the best use out of it. Please follow the safety precaution...
Page 3 - Contents
Contents 1 Safety precautions 5 1.1 Symbols used ........................................................................................................ 5 1.2 General safety precautions ................................................................................. 6 1.3 Appliance-specific saf...
Page 5 - Safety precautions; Symbols used; Information and precautions that should be observed.
1 Safety precautions 1.1 Symbols used Caution, risk of fire! Denotes important safety precautions.Failure to observe said precautions can result in injury or in damageto the appliance or fittings! Information and precautions that should be observed. Information on disposal Information about the oper...
Page 6 - Safety precautions; General safety precautions
1 Safety precautions 1.2 General safety precautions ▪ Read the operating instructions before using the appliance forthe first time! ▪ This appliance can be used by children aged 8 and aboveand by persons with reduced physical, sensory or mental cap-abilities, or lack of experience and/or knowledge, ...
Page 7 - Appliance-specific safety precautions
1 Safety precautions 1.3 Appliance-specific safety precautions ▪ Children under 3 years of age must be kept away from theappliance unless they are constantly supervised. ▪ The appliance has a maximum dry load capacity of 5 kg. ▪ The appliance is only to be used with the recommended va-porizing mediu...
Page 9 - Instructions for use; Before using for the first time; Use original spare parts only.; Note on use
1 Safety precautions 1.4 Instructions for use Before using for the first time ▪ The appliance must be installed and connected to the electricity supply inaccordance with the separate installation instructions. Have a qualified fitter/electrician carry out the necessary work. ▪ Ensure access to the p...
Page 10 - How to avoid damaging the appliance; Close the appliance door carefully.; Front
1 Safety precautions ▪ Packaging material, e.g. plastic film and polystyrene, can be dangerous forchildren. Danger of suffocation! Keep packaging material away from chil-dren. How to avoid damaging the appliance ▪ Close the appliance door carefully. ▪ When cleaning the appliance make sure no water g...
Page 11 - Disposal; Packaging; For more information, please contact the local authorities.; Note on heat pump; Heat pump
2 Disposal 2.1 Packaging Never allow children to play with packaging material due to the dangerof injury or suffocation. Store the packaging material in a safe locationor dispose of it in an environmentally-friendly way. 2.2 Safety Render the appliance unusable to prevent accidents caused by imprope...
Page 12 - Using for the first time; Where is the identification plate?; ▸ Open the appliance door.
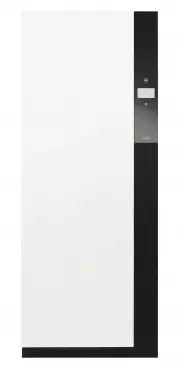
3 Using for the first time The appliance can only be operated after standing in the normal oper-ating position for around 2 hours. 3.1 Where is the identification plate? ▸ Open the appliance door. – The identification plate islocated on the inside of theappliance door at the top(see arrow). Note dow...
Page 13 - Your appliance; Appliance description
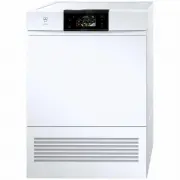
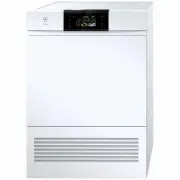
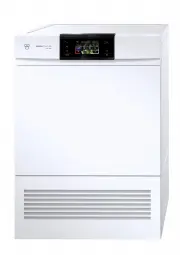
4 Your appliance 4.1 Appliance description The REFRESH-BUTLER uses steam and heat to refresh your clothes and re-duce odours and creases. Additionally, the extra programme hygiene leavesyour washing germ free. The extra programme drying allows clothes that arewet from the rain to be dried particular...
Page 14 - Clothes hangers
4 Your appliance 4.2 Appliance construction 1 Clothes rail 1 2 3 45 6 7 8 9 10 2 TouchDisplay, On/Off button 3 Fold-down clothes rails 4 Basket 5 Main filter with filter mat belowfloor grille 6 Water tank cover 7 Fresh air grille with filter mat 8 Fresh water tank 9 Condensate tank 10 Appliance door...
Page 15 - Your appliance; Operating and display elements; TouchDisplay; Refreshing
4 Your appliance 4.4 Operating and display elements TouchDisplay On/Off button TouchDisplay All available functions are displayed in the TouchDisplay and the desired func-tion can be selected by pressing the corresponding symbol or text. Programme Programme selection Refresh Ex tra programmes Refres...
Page 18 - Programme overview; Main refreshing programme; Select the
5 Programme overview 5.1 Main refreshing programme With the main refresh programme your dry washing is freed of odours usingsteam and heat and creasing is reduced.The main refresh programme has 3 phases: Refresh The heater increases the circulating air temperature and the washing isdampened using st...
Page 19 - Programme overview
5 Programme overview The following diagram gives an overview of the programme settings in themain refresh programme. Strong Medium Faint * Load Easy care Odour Timed refreshing Crease guard Delayed start * Factory setting Yes No * Full Half-full Small * 30 40 50 60 90 120 Off * Yes No * 19
Page 21 - Extra programme «Drying»
5 Programme overview 5.2 Extra programme «Drying» In the extra programme «Drying», warm air flows through your hung-up wash-ing for particularly gentle drying. The REFRESH-BUTLER dries clothes irre-spective of whether you washed them in the washing machine or by hand orwhether you were caught out in...
Page 22 - Extra programme «Hygiene»; Hygiene
5 Programme overview Load ▪ Full For a maximum 5 kg dry load spread out on the upper andlower clothes rails. ▪ Half-full For a normal load spread out on the upper and/or lowerclothes rail. ▪ Small For a small load, e.g. 4 shirts. Easy care ▪ Very gentle programme with reduced temperature. ▪ Particul...
Page 23 - Easy care
5 Programme overview Drying The washing is dried by the heat pump. The drying programme is monitoredby a moisture and temperature sensor. As soon as the required level of dry-ness is reached, the «Cool down / Airing» phase starts. Cool down / Airing When the «Drying» phase finishes, the washing is c...
Page 24 - Operating the appliance; Preparing the appliance; ▸ Insert plug into mains socket or turn; Arranging the washing; ing examples». The washing should not touch the appliance.
6 Operating the appliance 6.1 Preparing the appliance ▸ Insert plug into mains socket or turn on at wall switch. 1 0 1 0 6.2 Arranging the washing ▸ Open the appliance door.▸ Spread the washing out on the clothes rails and in the basket. See «Load- ing examples». The washing should not touch the app...
Page 25 - Operating the appliance; Loading examples
Page 26 - Refreshing and drying tips; Loading tips
6 Operating the appliance 6.4 Refreshing and drying tips Loading tips ▪ Place woollens and other knitted items in the basket or on the rails at mid-height. ▪ Larger items of clothing can be hung diagonally in the appliance. ▪ Shoes trees can accelerate the drying process for shoes. After drying, all...
Page 28 - Programme settings; Main programme
6 Operating the appliance 6.7 Programme settings Main programme Extra programmes Finishes in 1 h 3 0 Refreshing Drying Finishes in 1 h 3 0 Odour Level of dryness Load Load Easy care Easy care Timed refreshing Timed drying Crease guard Delayed start Delayed start Hygiene Finishes in 1 h 3 0 Easy care...
Page 29 - ▸ To switch the appliance on: press the
6 Operating the appliance 6.8 Programme selection ▸ To switch the appliance on: press the button below the TouchDisplay. – The programme selectionappears in the display: Programme selection Refresh Ex tra programmes ▸ Press the desired programme, e.g. refresh. – An overview of the pro-gramme setting...
Page 31 - Changing selection; During programme selection; Programme selection with childproof lock activated
6 Operating the appliance 6.9 Changing selection During programme selection ▸ Press the desired programme setting.▸ Press the setting value. – The overview of the programme settings appears in the display again. Once a programme has started it is no longer possible to change it.The programme must be...
Page 32 - Interrupting a programme
6 Operating the appliance 6.11 Interrupting a programme Hot steam may escape when the appliance door is opened: scaldinghazard! When the appliance door is opened, condensed drops of water canland on the floor. The inside of the appliance may be hot. Unload the washing care-fully. If the programme wa...
Page 33 - Aborting a programme before time; ▸ Press the button.; Abort
6 Operating the appliance 6.12 Aborting a programme before time Hot steam may escape when the appliance door is opened: scaldinghazard! When the appliance door is opened, condensed drops of water canland on the floor. The inside of the appliance may be hot. Unload the washing care-fully. ▸ Press the...
Page 34 - End of programme; End
6 Operating the appliance 6.13 End of programme – In the display appears: Refreshing End Door can be opened ▸ Open the appliance door. Depending on the textile type, the washing may still be damp at theend of the programme. In such cases, the washing can be dried offon the «Timed drying» programme s...
Page 35 - User settings; Adjusting user settings; Changing user settings; ▸ Press the
7 User settings 7.1 Adjusting user settings Providing no programme is running and no error message is displayed, theuser settings can be changed. The procedure is generally the same for all set-tings. Changing user settings ▸ To switch the appliance on: press the button below the TouchDisplay. – The...
Page 36 - Exiting user settings
7 User settings ▸ Press the desired setting value to change the setting. – The selected button has a blue background. ▸ Press the button to confirm the setting. – The overview of the user set-tings appears in the displayagain. – The changes have beensaved. Settings Exiting user settings To exit user...
Page 37 - User settings; Language
7 User settings The following diagram gives an overview of the possible user settings. Language Brightness Update software * Factory setting Select desired language 1 2 3 * 4 Button tone On * Off Water hardness Hard * Medium Soft Information Descale Clean air duct V-ZUG Service Childproof lock On Of...
Page 38 - Levels of brightness; Type
7 User settings 7.3 Brightness With this function the readability of the display can be adjusted to the prevail-ing lighting conditions. Levels of brightness 1 Dark 2 Medium 3 Bright 4 Very bright 7.4 Button tone The button tone can be switched on/off. 7.5 Water hardness The relevant range of water ...
Page 39 - Descaling; Descaler; Durgol swiss steamer
7 User settings 7.9 Descaling Whenever steam is produced, depending on the hardness of the local watersupply (i.e. the limescale content of the water), limescale is deposited in theboiler. The appliance automatically detects when descaling is necessary.The time interval between descaling depends on ...
Page 40 - Cleaning the air duct; Operating mode
7 User settings Remove clothes, accessories and any other objects from out of theappliance. ▸ Press the button to descale the appliance. ▸ Follow the instructions in the Touch- Display. Descale Press ok to start user-guided descaling programme 7.10 Cleaning the air duct Over time, deposits can build...
Page 41 - Updating the software
7 User settings 7.13 Updating the software With this function the software can be updated. Starting programme (see page 35) ▸ Push the SD card with the latest software into the card slot. ▸ Press the button to update the software. – The software starts updating. – The display goes black andthe backg...
Page 42 - Care and maintenance; Cleaning intervals; Cleaning interval
8 Care and maintenance 8.1 Cleaning intervals 1 2 Pos. Appliance part Cleaning interval Cleaning 1 Main filter As required * ▸ Remove any fluff. Whenever there is aheavier build-up of deposits ▸ Clean with an abrasive liquid cleaning agent anda sponge. ▸ Rinse off with water and allow to drip dry. I...
Page 44 - Cleaning the main filter mat; Cleaning the fresh air filter mat; Do not operate the appliance without the filter mat.
8 Care and maintenance 8.5 Cleaning the main filter mat Do not operate the appliance without the filter mat. ▸ Open the appliance door. ▸ Open back the floor grille 1 (see arrow). ▸ Pull out the main filter cassette 2 and open it. ▸ Take out the filter mat 3 . ▸ Clean the filter mat under running wa...
Page 45 - Care and maintenance; Cleaning the water tank; Do not clean the water tank in the dishwasher.
8 Care and maintenance 8.7 Cleaning the water tank Do not clean the water tank in the dishwasher. ▸ Open the appliance door. ▸ Open the water tank cover 1 (press in the middle at the top). ▸ Using the handle, take out the wa- ter tank. ▸ Remove the lid.▸ Clean the water tank by hand us- ing a little...
Page 49 - Accessories and spare parts
10 Accessories and spare parts Please give product family and exact designation when ordering parts. Clothes hangers Basket Fresh water tank Condensate tank Main filter Main filter mat 49
Page 51 - Technical data; Dimensions; Consumption data for factory setting; Programme
11 Technical data Dimensions Height: 1960 mm Width: 775 mm Depth: 570 mm Weight: 170 kg Dry load capacity: 5 kg Ambient conditions Permissible room temperature: 5 °C to 30 °C Electrical connection ▸ See identification plate (see page 12) 11.1 Consumption data for factory setting D = Duration E = Ene...
Page 52 - 1 Technical data; Note for testing institutes
11 Technical data 11.2 Note for testing institutes The note for testing institutes can be obtained from the internet: www.vzug.com/testinstitute. 11.3 EcoStandby The appliance is equipped with an automatic energy-saving «EcoStandby»function to avoid consuming energy unnecessarily. The interior illum...
Page 53 - Index
12 Index A Accessories ................................................... 14 Basket.................................................. 14Clothes hangers ................................ 14 Additional functions ...................................... 17Airing ...........................................
Page 55 - Appliance; Your repair order
13 Service & Support The «Troubleshooting» chapter provides valuable information for dealing with minor operating faults. This saves you the time, effort and potential cost of having to call out a service technician. Information on the V-ZUG warranty can be found at www.vzug.com →Service →Warran...
Page 56 - Quick instructions
Quick instructions Please first read the safety precautions in the operating instructions! ▸ Press the button. ▸ Open the appliance door.▸ Load the washing.▸ Close the appliance door.▸ Select main programme.▸ Select any additional functions, if required ▸ Press the button. End of programme appears i...