Page 2 - – Describes how the appliance reacts to the steps taken.; Validity; Variations depending on the model are noted in the text.
2 Thank you for choosing to buy one of our products. Your appliance is made to high standards and is easy to use. Nevertheless, please take the time to read these operating instructions in order to familiarize yourself with the appliance and get the best use out of it. Please follow the safety preca...
Page 3 - Contents; Safety precautions
3 Contents Safety precautions 5 Before using for the first time . . . . . . . . . . . . . . . . . . . . . . . . 5 Correct use . . . . . . . . . . . . . . . . . . . . . . . . . . . . . . . . . . . . . . 6 Children in the home . . . . . . . . . . . . . . . . . . . . . . . . . . . . . . 7 Note on use ....
Page 4 - ... Contents
… Contents 4 Operating modes 34 Tips on settings 36 Optimal use . . . . . . . . . . . . . . . . . . . . . . . . . . . . . . . . . . . . . 37 Cooking tables . . . . . . . . . . . . . . . . . . . . . . . . . . . . . . . . . . 38 Tips and tricks 55 Saving energy . . . . . . . . . . . . . . . . . . . . ...
Page 5 - In accordance with the requirements of IEC 60335-1:; Before using for the first time; Make the desired user settings.
5 Safety precautions In accordance with the requirements of IEC 60335-1: 䡲 This appliance is not intended for use by persons (including children) withreduced physical, sensory or mental capabilities, or lack of experience andknowledge, unless supervised or unless they have been given instructionconc...
Page 6 - ... Safety precautions; Correct use; Never use the appliance to dry animals, textiles or paper!
… Safety precautions 6 Correct use 䡲 The appliance is designed for use in the home for preparing food. Noliability is assumed for any damage caused by improper or incorrect use. 䡲 Never use the appliance to dry animals, textiles or paper! 䡲 Not to be used as a room heater or humidifier. 䡲 The applia...
Page 7 - Children in the home; Use the childproof locking facility.; Note on use
… Safety precautions 7 Children in the home 䡲 Packaging material, e.g. plastic and polystyrene, can be dangerous forchildren. Danger of suffocation! Please keep packaging material away fromchildren. 䡲 The appliance is designed for use by adults who are familiar with theseoperating instructions. Chil...
Page 9 - How to avoid damaging the appliance; Close the appliance door carefully.
… Safety precautions 9 Caution: Danger of injury! 䡲 Be careful not to put fingers in the door hinges, there is otherwise a risk ofinjury if the appliance door is moved. Particular care should be taken whenchildren are around. 䡲 Only leave the appliance door open in the at-rest position. An openappli...
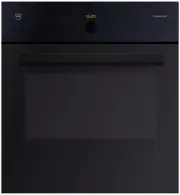
Page 10 - Appliance description; Construction; Operating and display elements
10 Appliance description Construction 1 Operating and display elements 2 Door handle 3 Appliance door 1 2 3
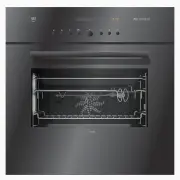
Page 11 - Buttons
… Appliance description 11 Operating and display elements Buttons Displays Symbols Operating modes Operating mode Timer Adjusting knob Time, operating time, switch-off time Off Temperature 䡲 Appears for 3 seconds while selecting the operating mode. Time, operating time, switch-off time, timer Timer ...
Page 12 - Cooking space
… Appliance description 12 Cooking space Do not place any protective insert or aluminium foil on the floor of the cooking space. 1 Appliance door 5 Climate sensor 2 Door seal 6 Ventilation outlet 3 Knurled nut 7 Water tank compartment 4 Cooking space temperature sensor 8 Levels 9 Steam inlet 1 2 7 5...
Page 13 - ... Appliance description; Accessories; Stainless steel tray; Only fill with fresh, cold drinking water.
… Appliance description 13 Accessories The baking trays and wire shelves are inserted into the oven between the tworails of a shelf runner.The wire shelves have non-tip safety notches which prevent them being pulledright out when they only need to be partially pulled out. The wire shelves canthen on...
Page 15 - Unperforated cooking tray; Perforated cooking tray; Available in different sizes and depths.; Unperforated cooking tray with pouring lip
… Appliance description 15 Unperforated cooking tray 䡲 For cooking meat, fish, sauerkraut, rice, millet, cereal products, soaked pulses, chickpeas, etc. 䡲 Using knives or cutting wheels in the unperforated cooking tray will visibly damage the surface. Available in different sizes and depths. Perfora...
Page 16 - Operating the appliance
16 Operating the appliance The operating mode, operating time and switch-off time can be selected by pressing the corresponding button once or more. 䡲 The symbol for the function selected illuminates or flashes. 䡲 Turn the adjusting knob to change the setting. 䡲 Press the adjusting knob to confirm t...
Page 17 - Using for the first time
… Operating the appliance 17 Using for the first time Before using the newly installed appliance for the first time the following measures should be taken: A Remove all packaging and transport materials from the cooking space. A When flashes in the digital display, turn the adjusting knob to set the...
Page 18 - ... Operating the appliance; Example; Put the stainless steel tray into the cold cooking space at level 1.; Filling the water tank; Refilling the water tank
… Operating the appliance 18 Example The symbols are explained in 'Tips on settings'. The tables in 'Tips on settings' give: A Put the stainless steel tray into the cold cooking space at level 1. A Put the broccoli in the perforated cooking tray at level 2. A Next steps are described on the followin...
Page 20 - Removing the cooked food from the cooking space; Take the broccoli out of the cooking space.; Emptying the water tank; The water in the water tank can be hot. Scalding hazard!; If
… Operating the appliance 20 Removing the cooked food from the cooking space A Take the broccoli out of the cooking space. A Any condensate or food in the cooking space must be dried completely or removed after each cooking session with steam. A To prevent corrosion, leave the appliance door open in...
Page 21 - User settings
21 User settings You can adjust the settings. A With the appliance switched off, hold the adjusting knob depressed for 5 seconds. – appears in the digital display. A Press the adjusting knob to confirm. – appears in the digital display for «Childproof lock off». A Turn the adjusting knob to select s...
Page 22 - ... User settings; Possible settings
… User settings 22 Possible settings off * on visible * invisible Childproof lock Acoustic signal Water hardness Temperature unit Time format Factory settings high * low off 36–50 ˚fH * 16–35 ˚fH 1–15 ˚fH 12 h 24 h * ˚C * ˚F * Factory setting restore no change Time display
Page 23 - Childproof lock; Operating the appliance when the childproof lock is activated
… User settings 23 Childproof lock The childproof lock is to prevent the appliance being inadvertently switched on. If an attempt is made to select an operating mode:– A double acoustic signal is emitted. – Nothing happens when the button is pressed. – appears in the digital display. Operating the a...
Page 25 - Type
… User settings 25 Water hardness The appliance features a system that automatically indicates when it is time to descale. The system can be optimised for households with soft water (also through using a water softening appliance) and medium water hardness by changing the user settings to the releva...
Page 26 - Time functions; Setting and changing the time
26 Time functions The following time functions are available: 䡲 Time 䡲 Timer – can be used at any time and independently of all other functions 䡲 Operating time – time-controlled switch-off of the appliance 䡲 Delayed start – time-controlled switch-on and switch-off of the appliance Setting and chang...
Page 27 - Timer; Setting
… Time functions 27 Timer The timer functions like an egg timer. It can be used at any time and independently of all other functions. Setting A Press the button. – flashes in the digital display. – The symbol flashes. A Turn the adjusting knob to set the timer duration. The timer can be set for: 䡲 u...
Page 29 - Operating time
… Time functions 29 Operating time The operating mode selected automatically switches off when the operating time is up. Setting A Select the desired operating mode. A Preheat the cooking space if necessary. A Place the food in the cooking space. A Press the button. – flashes in the digital display....
Page 31 - Delayed start; Setting the operating time
… Time functions 31 Delayed start The delayed start is activated when for the operating mode selected both an operating time and a switch-off time are set. The appliance switches automati-cally on and off again at the desired times. A Place the food in the cooking space. A Select the desired operati...
Page 34 - Operating modes; Press the
34 Operating modes The appliance has four preset cooking space temperatures for steaming which cannot be changed. A Follow the advice in 'Tips on settings' and in 'Tips and tricks'. A Press the button once or more to selected the desired cooking space temperature. Operating mode Symbol Temperature r...
Page 36 - Tips on settings; Symbols used
36 Tips on settings Symbols used Operating mode Cooking space temperature 䡲 Depends on the operating mode and cannot be changed. Preheating until the cooking space temperature is reached. Level mins. Duration in minutes hrs. Duration in hours Accessories ˚C
Page 37 - ... Tips on settings; Optimal use
… Tips on settings 37 Optimal use The following tables serve as a guide to help you get optimal use out of your appliance.
Page 38 - Cooking tables; Put the food to be cooked in the cold cooking space.
… Tips on settings 38 Cooking tables Vegetables (fresh) A Put the food to be cooked in the cold cooking space. Leaf spinach 100 no Beans, Cauliflower, whole 100 no Cauliflower florets 100 no Broccoli 100 no Chicory 100 no Dried string beans, soaked 100 no Fennel, chopped 100 no White cabbage, choppe...
Page 42 - Potatoes
… Tips on settings 42 Potatoes Accompaniments Potatoes, chopped 100 no Sweet potatoes, Whole potatoes 100 no Rice + liquid 100 no Risotto + liquid 100 no Maize semolina (polenta) + liquid 100 no Semolina + liquid 100 no Lentils + liquid 100 no Ebly wheat + liquid 100 no Millet + liquid 100 no Chickp...
Page 44 - Meat
… Tips on settings 44 Meat Poultry Stewing meat 100 no Ham 100 no Smoked pork loin, kasseler 100 no Saucisson, geschnetzeltes (chopped meat in a sauce) 100 no Bacon, fillet (beef, veal, pork) 100 no Chicken breast 100 no Poultry terrine 90 no ˚C ˚C
Page 46 - Desserts
… Tips on settings 46 Fish, seafood Desserts Joghurt Fillet of fish 80 no Fish, whole (trout, gilthead seabream, etc.) 80 no Tuna 100 no Mussels 100 no Fish terrine 100 no Crème caramel 90 no Creams and custards 90 no Compote (apple, plum, quince, etc.) 100 no Creamy joghurt 40 no Set joghurt 40 no ...
Page 48 - Reheating; Put the food to be reheated in the cold cooking space.
… Tips on settings 48 Reheating * According to the manufacturer’s instructions. Defrosting Baby food Put the food to be reheated in the cold cooking space. Reheating meals (1–2 plates) 90 no Preparing ready meals * – – – Spätzli (egg noodles), pasta, rice 100 no Meat, poultry, fish 40 no Milk in gla...
Page 55 - Tips and tricks; Season vegetables after steaming.
55 Tips and tricks Steaming 䡲 When steaming, a variety of food can be cooked at the same time. For example, rice or pulses can be prepared at the same time as vegetables with similar cooking times, saving energy and the washing-up. 䡲 Grains (e. g. rice and millet) and pulses (e. g. lentils), adding ...
Page 56 - Saving energy
… Tips and tricks 56 Warm, moist cloths Warm, moist cloths can be a pleasant way to clean hands after a meal. A Spread clean, moist towelling cloths across the perforated cooking tray. A Select the following settings: Saving energy A Avoid opening the appliance door frequently. A Keep preheating tim...
Page 57 - Care and maintenance; Cleaning the exterior; Remove any soiling or excess cleaning solution immediately.; flashes, do not place your hands in
57 Care and maintenance Cleaning the exterior A Remove any soiling or excess cleaning solution immediately. A Clean the surface with a soft cloth dampened with water and a little washing-up liquid – for metallic surfaces rub in the direction of the original polish lines. Dry with a soft cloth. A Cle...
Page 58 - Cleaning the appliance door; Removing the appliance door
… Care and maintenance 58 Cleaning the appliance door A Clean the appliance door with a soft cloth dampened with water and a little washing-up liquid. Dry with a soft cloth. Removing the appliance door A Open the appliance door as far as it will go. A Fold the clips 2 on both door hinges 1 forward. ...
Page 59 - Removing the shelf guides; Reassembling the shelf guides; Replacing the door seal
… Care and maintenance 59 Removing the shelf guides A Unscrew the knurled nuts 1 in the front of the shelf guides in an anti-clockwise direction. A Pull the shelf guides 2 to the side of the screws and remove from the front. Reassembling the shelf guides A Insert the shelf guides into the openings i...
Page 60 - ... Care and maintenance; Cleaning the cooking space; operating mode. This will
… Care and maintenance 60 Cleaning the cooking space A Any condensate or food in the cooking space must be dried completely or removed after each cooking session with steam. A Wipe the cooking space clean while still warm using just a soft cloth dampened with soapy water. Polish dry with a soft clot...
Page 61 - Descaling; Water hardness
… Care and maintenance 61 Descaling Whenever steam is produced, depending on the hardness of the local water supply (i. e. the limescale content of the water), limescale is deposited in the boiler.The appliance automatically recognises when descaling is necessary. – flashes in the digital display. T...
Page 62 - Durgol swiss steamer decalcifier; Using a different descaler could cause:
… Care and maintenance 62 Durgol swiss steamer decalcifier For descaling, only use the special descaler developed for this appliance and which is available at all good chemists. This special descaler enables you to achieve a gentle yet professional level of descaling. Standard descaling solutions ar...
Page 65 - What to do if ...; ... the appliance is not working and the displays are not illuminated; Possible cause
65 Trouble-shooting This section lists faults that can be solved simply by following the instructions given. If another fault is displayed or the fault cannot be remedied, please call Customer Services. What to do if … … the appliance is not working and the displays are not illuminated Before callin...
Page 70 - appears; After a power failure
… Trouble-shooting 70 … appears After a power failure After a power failure, and the symbol flash in the digital display. A Turn the adjusting knob to set the hour. A Press the adjusting knob to confirm. A Turn the adjusting knob to set the minutes. A Press the adjusting knob again to confirm the ti...
Page 71 - Accessories and spare parts
71 Accessories and spare parts Please give model number and exact description when ordering parts. Accessories * Included in scope of delivery Width × Depth × Length [mm] Stainless steel tray, GN * 325 × 20 × 354 Cooking tray, perforated, GN * 325 × 40 × 354 Wire shelf 325 × 23 × 354 Cooking tray, u...
Page 73 - ... Accessories and spare parts; Spare parts; Knurled nut
… Accessories and spare parts 73 Spare parts Shelf guide, left/right Knurled nut Water tank
Page 74 - Technical data; External dimensions; See Installation Instructions; Electrical connection; See identification plate; Note for testing institutes; To reduce power consumption to an absolute minimum, select
74 Technical data External dimensions A See Installation Instructions Electrical connection A See identification plate 1. Note for testing institutes The usable volume within the meaning of EN 50304/EN 60350 is obtained with the shelf guides disassembled. General note Maximum load capacity: 2 kg Aut...
Page 75 - Disposal; Packaging; The
75 Disposal Packaging 䡲 All packaging materials (cardboard, plastic film (PE) and polystyrene(EPS)) are marked and should, if possible, be collected for recycling anddisposed of in an environmentally friendly way. Disconnection 䡲 Disconnect the appliance from the mains. With a fixed appliance, this ...
Page 76 - Index; Baby bottles
76 Index A Accessories ........................... 13, 71 Cleaning .................................... 59 Accompaniments ......................... 42Acoustic signal ...................... 22, 24Appliance description ................. 10Appliance door............................. 12 Removing...........
Page 77 - ... Index
… Index 77 I Identification plate ........................ 74 J Joghurt ........................................... 46Juice Extracting .................................. 50 K Knurled nut .................................... 12 L Levels ............................................. 12Load capacity .....
Page 79 - Repair service; Open the appliance door.
79 Repair service Whether you contact us about a malfunction or an order, please always statethe serial number (FN) and the model type of your appliance. Enter thesedetails below and also on the service sticker which comes with the appliance.Stick it in a conspicuous place or in your telephone or ad...
Page 80 - Quick instructions; To set the time
Quick instructions Please first read the safety precautions in the operating instructions! To set the time A Press the button. A Turn the adjusting knob to set the hour. A Press the button again. A Turn the adjusting knob to set the minutes. To select the operating mode A Press the button repeatedly...